| View previous topic :: View next topic |
| Author |
Message |
recycler
Gate Opener
Joined: 09 Feb 2013
Odometer: 46
Location: West Lothian
|
 Posted: Mon Apr 22, 2013 3:54 pm Post subject: vitara LWB TD rescue Posted: Mon Apr 22, 2013 3:54 pm Post subject: vitara LWB TD rescue
|
 |
|
ive been looking here enough and got some great info from this site so im here to pay back with this project of mine and put some photos up, there may be a few questions along the way.
If i'd have known how bad it was id have scrapped it, but have persisted so-far, this bloody car has caused me so much misery of late and have very nearly thrown the towel in more than a few times...
ive owned it 4 years and it has never failed on me, there have been a few running issues, like the clutch, turned out to be a loose bolt on the pedal, only discovered after replacing master and slave cylinders, wonky gear plastic in the lever, i fixed that on my wee lathe, continuous water leakage from rear boot seal, still not fixed but i have a plan for that, the wonky front doors that refuse to catch closed when its below freezing- much slamming in winter months
ok, so the plan was for a 2"+2" lift suspension and body, drop the diff, refurb the brakes all round, cut and weld the rust worm to the body and detach the body from the chassis (Mr MOT man welded it last time round), sort out leaking boot and a few other minor bits and bobs
[img]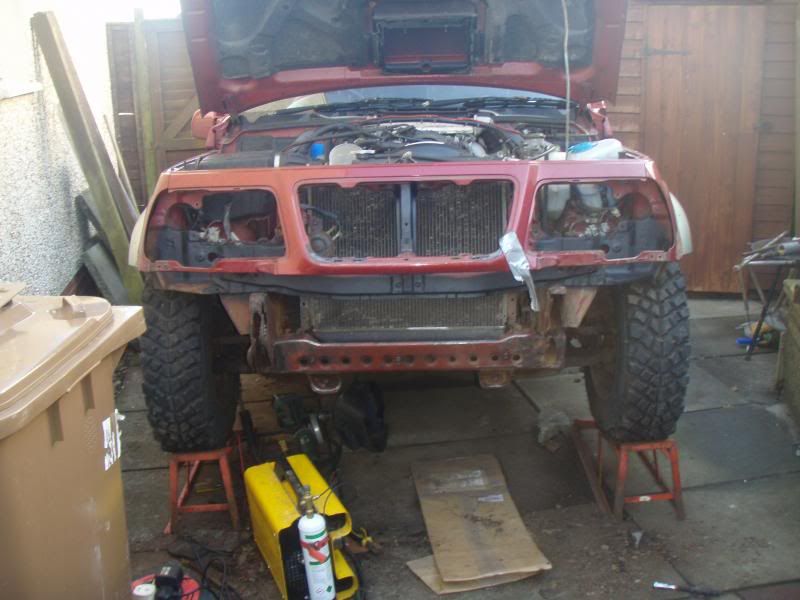 [/img] [/img]
|
|
| Back to top |
|
 |
|
|
recycler
Gate Opener
Joined: 09 Feb 2013
Odometer: 46
Location: West Lothian
|
| Posted: Mon Apr 22, 2013 4:06 pm Post subject:
|
|
|
the fuel tank connections disintegrated on removal
[img]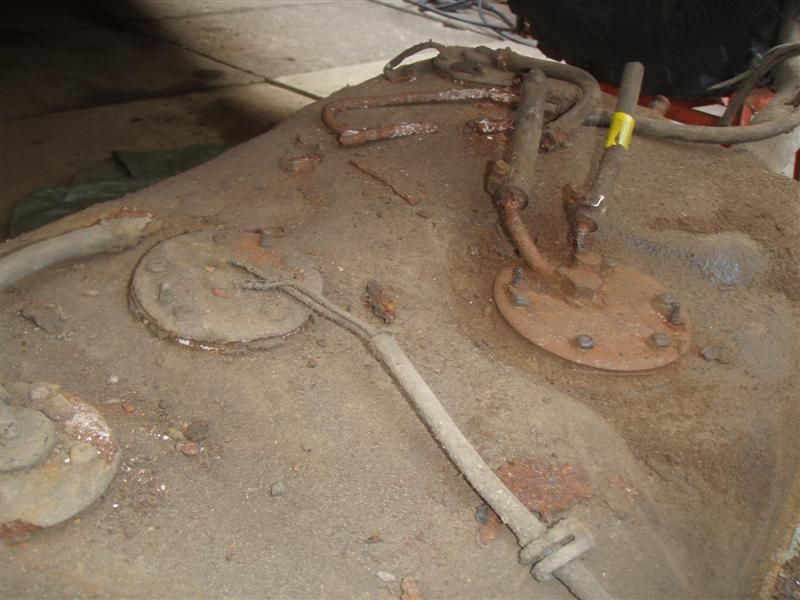 [/img] [/img]
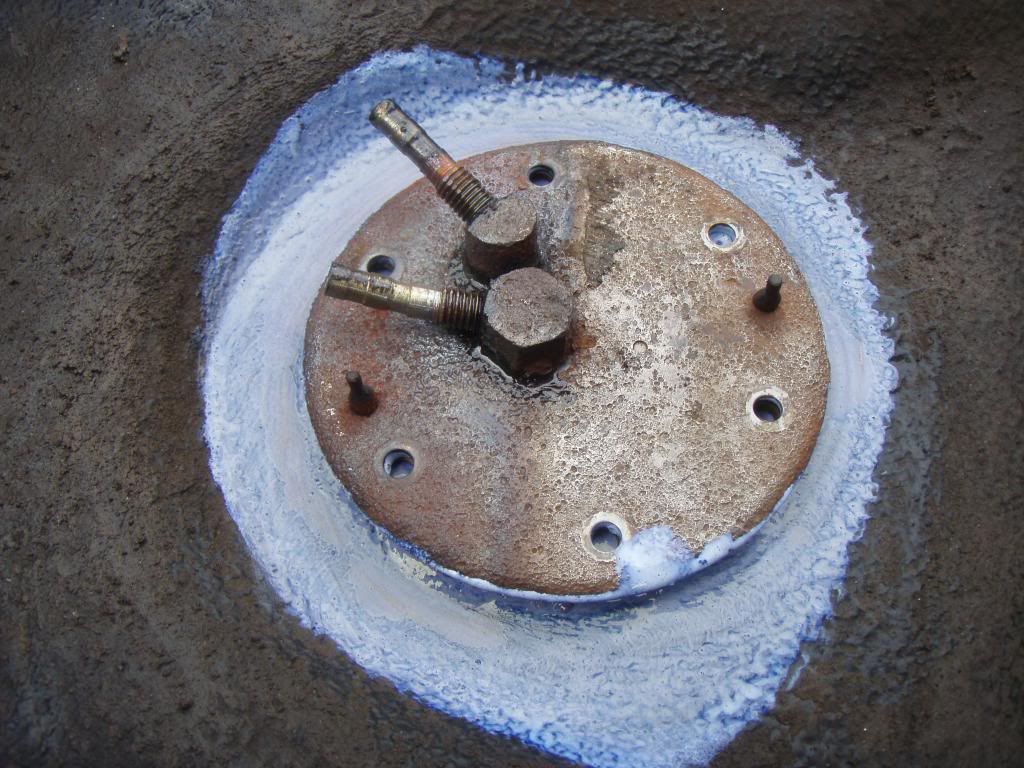
after
[img]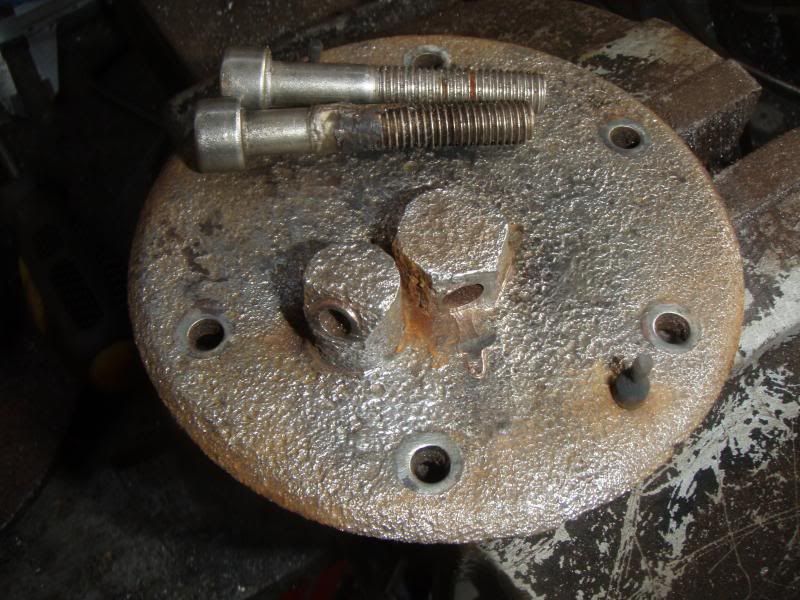 [/img] [/img]
a bit of lathe work
[img]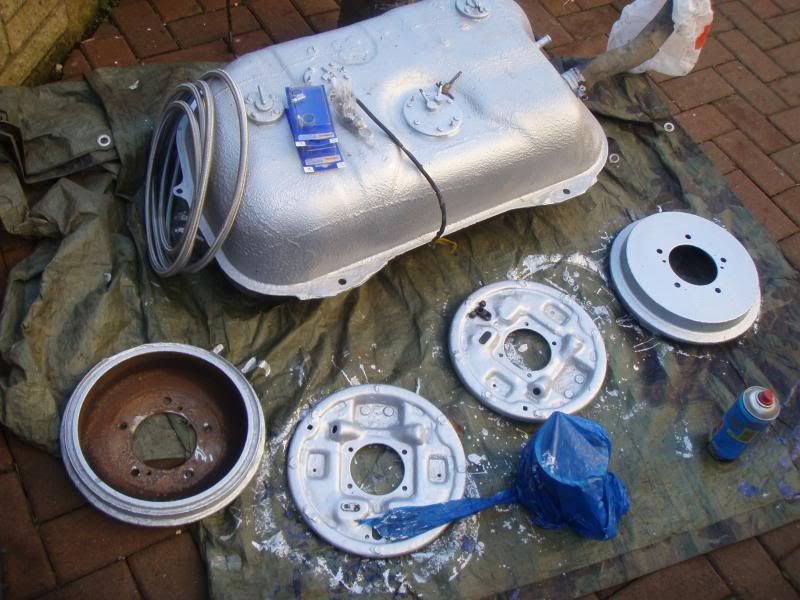 [/img] [/img]
|
|
| Back to top |
|
|
recycler
Gate Opener
Joined: 09 Feb 2013
Odometer: 46
Location: West Lothian
|
| Posted: Mon Apr 22, 2013 7:39 pm Post subject:
|
|
|
photos may be a bit random up until now as i have finished the driver side including box section sills and floor repairs
here is the driver side
[img]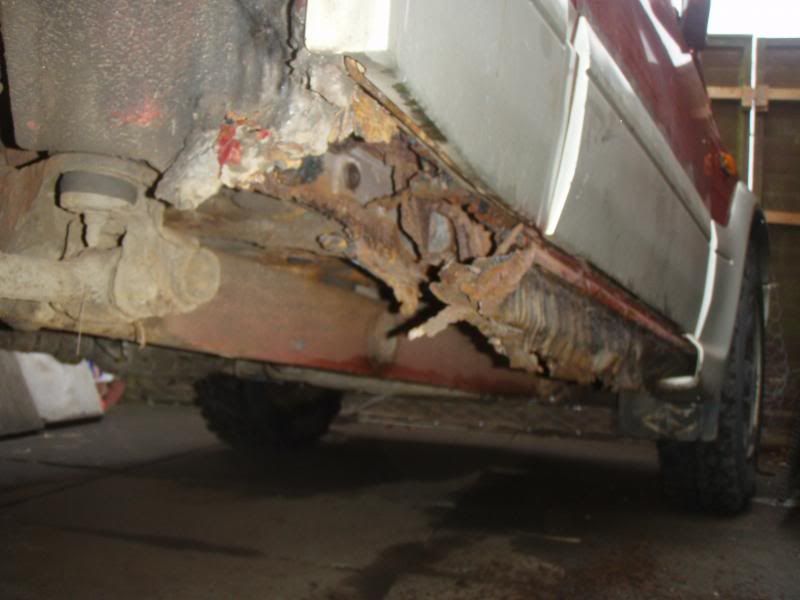 [/img] [/img]
[img]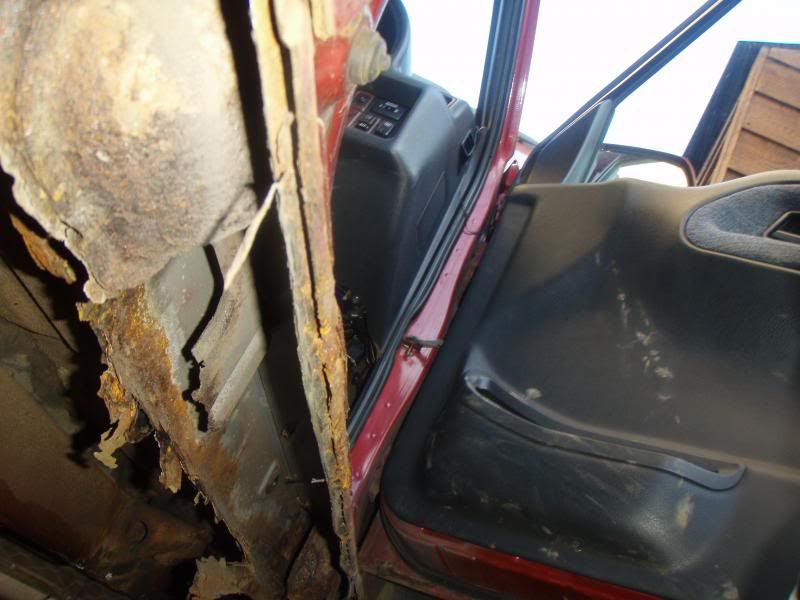 [/img] [/img]
front body mount
[img]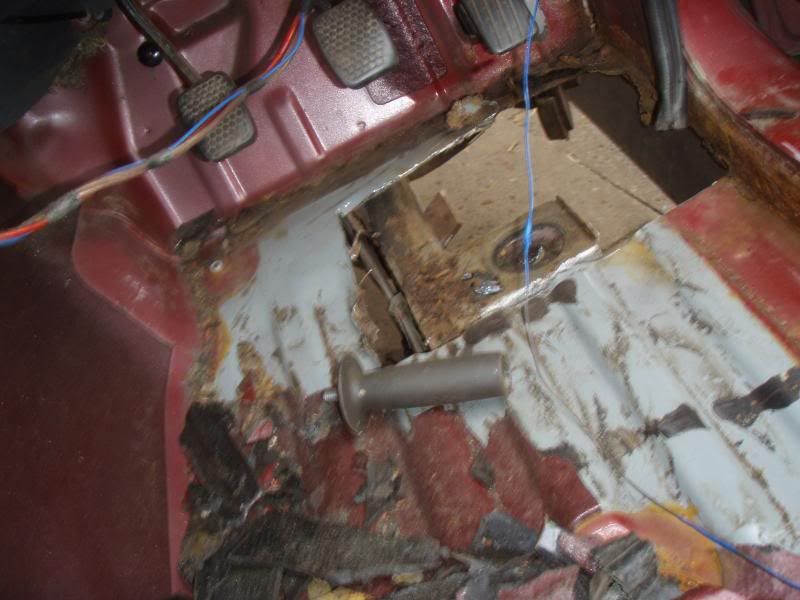 [/img] [/img]
[img]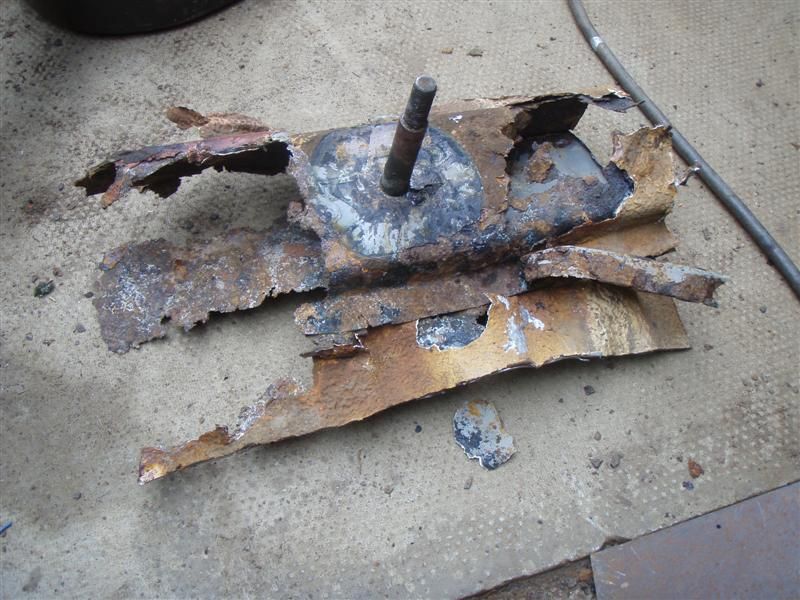 [/img] [/img]
[img]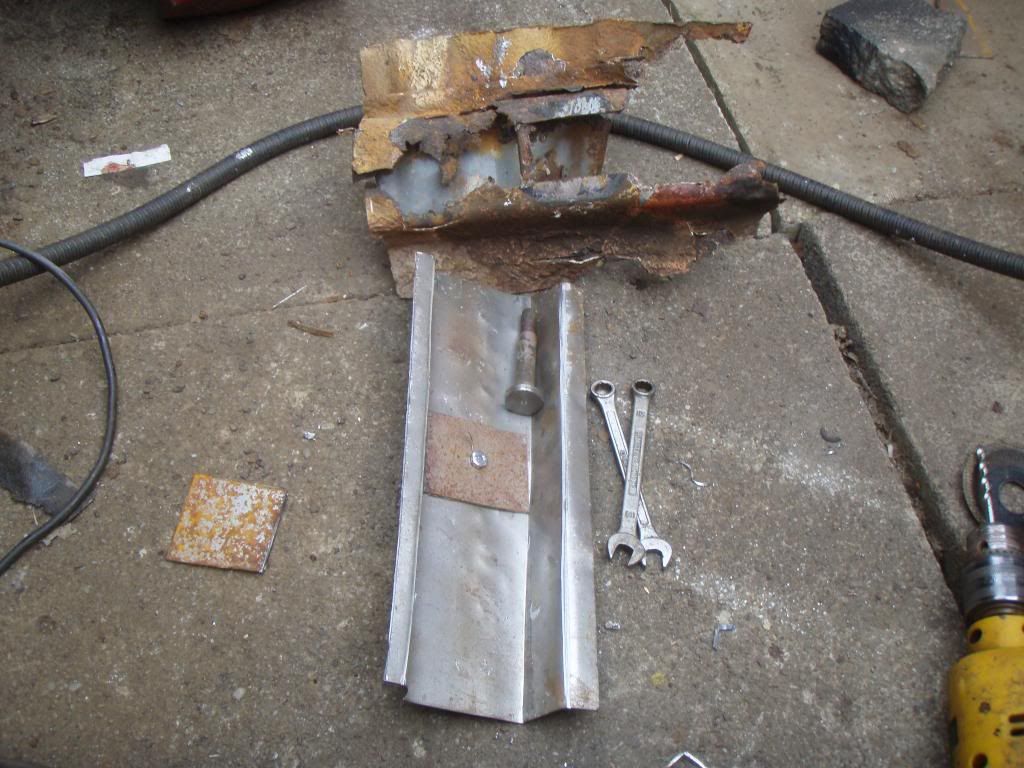 [/img] [/img]
[img]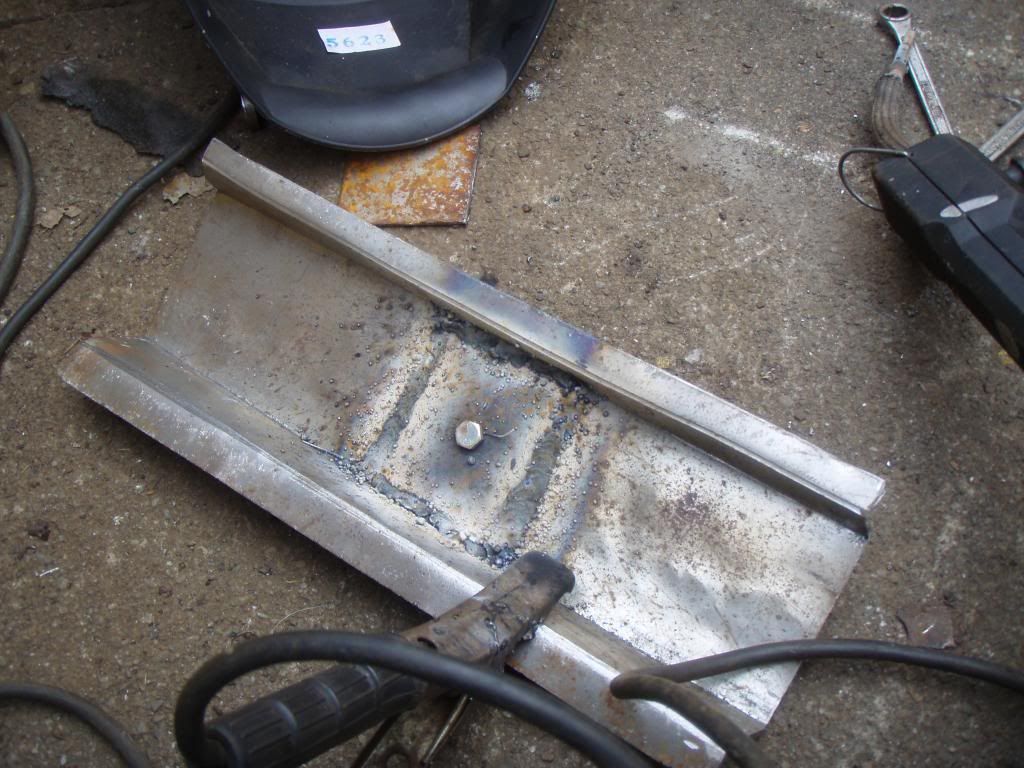 [/img] [/img]
[img]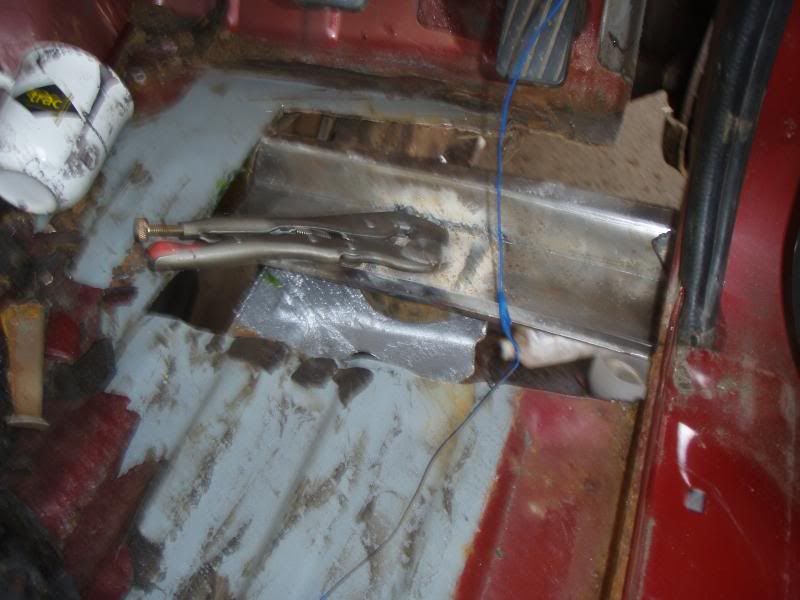 [/img] [/img]
repairs to front well
[img]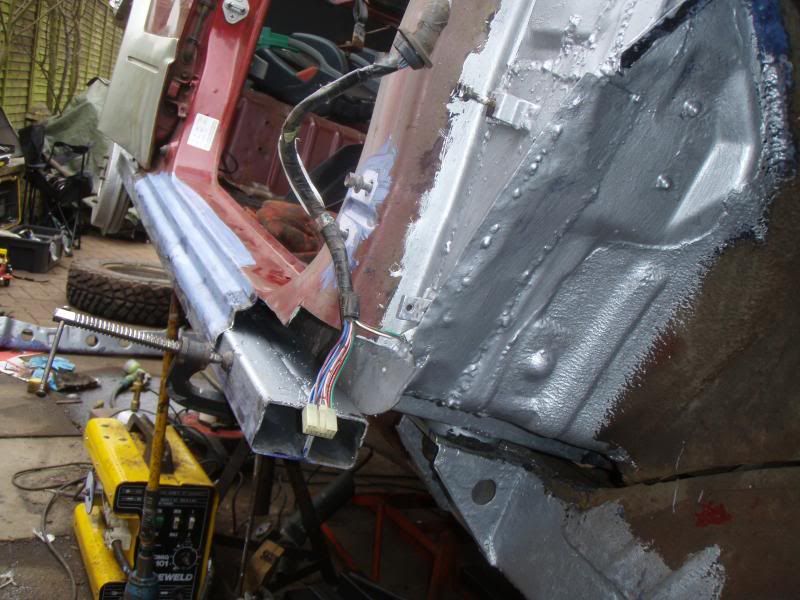 [/img] [/img]
[img]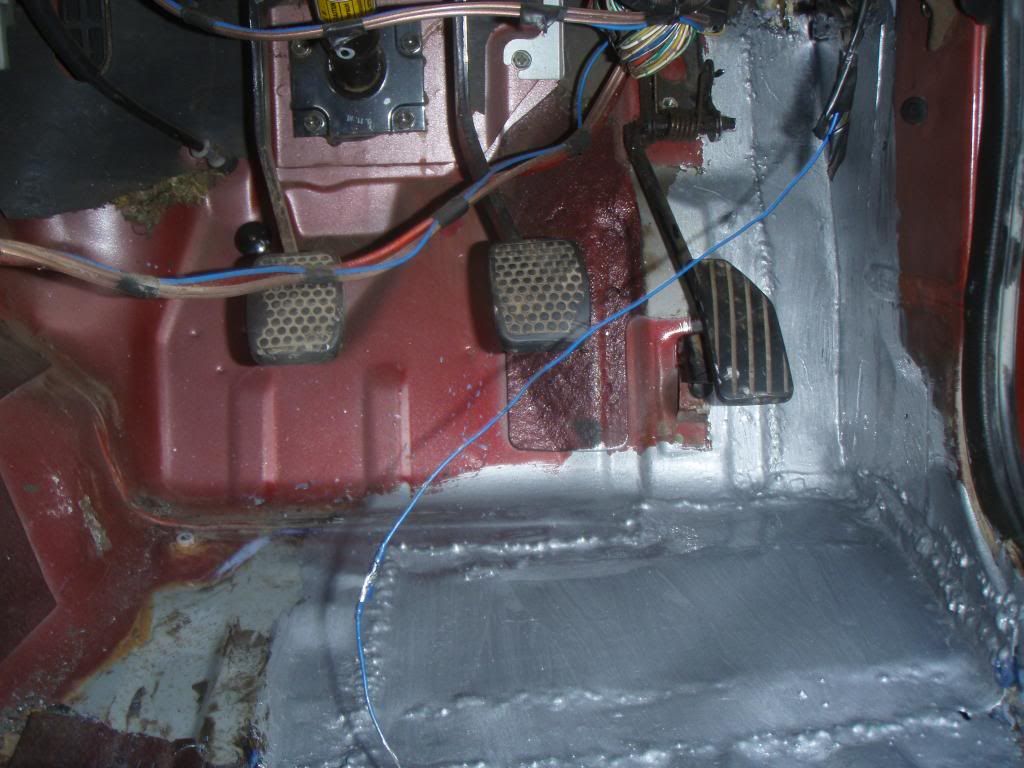 [/img] [/img]
|
|
| Back to top |
|
|
recycler
Gate Opener
Joined: 09 Feb 2013
Odometer: 46
Location: West Lothian
|
| Posted: Mon Apr 22, 2013 8:04 pm Post subject:
|
|
|
This bit took for ever, i nearly quit right here, the rear arch and door entry, when looking for good metal, there was none, so thats when the box section came in to play
[img]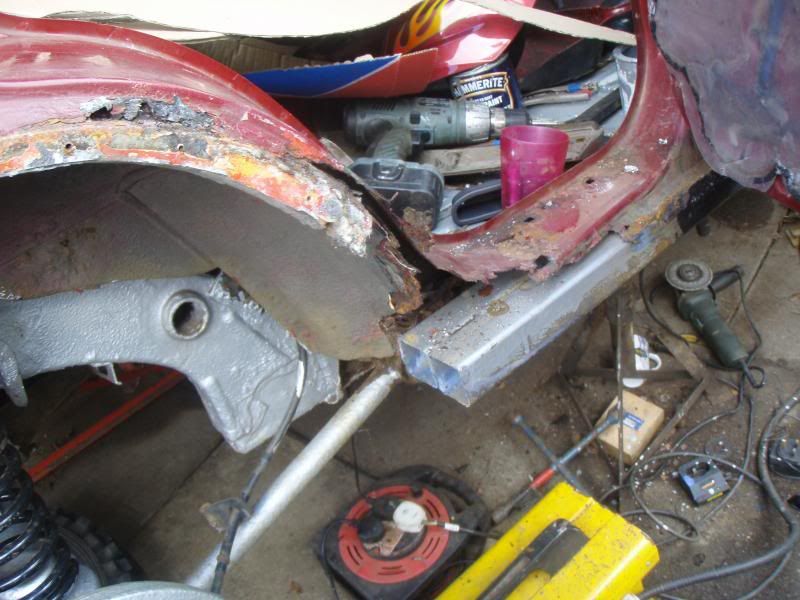 [/img] [/img]
[img]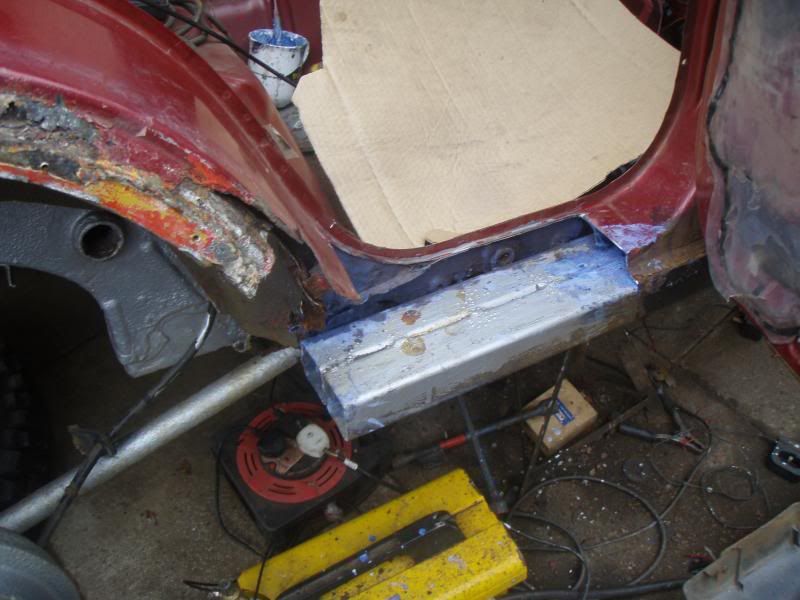 [/img] [/img]
[img]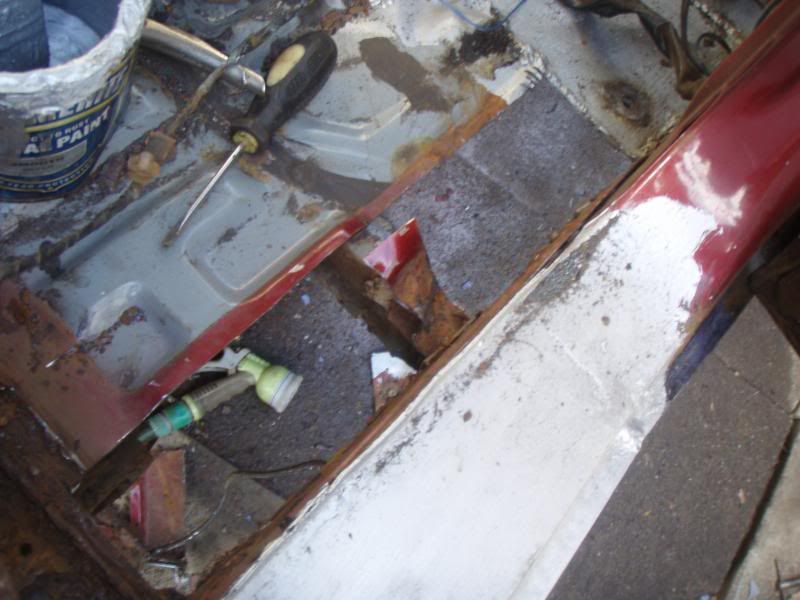 [/img] [/img]
[img]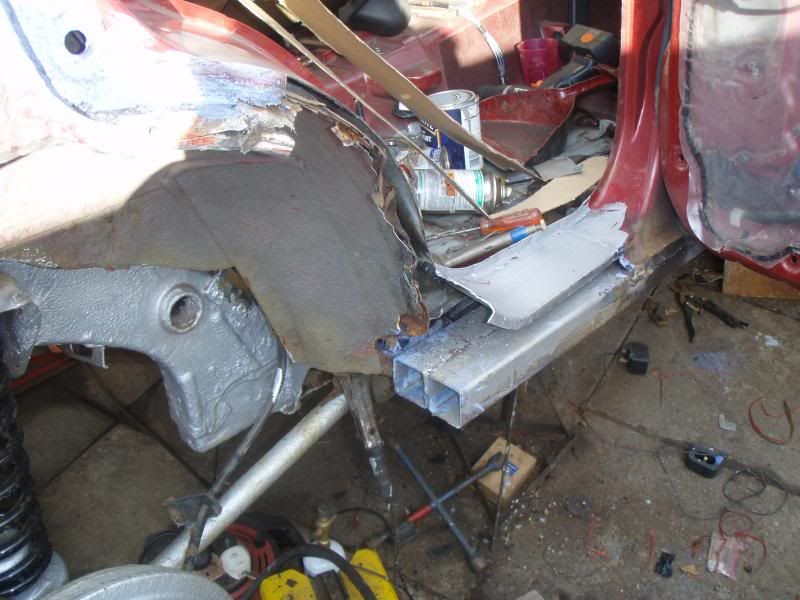 [/img] [/img]
[img]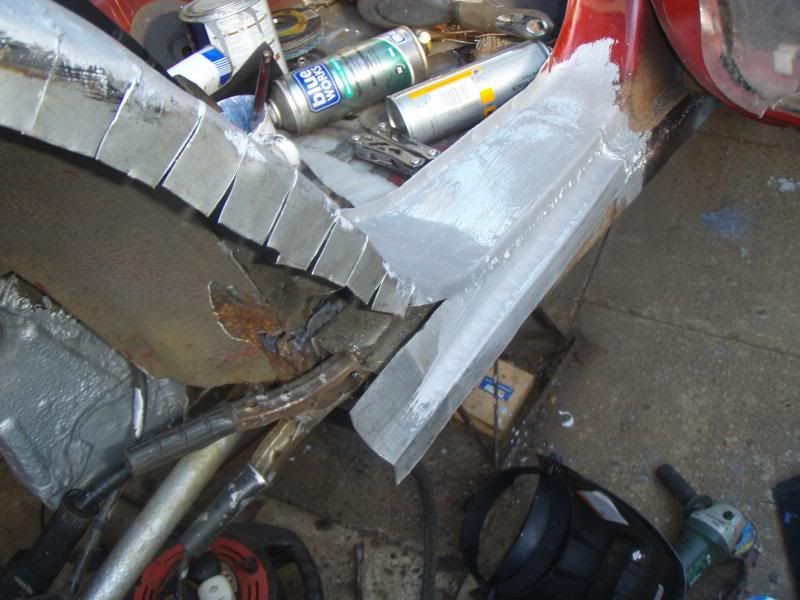 [/img] [/img]
[img]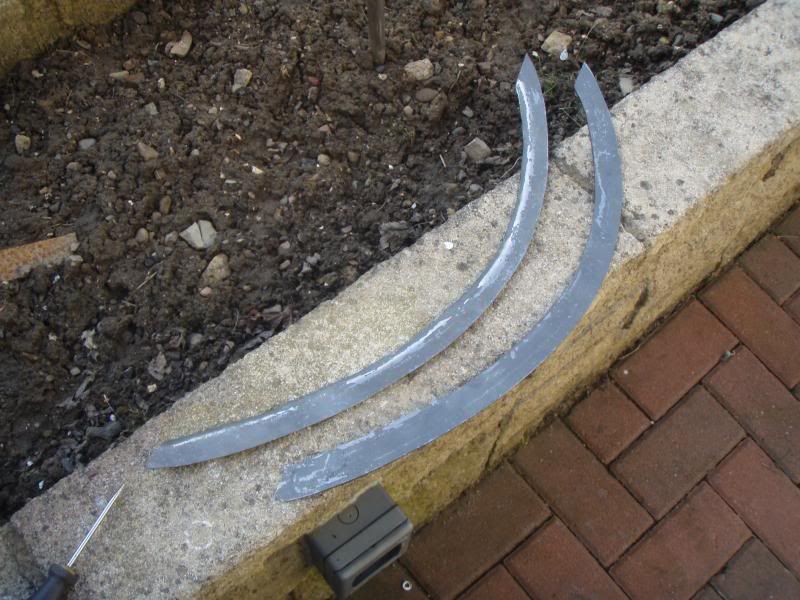 [/img] [/img]
[img]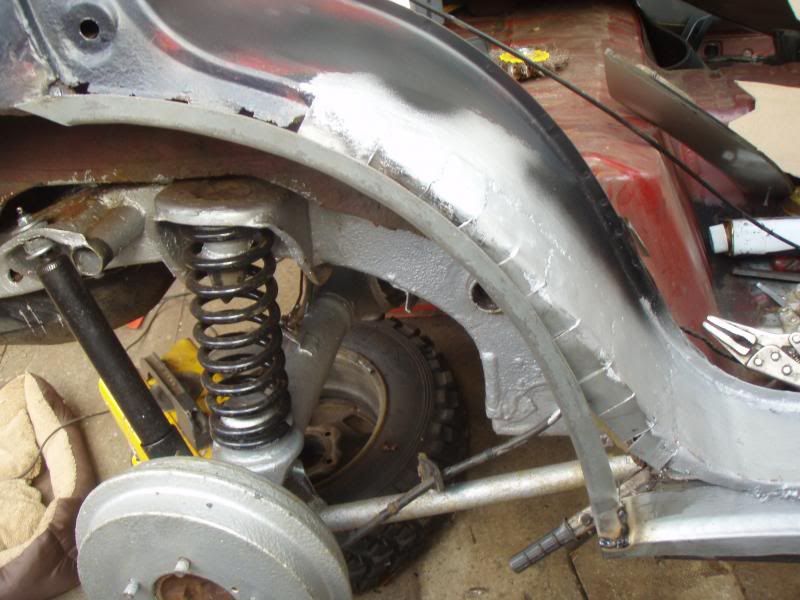 [/img] [/img]
[img]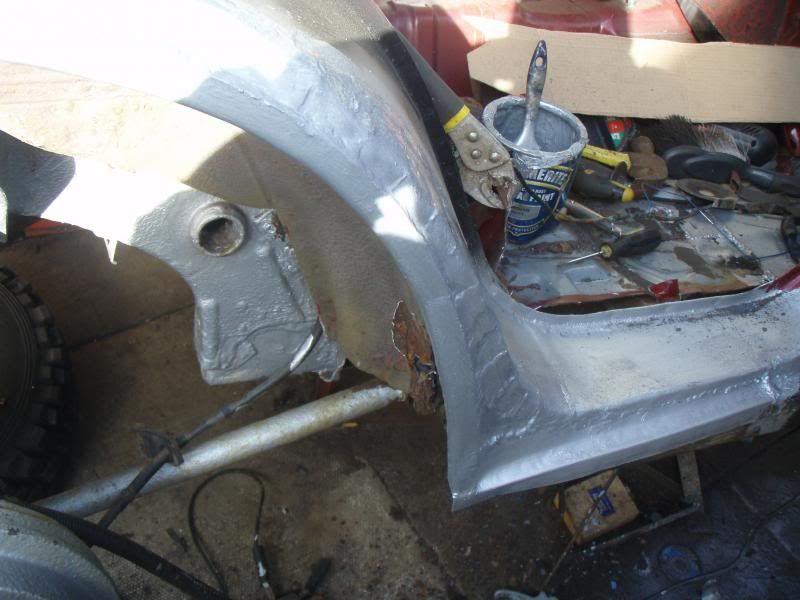 [/img] [/img]
then the lower inner wheel arch at rear body mount
[/img]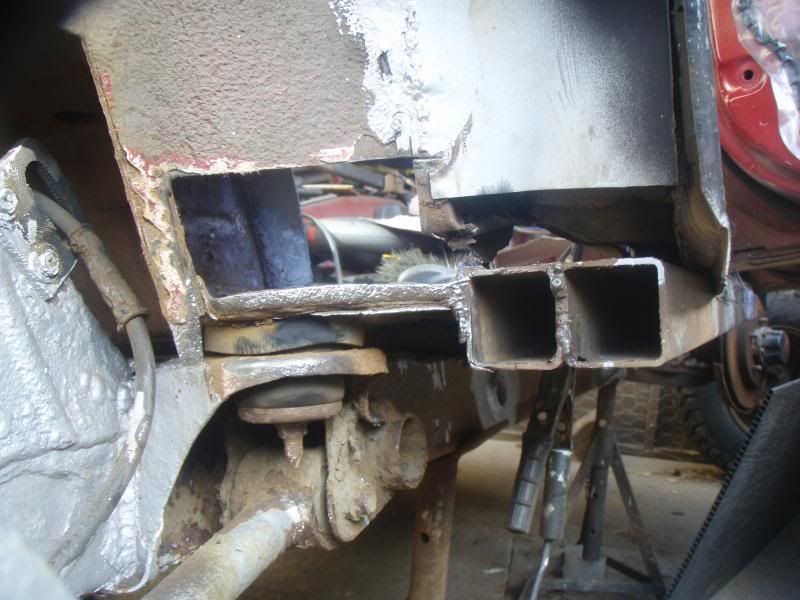 [img] [img]
|
|
| Back to top |
|
|
recycler
Gate Opener
Joined: 09 Feb 2013
Odometer: 46
Location: West Lothian
|
| Posted: Mon Apr 22, 2013 8:28 pm Post subject:
|
|
|
pictures to finish this piece
[img]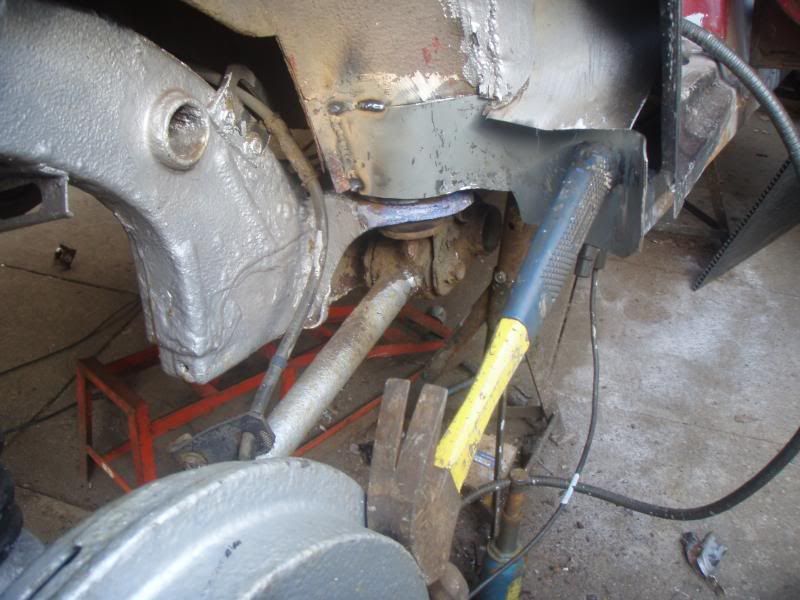 [/img] [/img]
[img]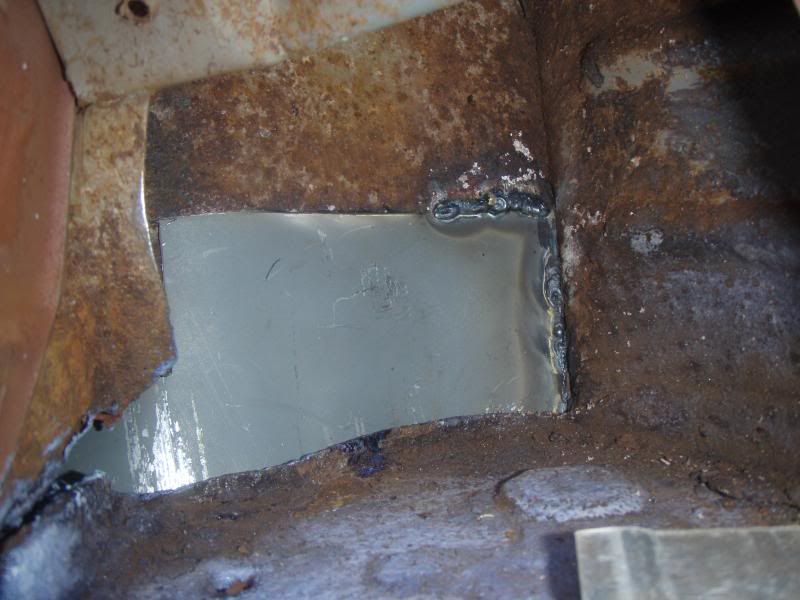 [/img] [/img]
[img]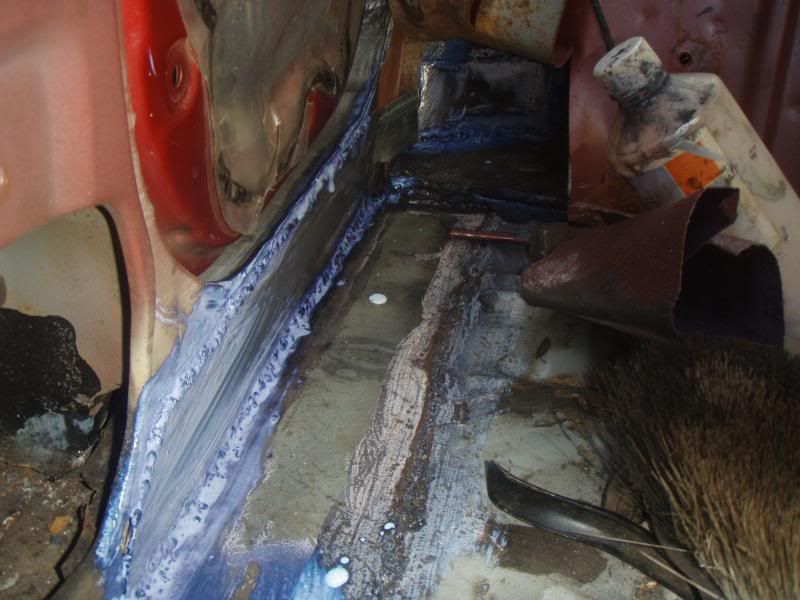 [/img] [/img]
[img]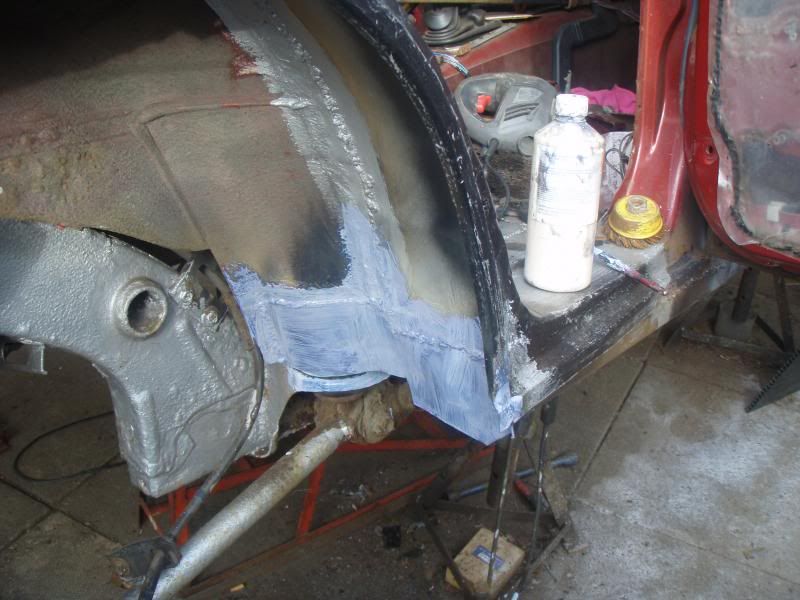 [/img] [/img]
|
|
| Back to top |
|
|
masseyzook
Just got MTs

Joined: 03 Sep 2008
Odometer: 120
Location: Bathgate,West Lothian,Scotland.
|
| Posted: Mon Apr 22, 2013 8:29 pm Post subject:
|
|
|
10/10 for effort,
final furlongs approaching,
"TF"says you.
Des
__________________________________
Cheers,
Des  |
|
| Back to top |
|
|
recycler
Gate Opener
Joined: 09 Feb 2013
Odometer: 46
Location: West Lothian
|
| Posted: Mon Apr 22, 2013 8:52 pm Post subject:
|
|
|
cheers des, it better be all worth it after all this
here is the front wing, which needed a it of work
[img]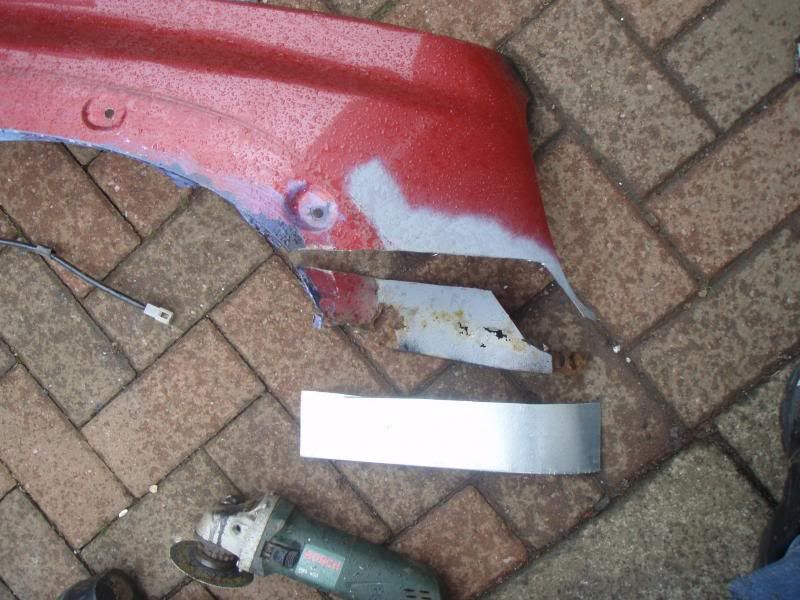 [/img] [/img]
[img]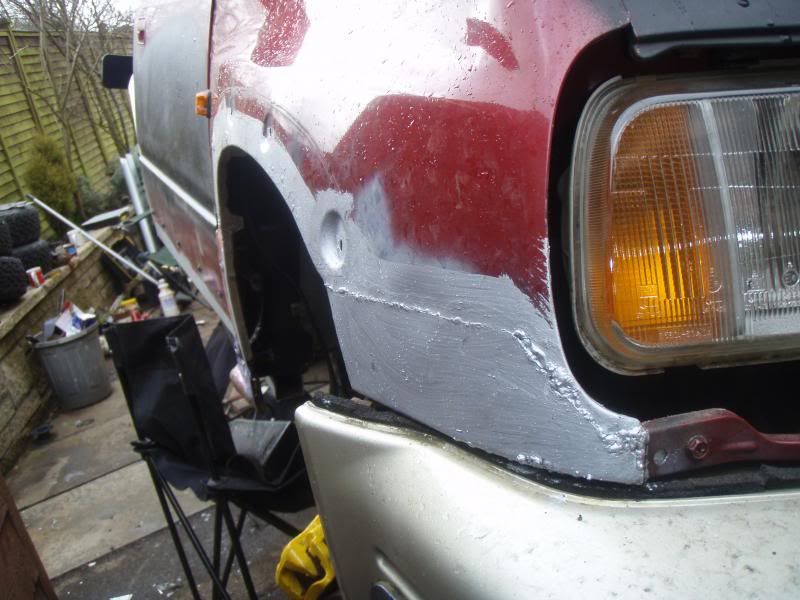 [/img] [/img]
it took 5hrs to remove front shocker
[img]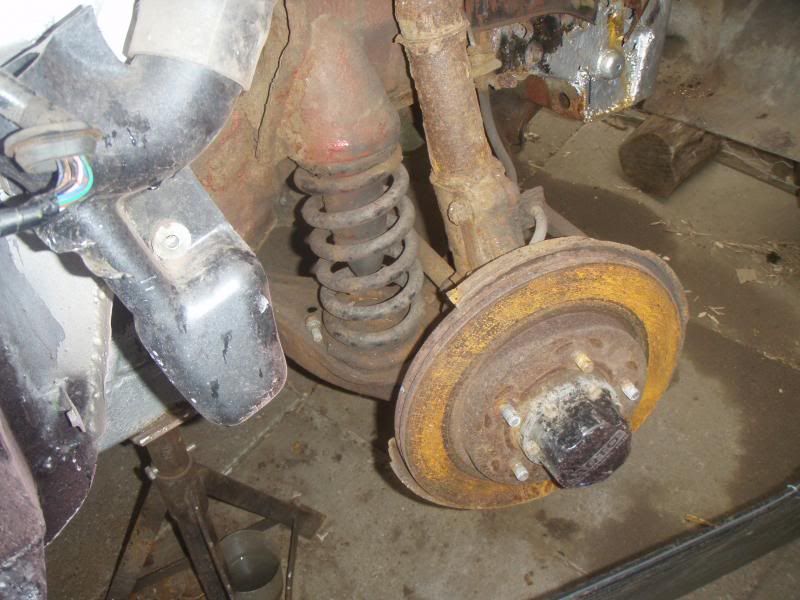 [/img] [/img]
[img]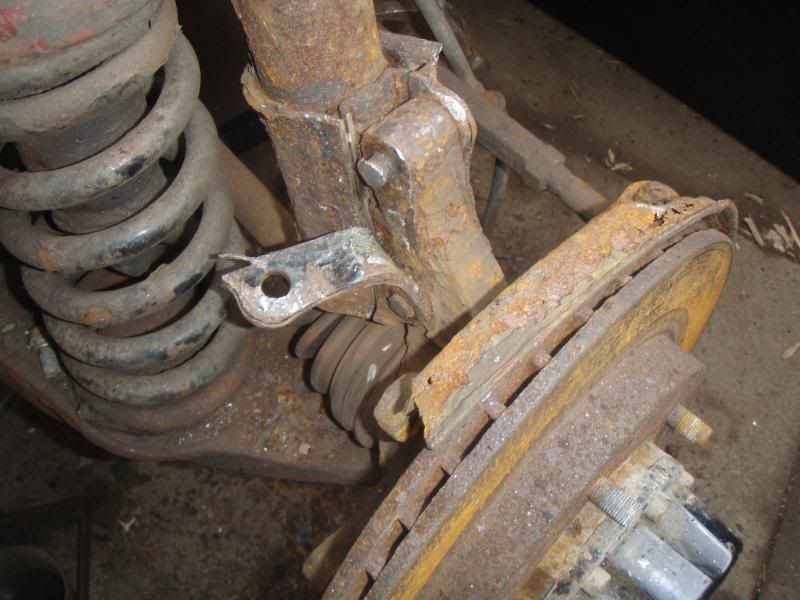 [/img] [/img]
[img]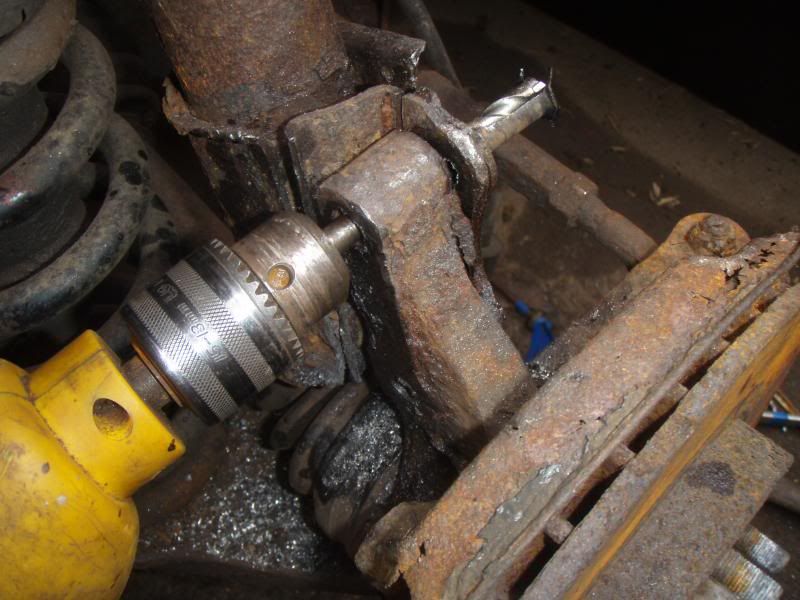 [/img] [/img]
[img] [/img] [/img]
also repaired front body mount as was not a good welding day first time round
[img]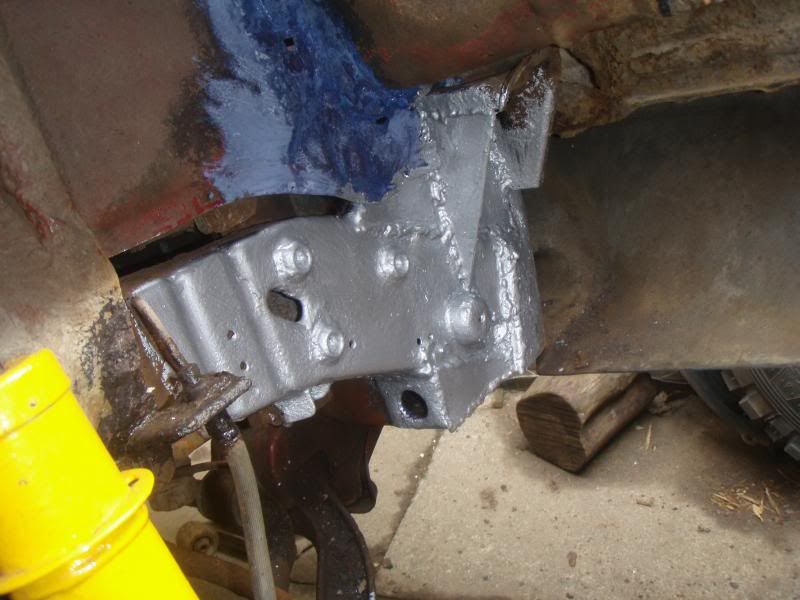 [/img] [/img]
|
|
| Back to top |
|
|
recycler
Gate Opener
Joined: 09 Feb 2013
Odometer: 46
Location: West Lothian
|
| Posted: Mon Apr 22, 2013 9:33 pm Post subject:
|
|
|
old rear end now nice and fresh
[img]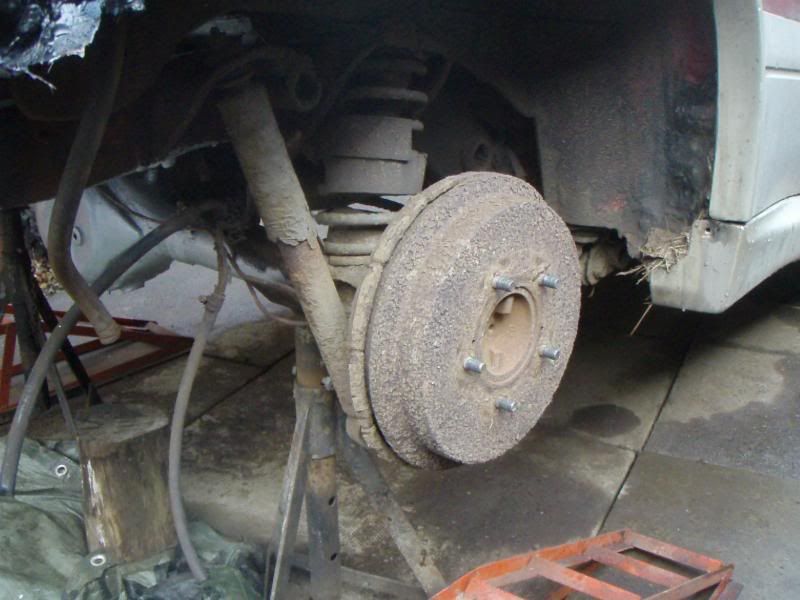 [/img] [/img]
[img]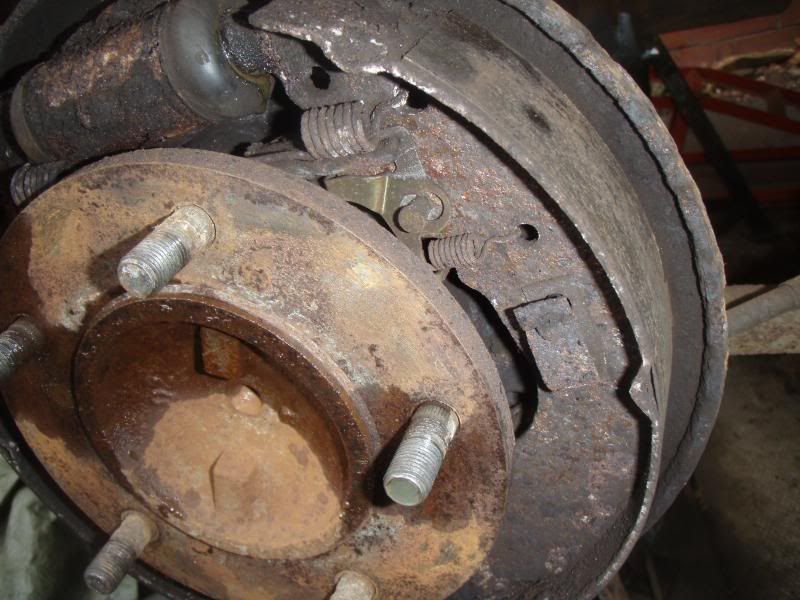 [/img] [/img]
[img]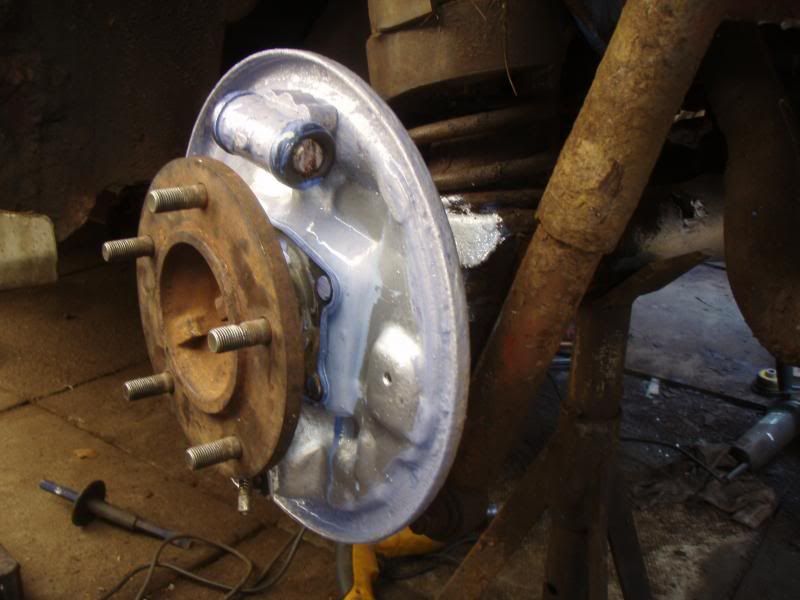 [/img] [/img]
[img]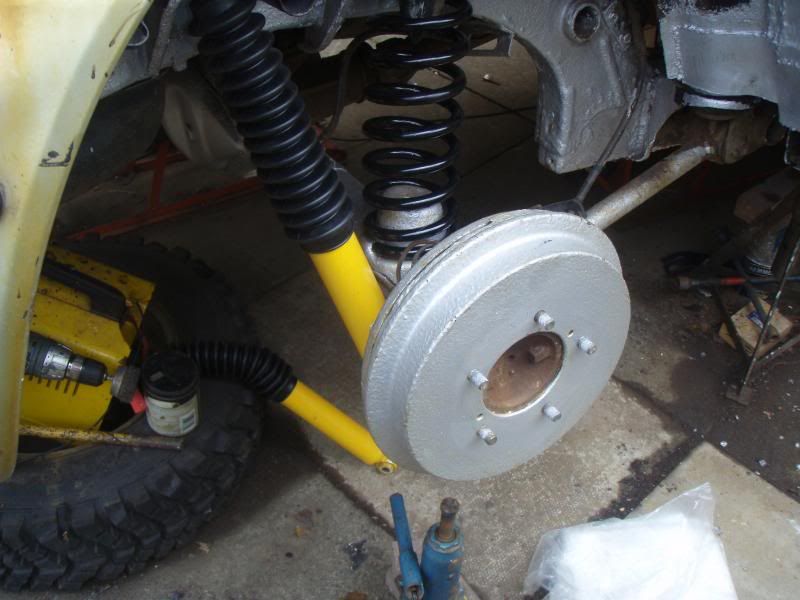 [/img] [/img]
|
|
| Back to top |
|
|
Xpajun
Mud Obsessed

Joined: 22 Sep 2008
Odometer: 3245
1988 Mitsubishi Shogun
|
| Posted: Mon Apr 22, 2013 9:38 pm Post subject:
|
|
|
those shoe linings look a tad thin  Mind you when I did my daughter's vit discs they were nigh on as thin as that Mind you when I did my daughter's vit discs they were nigh on as thin as that 
Nice work by the way
|
|
| Back to top |
|
|
recycler
Gate Opener
Joined: 09 Feb 2013
Odometer: 46
Location: West Lothian
|
| Posted: Tue Apr 23, 2013 1:42 pm Post subject:
|
|
|
aye not much meat there, and they were still working too at taking it off the road, this poor car has just been neglected, time to put it right now
so driver side all done with most plastics back on
[img]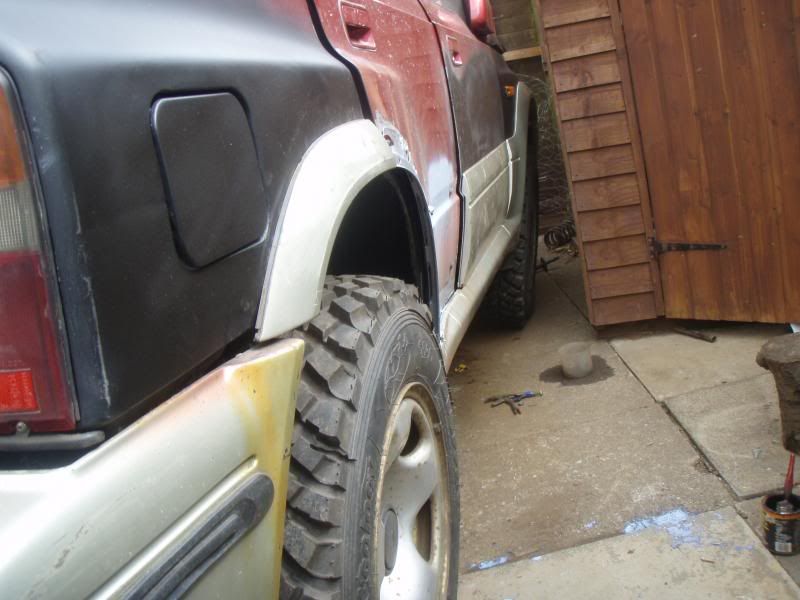 [/img] [/img]
time now for the passenger side, it took about 3hrs to get front shock off, 1 bolt seized and one sheared, after the marathon on the driver side i wanted a little help, que 2 ton jack...
[img]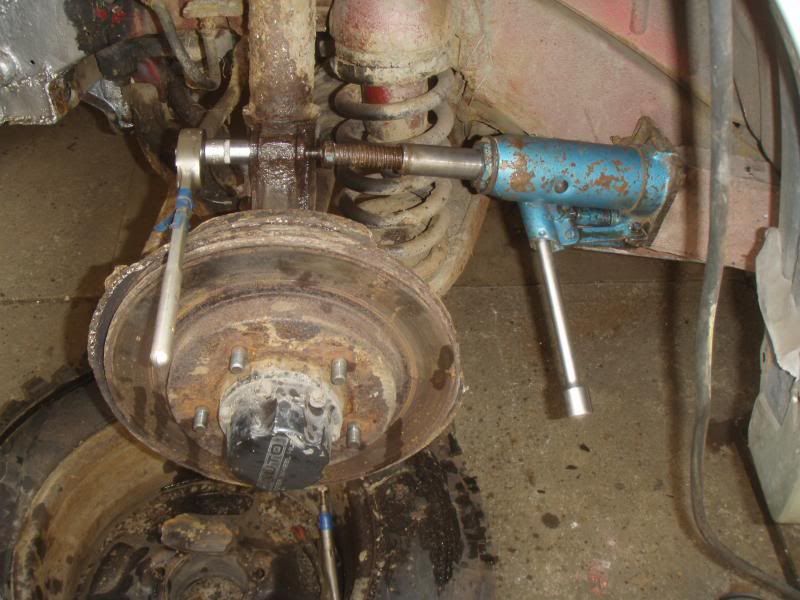 [/img] [/img]
[img]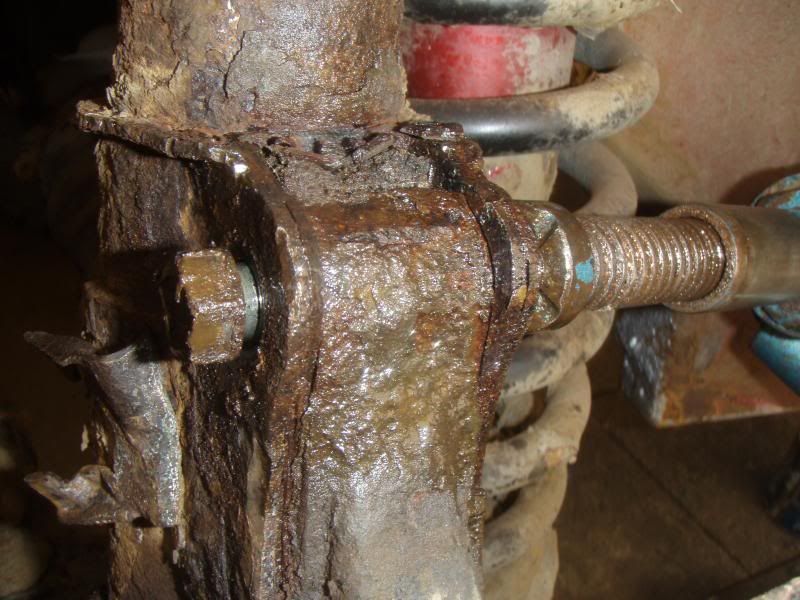 [/img] [/img]
[img] [/img] [/img]
[img]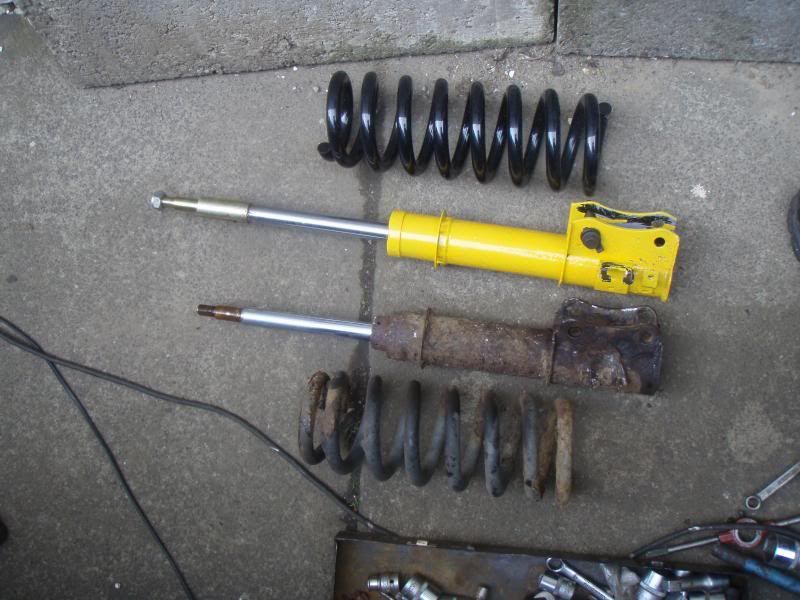 [/img] [/img]
[img]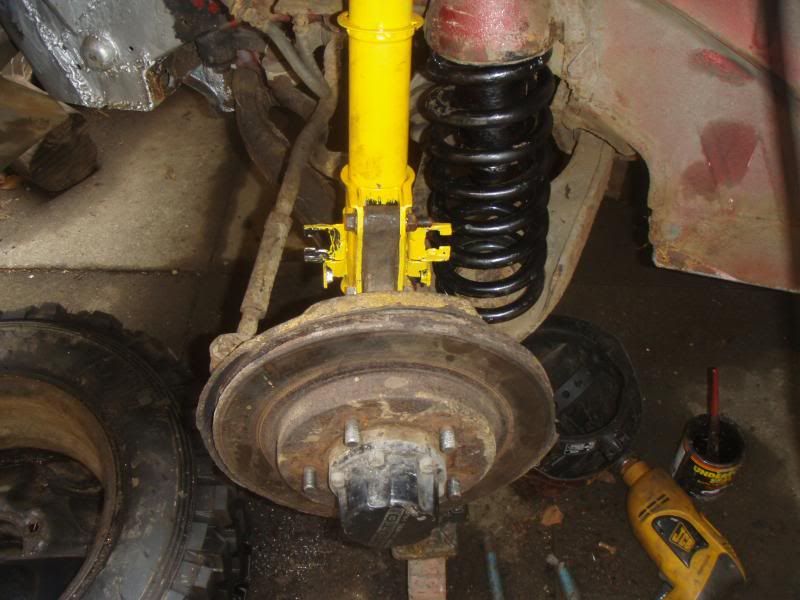 [/img] [/img]
|
|
| Back to top |
|
|
|
|
recycler
Gate Opener
Joined: 09 Feb 2013
Odometer: 46
Location: West Lothian
|
| Posted: Tue Apr 23, 2013 1:58 pm Post subject:
|
|
|
nearly up to date now, a few more photo's to go
The front diff drop brackets have been fitted, only 1" as that is all that is made for the LWB i think, theyre steel so can be cut and welded if need be
Passenger side went without a hitch, the driver side saw me under the car for a total of 9hrs for one fricken bolt 
The mount to the chassis was a pain in the ass, the M12 bolt was seized within the bush, and the bush was free rotating in the rubber, and with only 3inches of spanner / ratchet travel amongst the steering linkages
long story short, cut through bolt and bush/remove mount/ spend about 2hrs trying to weld a stud onto the left over bolt which is still in the chassis
all in 9hrs
[/img]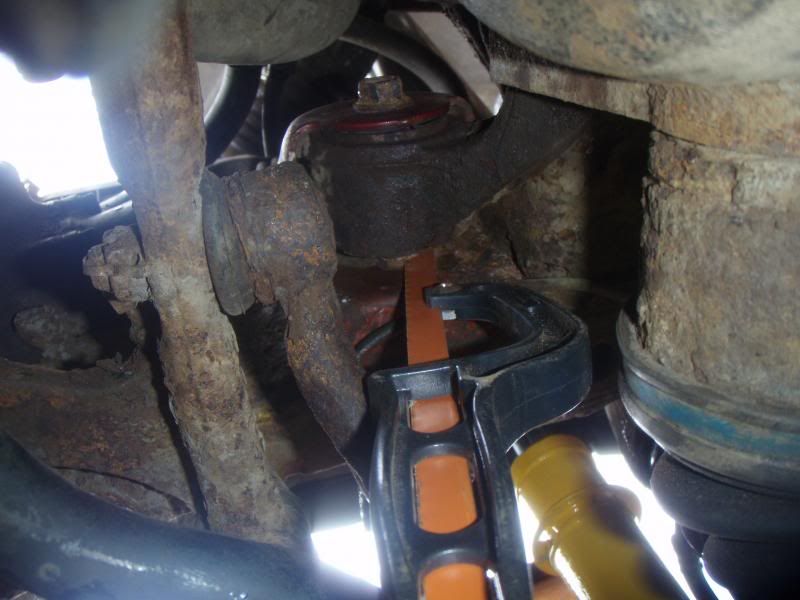 [img] [img]
[/img]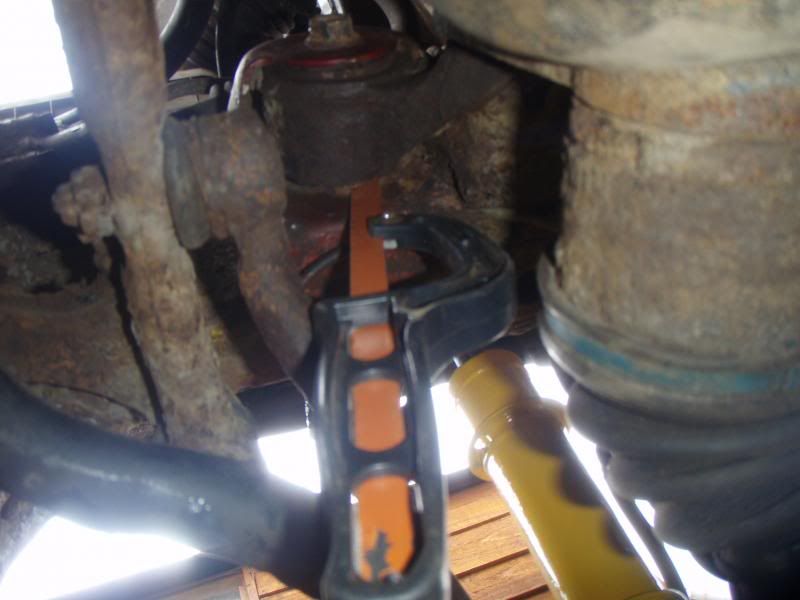 [img] [img]
[img]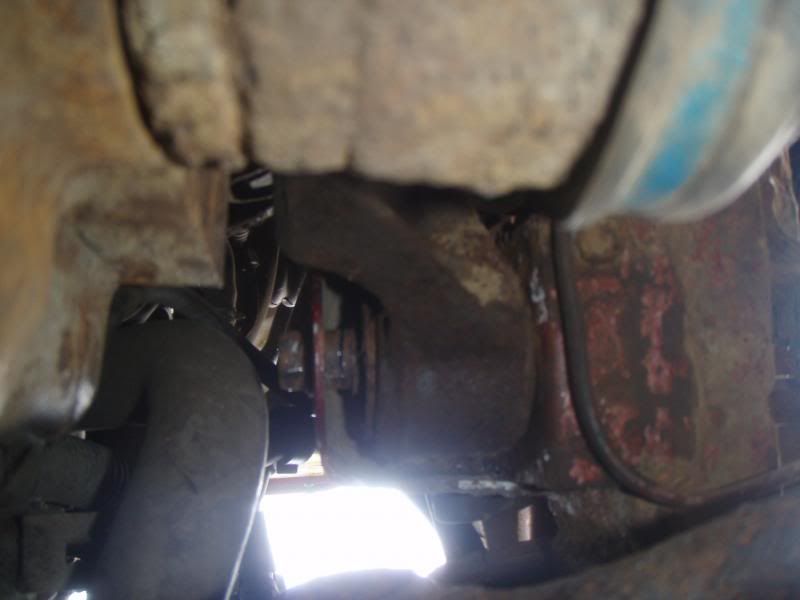 [/img] [/img]
|
|
| Back to top |
|
|
Blue dragon
Just got MTs

Joined: 12 Mar 2009
Odometer: 180
Location: Midlands UK
|
| Posted: Thu Apr 25, 2013 7:32 am Post subject:
|
|
|
Man, you have the patience of a saint 
I mostly build machines from scratch and often think it would be way quicker to modify an existing vehicle. However when I see threads like this making loads of new bits suddenly seams easier than fighting Mr rot !!
Keep going, you are making a lovely job of it and the reward for beating Mr seized bolt will be driving joy soon enough.
__________________________________
Builder of Citroen / Suzuki lightweight rock crawler and super lightweight Bike engined 4x4 buggy |
|
| Back to top |
|
|
recycler
Gate Opener
Joined: 09 Feb 2013
Odometer: 46
Location: West Lothian
|
| Posted: Thu Apr 25, 2013 5:03 pm Post subject:
|
|
|
i would have been just as well starting from scratch, there's something about this car though, its always just smiles.
Ive decided when this is done i am going to look for a proper "build it" project
Had a laptop disaster last night, it fell and destroyed a 2 month old hard drive, fortunately i had these pics on a usb drive, ive got the bad drive plugged in but its not looking good
these pics are upto date, nothing done since taking them so progress may be slow
doesn't look too bad with all this plastic
[img]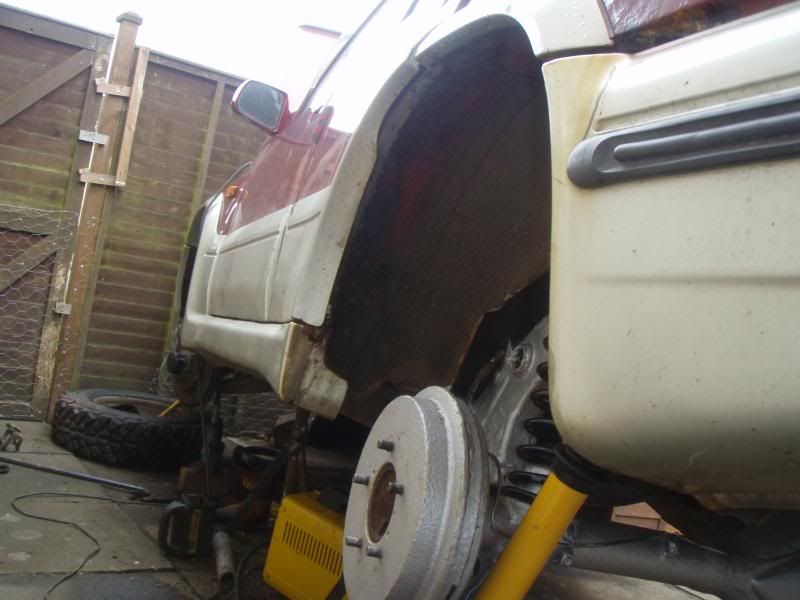 [/img] [/img]
take the plastic off, still not too bad
[img]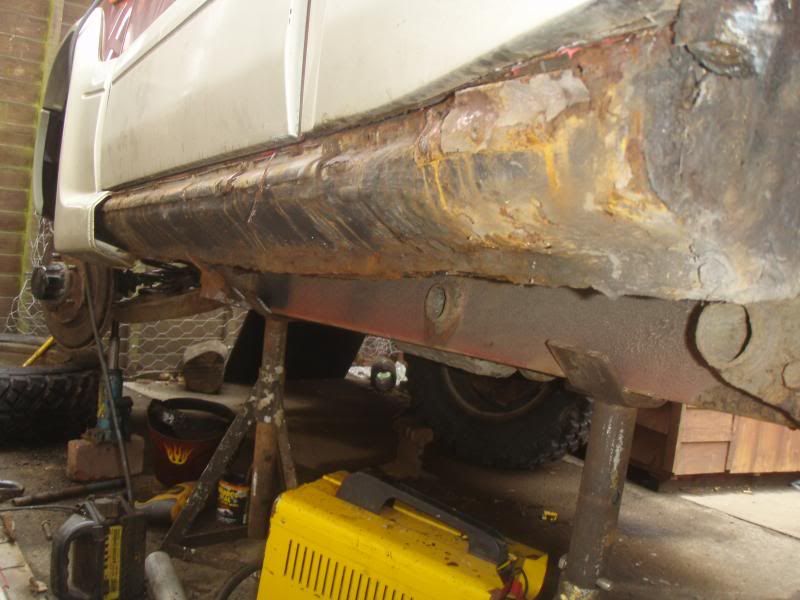 [/img] [/img]
i just love this hammer
[img]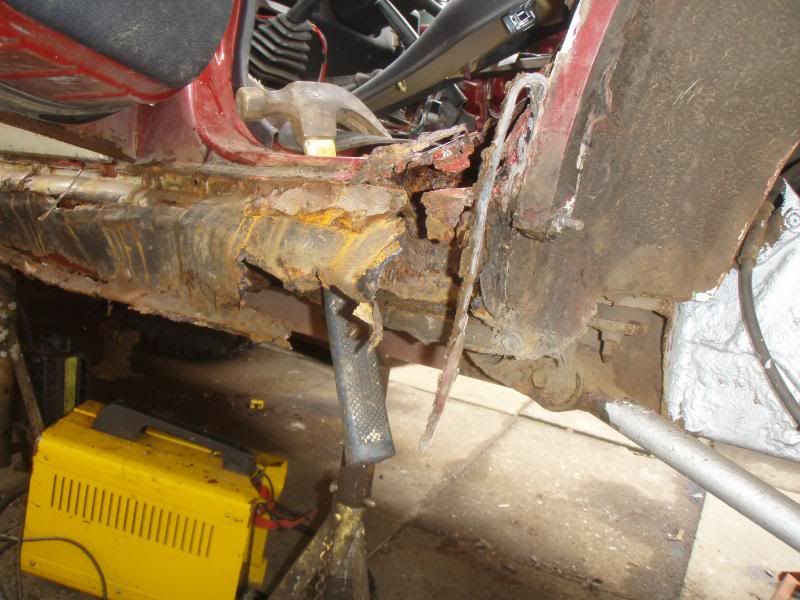 [/img] [/img]
[img]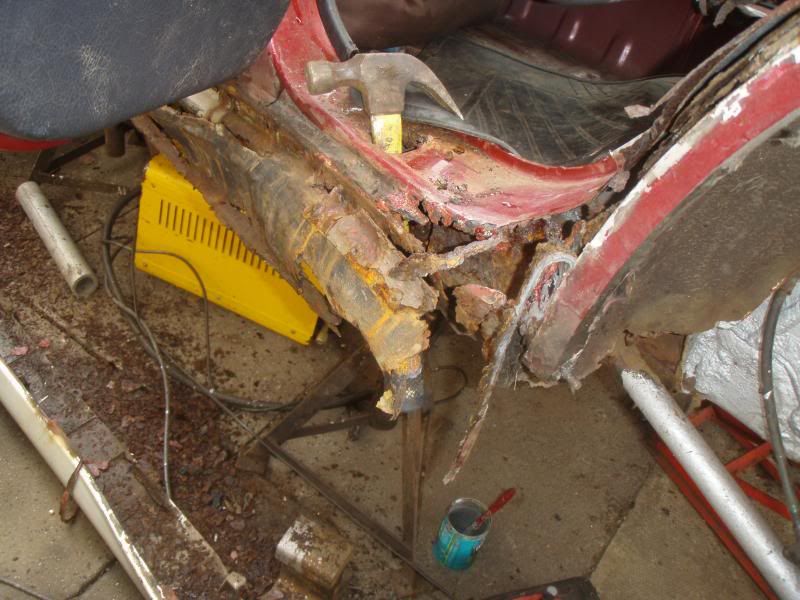 [/img] [/img]
a bit more exposing, no power tools involved yet, just some pulling
[img]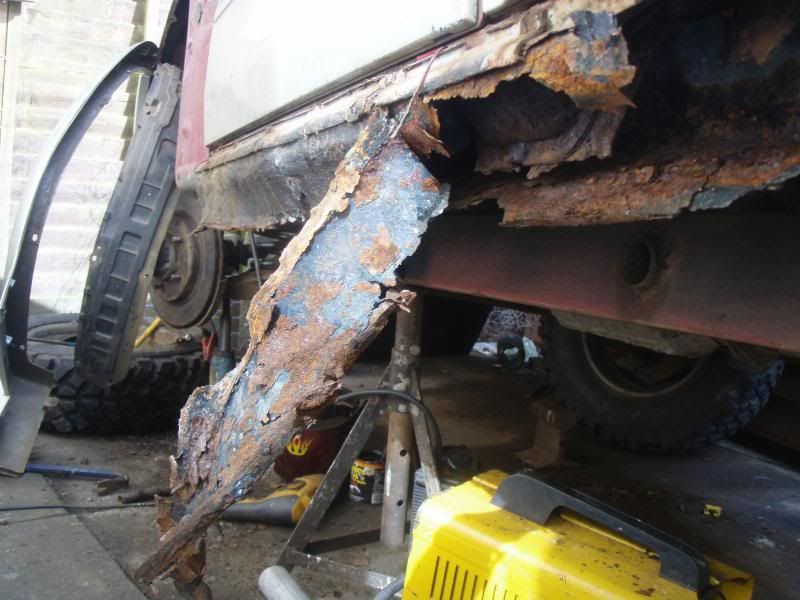 [/img] [/img]
[img]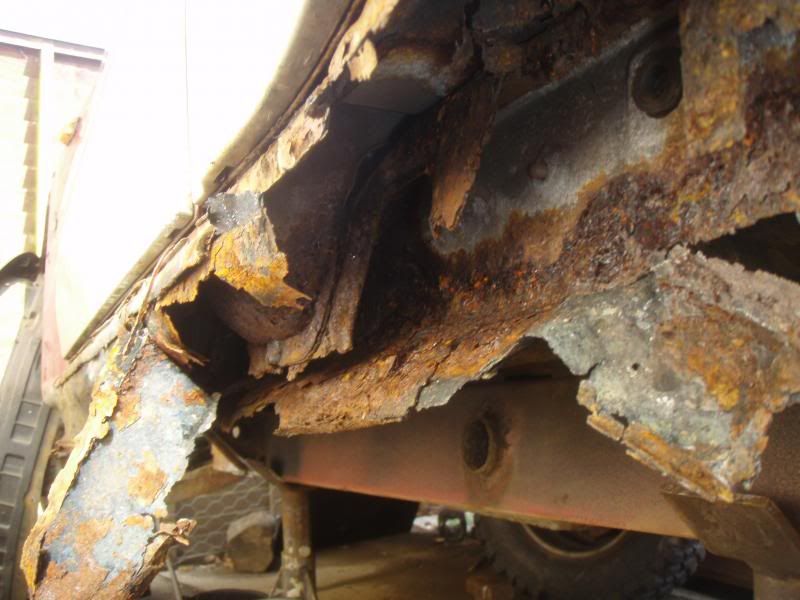 [/img] [/img]
[img]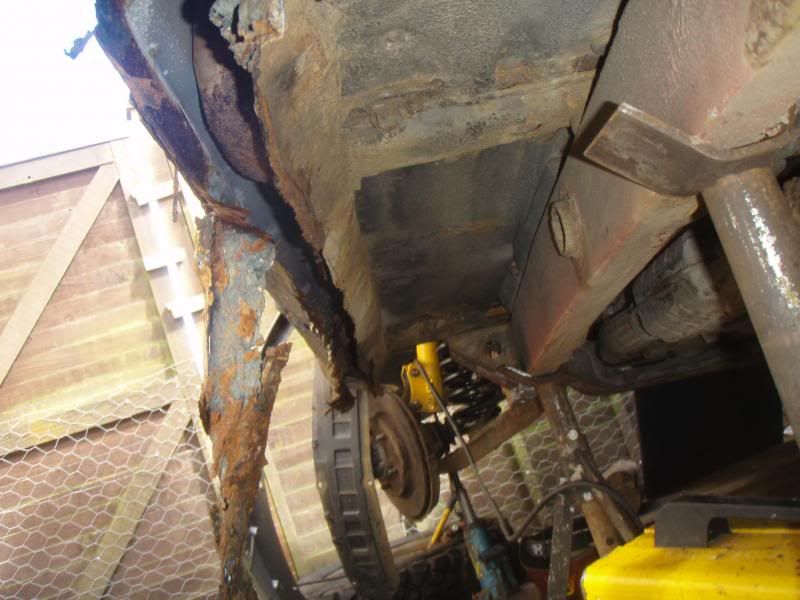 [/img] [/img]
somebody has already put another cill on here, not a very good job either
[img]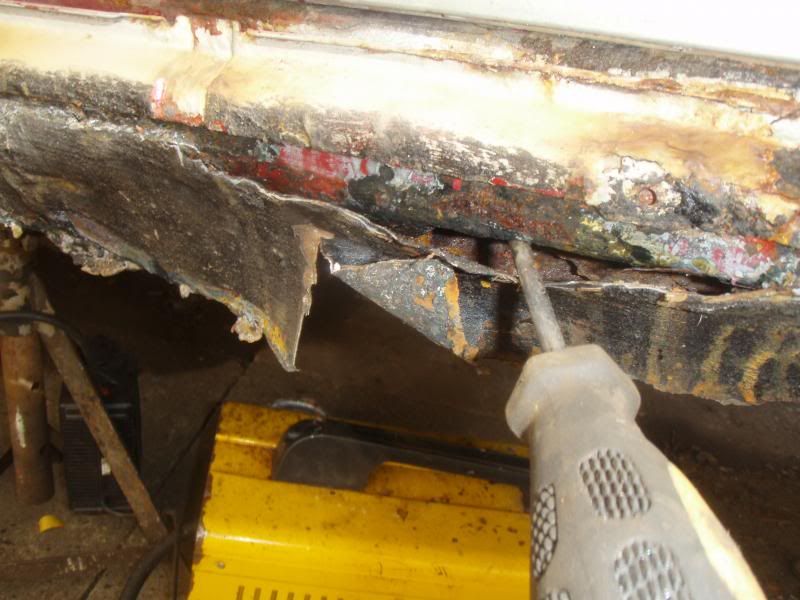 [/img] [/img]
could be worse [/img]
|
|
| Back to top |
|
|
teamidris
Mud Obsessed

Joined: 24 Feb 2008
Odometer: 3372
Location: Staffordshire UK

|
|
| Back to top |
|
|
rhinoman
Mud Obsessed

Joined: 04 Sep 2004
Odometer: 3277
Location: Brinkworth, Wilts
|
| Posted: Thu Apr 25, 2013 7:49 pm Post subject:
|
|
|
Nice work
__________________________________
2000 Vitara 4u2, 3+3 lift, 33s, winch, safari rack, steel front axle and 5:83 R&Ps, LWB brakes
1986 SJ413K Pickup, 1.6 conversion
2006 Jimny JLX+, stock |
|
| Back to top |
|
|
recycler
Gate Opener
Joined: 09 Feb 2013
Odometer: 46
Location: West Lothian
|
| Posted: Thu Apr 25, 2013 8:06 pm Post subject:
|
|
|
its hilarious isnt it, what the hell have i started here, i must need some electric shock therapy or something, its a wreck argh!!!!!!
next installment maybe Monday, i will do a pic by pic on the box section and the rest of the butchery
could someone be kind enough to post a side on photo of the rear A frame Heim joint thing that bolts to the top of the rear axle, im not sure if mine is bent, it is sitting at a strange angle, i will make a spacer for it but mine doesn't look right
thanks
Trev
|
|
| Back to top |
|
|
Xpajun
Mud Obsessed
Joined: 22 Sep 2008
Odometer: 3245
1988 Mitsubishi Shogun
|
| Posted: Thu Apr 25, 2013 8:11 pm Post subject:
|
|
|
| recycler wrote: | its hilarious isnt it, what the hell have i started here, i must need some electric shock therapy or something, its a wreck argh!!!!!!
|
I bought, what I decided was a two month project that was very much like that - it turned into a 18 month job of almost continuous welding followed by a respray.
By the time I'd finished and was driving it I was real chuffed, both with the way it turned out and the fact that I'd done it all myself...
|
|
| Back to top |
|
|
teamidris
Mud Obsessed
Joined: 24 Feb 2008
Odometer: 3372
Location: Staffordshire UK
|
| Posted: Fri Apr 26, 2013 6:12 am Post subject:
|
|
|
I gain a certain satisfaction keeping a 1991 transit on the road
It would be nice to 'finish' though 
A bit like painting the forth bridge 
If I ever want a big fabrication job to keep me busy I just take a screwdriver to it and start hunting.
__________________________________
https://m.youtube.com/channel/UC3l3zoaCabKrgBSULSV1YgA |
|
| Back to top |
|
|
recycler
Gate Opener
Joined: 09 Feb 2013
Odometer: 46
Location: West Lothian
|
| Posted: Wed May 15, 2013 8:29 pm Post subject:
|
|
|
thanks for the comments guys, i need them, even the bad ones
Moderators feel free to move this to the suzuki section as im feeling not worthy among these amazing posts of custom builds, keep it up ye all
right here are some more disaster pics
heres the inspector
[img]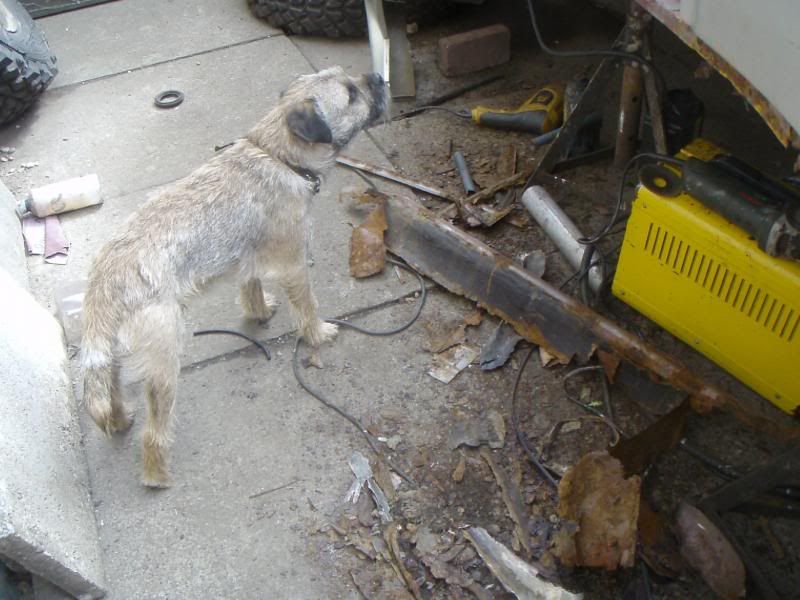 [/img] [/img]
front foot well body mount
[img]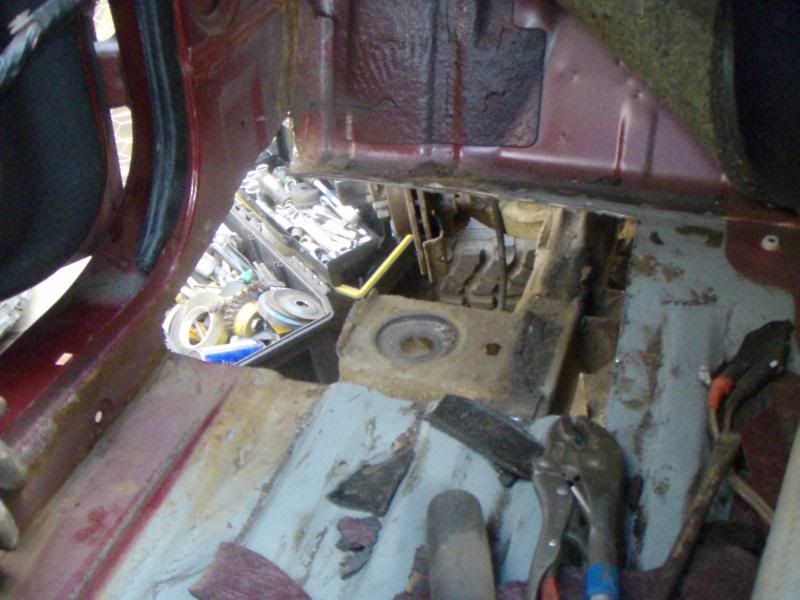 [/img] [/img]
[img]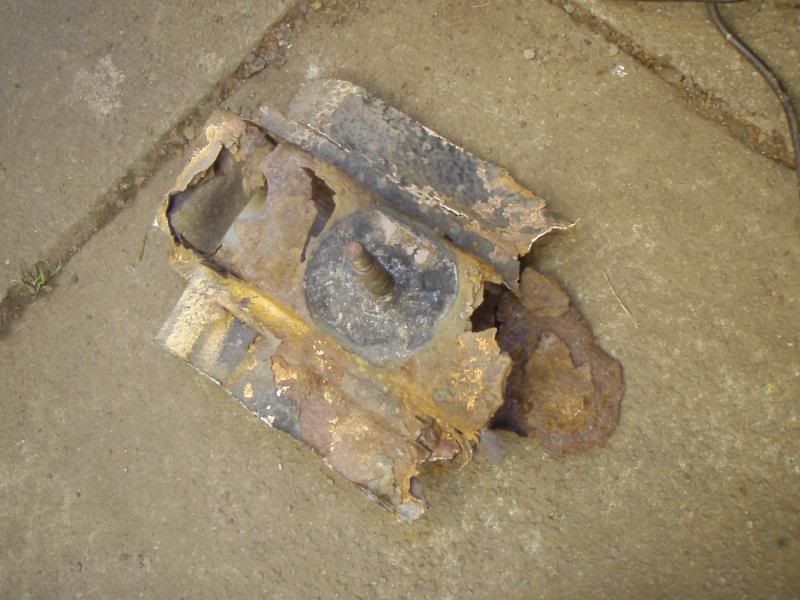 [/img] [/img]
[img]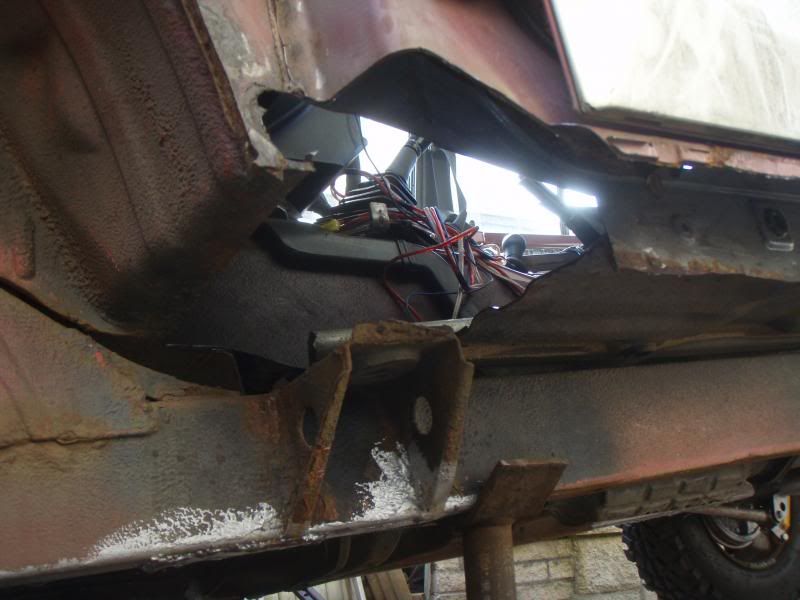 [/img] [/img]
[img]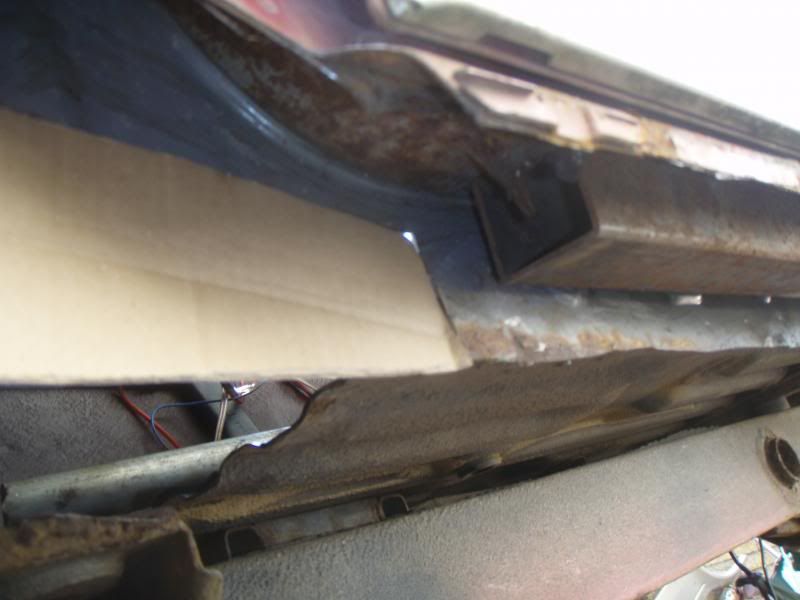 [/img] [/img]
[img]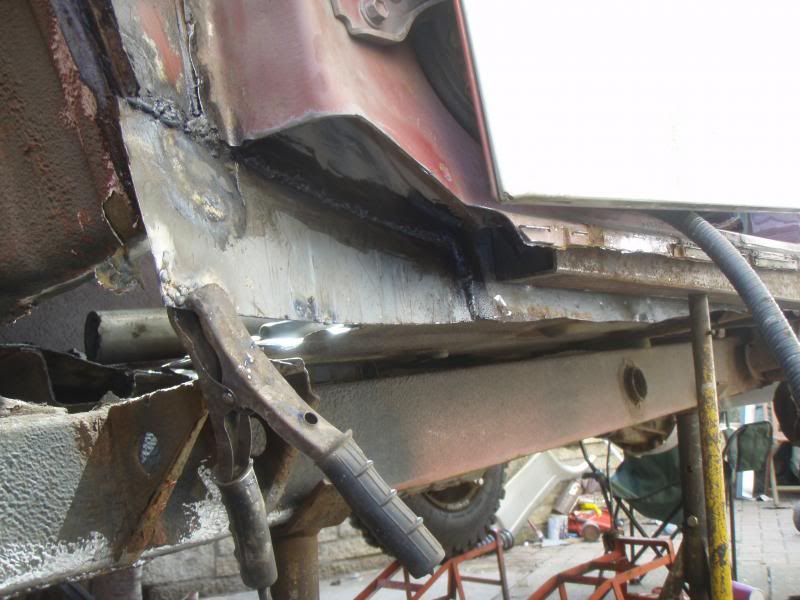 [/img] [/img]
[img]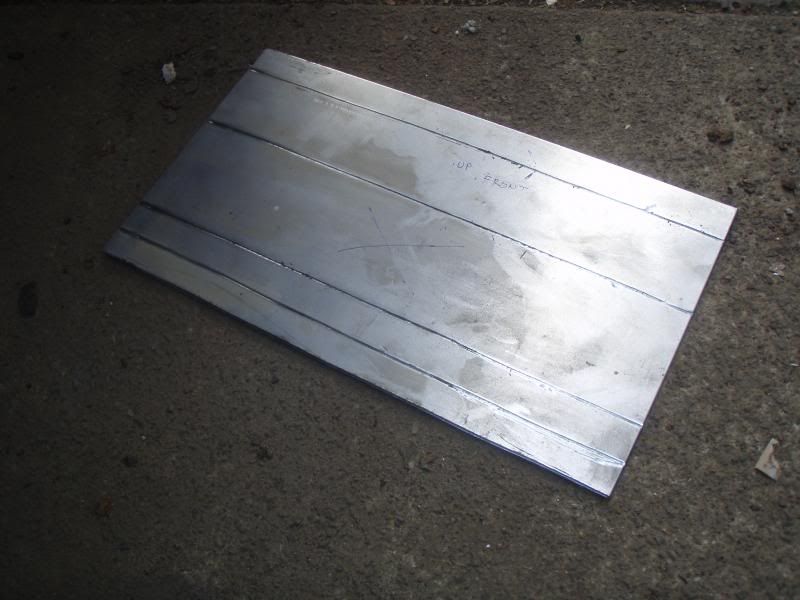 [/img] [/img]
[img] [/img] [/img]
[img]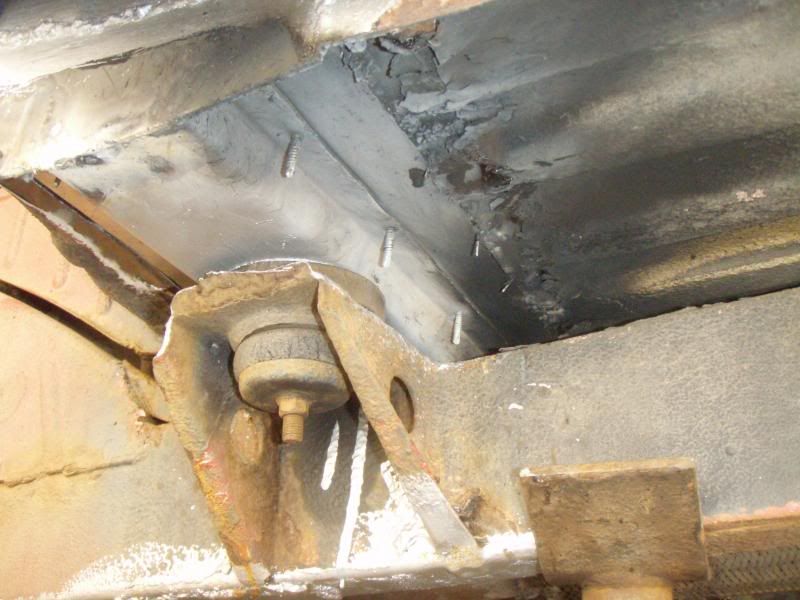 [/img] [/img]
[img]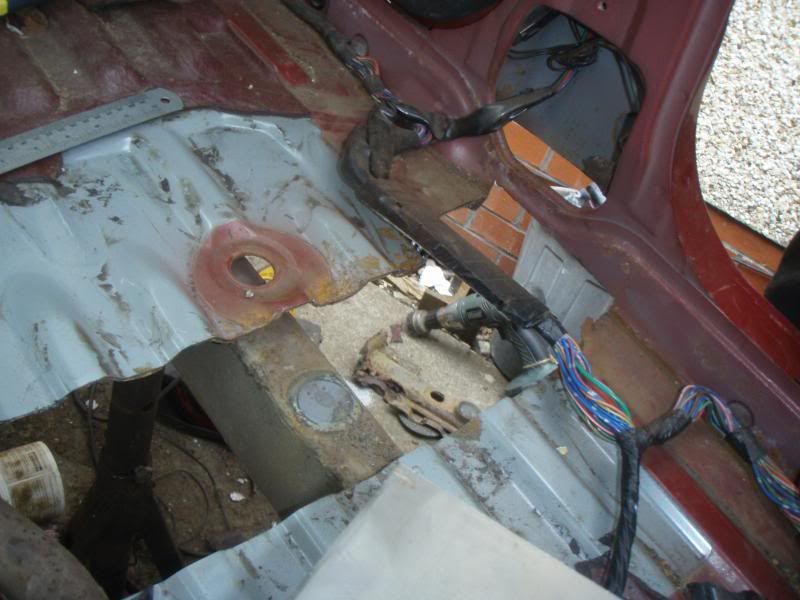 [/img] [/img]
[img][URL=http://s31.photobucket.com/user/the2max/media/P5040006.jpg.html][img:42e0ff59fc]http://i31.photobucket.com/albums/c365/the2max/P5040006.jpg[/img:42e0ff59fc][/URL][/img]
so thats almost up to date i will add some more soon,
Last edited by recycler on Wed May 15, 2013 9:46 pm; edited 1 time in total |
|
| Back to top |
|
|
recycler
Gate Opener
Joined: 09 Feb 2013
Odometer: 46
Location: West Lothian
|
| Posted: Wed May 15, 2013 9:44 pm Post subject:
|
|
|
here is the new piece for seat belt an chair mounts
[img]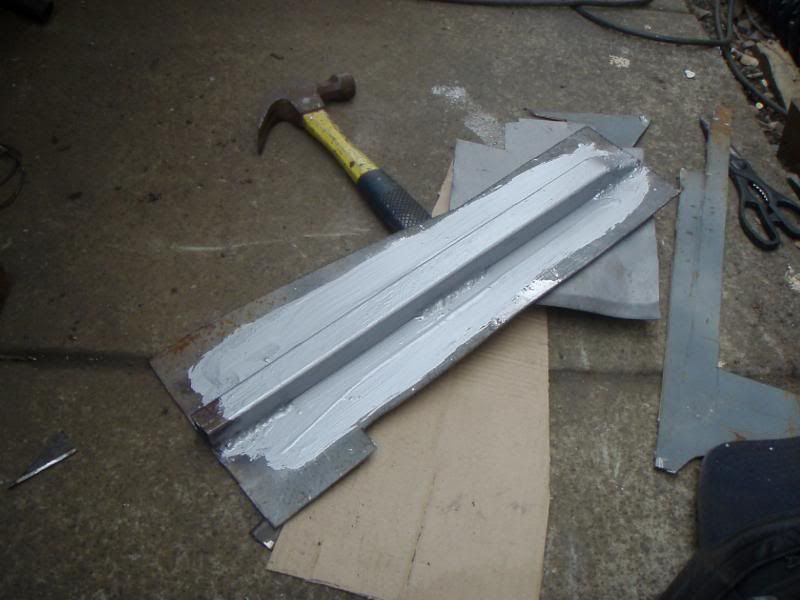 [/img] [/img]
part welded in place
[img]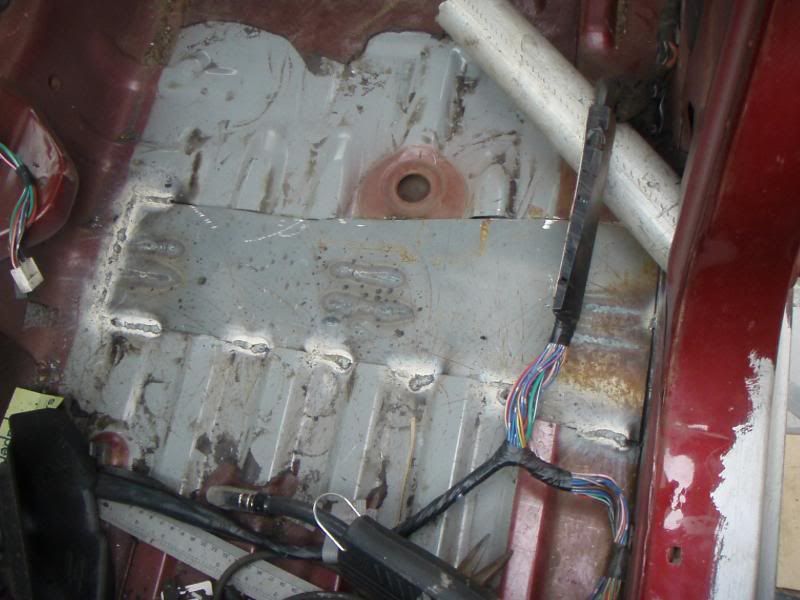 [/img] [/img]
i had to cut behind it up to the rear body mount as the metal was no good
[img] [/img] [/img]
rear view of the big hole
[img]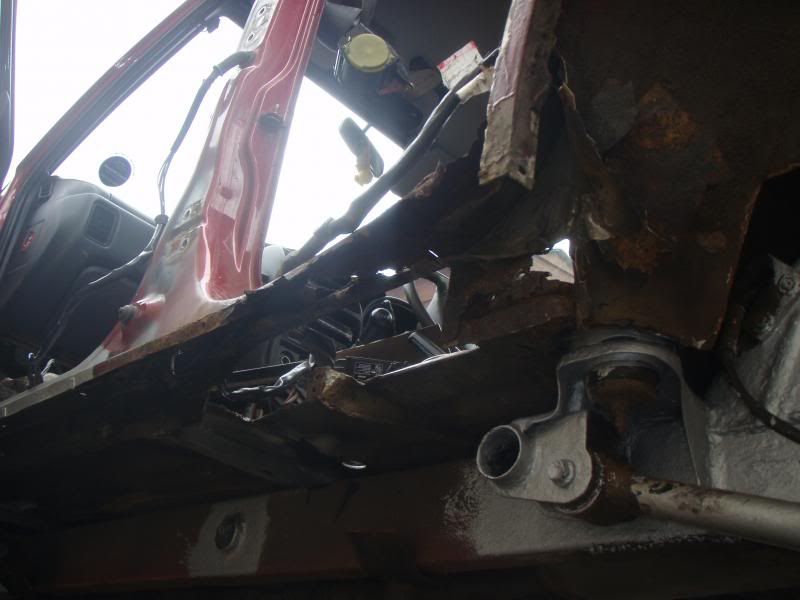 [/img] [/img]
cut access to rear body mount to be safe and check it out, it wasnt too bad
[img]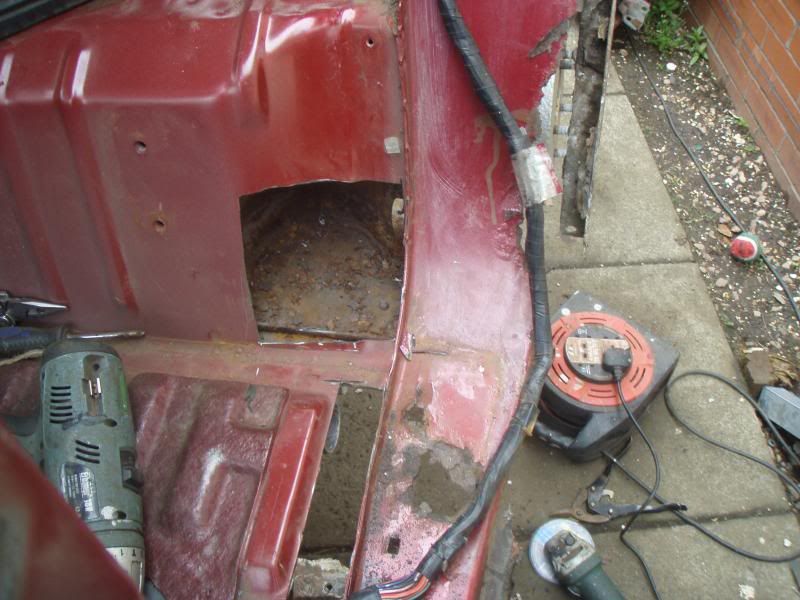 [/img] [/img]
rear repair
[img]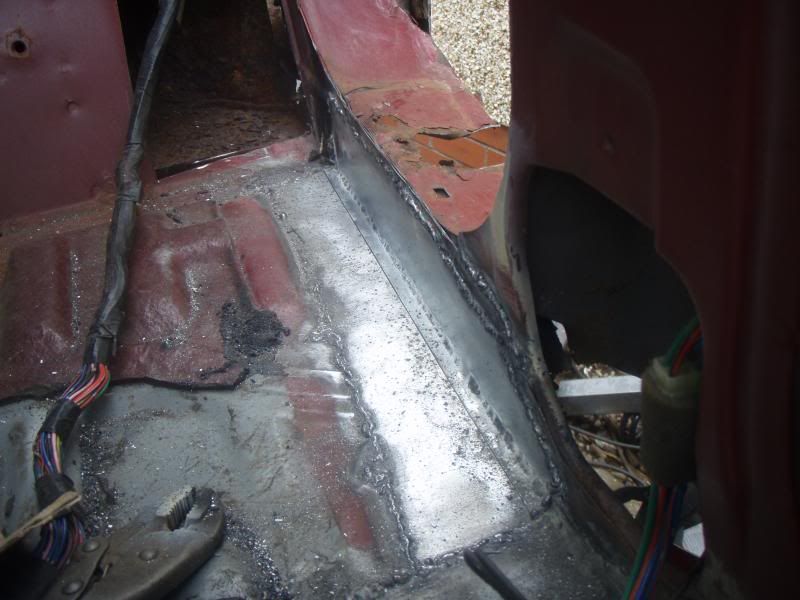 [/img] [/img]
and a little accident here, the indicators do funny things now, i will sort it later as theres bigger fish to fry
[img]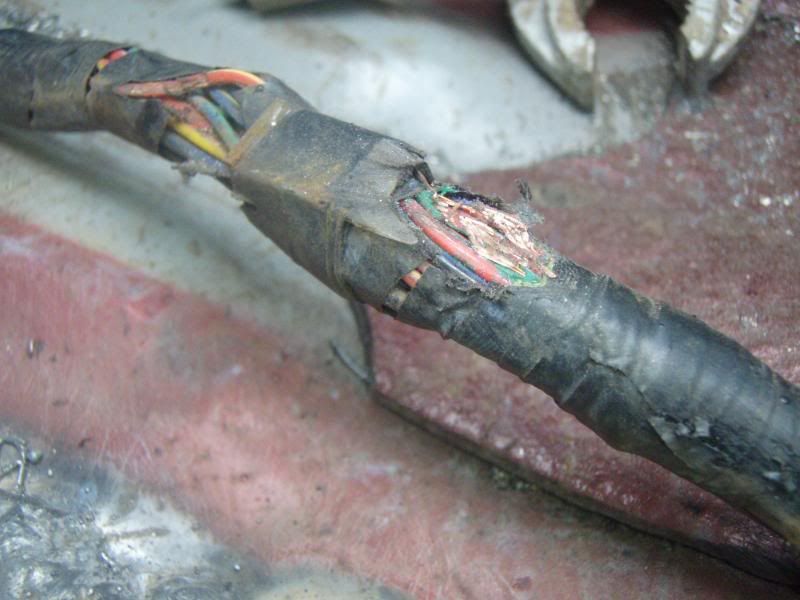 [/img] [/img]
and here is the inner cill nearly ready for the box section to go in, just needs a little trimming
[img]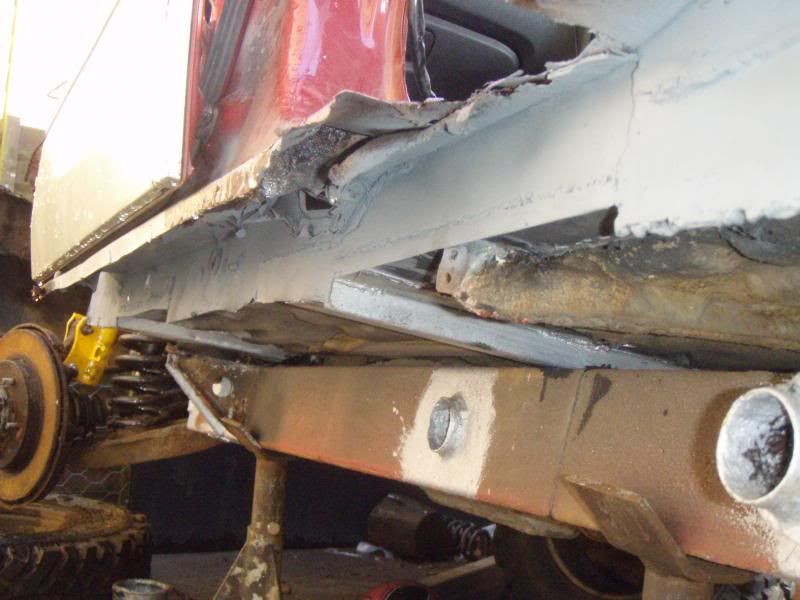 [/img] [/img]
and here is the box section, its overkill i know, ideal would be 100x100mm, or 100x50mm, but in order to put the plastic back on i need the other 50x50mm
its welded together this time as last time round i did way too much on my back welding definitely not nice
[img]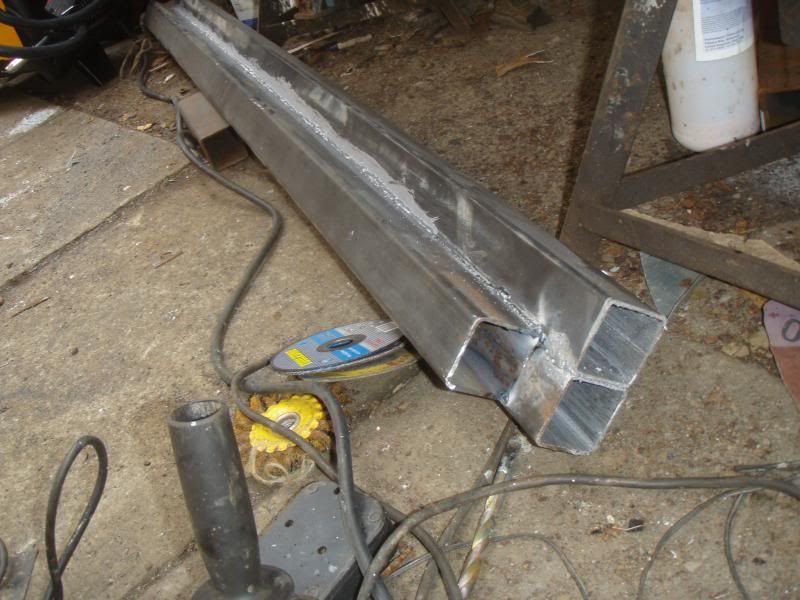 [/img] [/img]
and here is my impression of a spacer for the rear linkage, i hope it works as planned, 50x50 box section 5mm thick stiffened with 1" box to the rear
[img]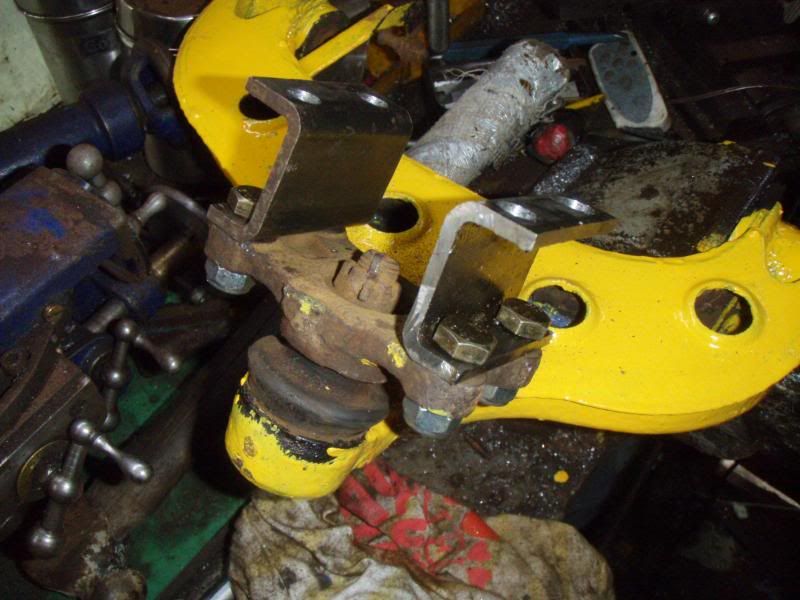 [/img] [/img]
|
|
| Back to top |
|
|
|
|
recycler
Gate Opener
Joined: 09 Feb 2013
Odometer: 46
Location: West Lothian
|
| Posted: Wed May 15, 2013 9:52 pm Post subject:
|
|
|
[img]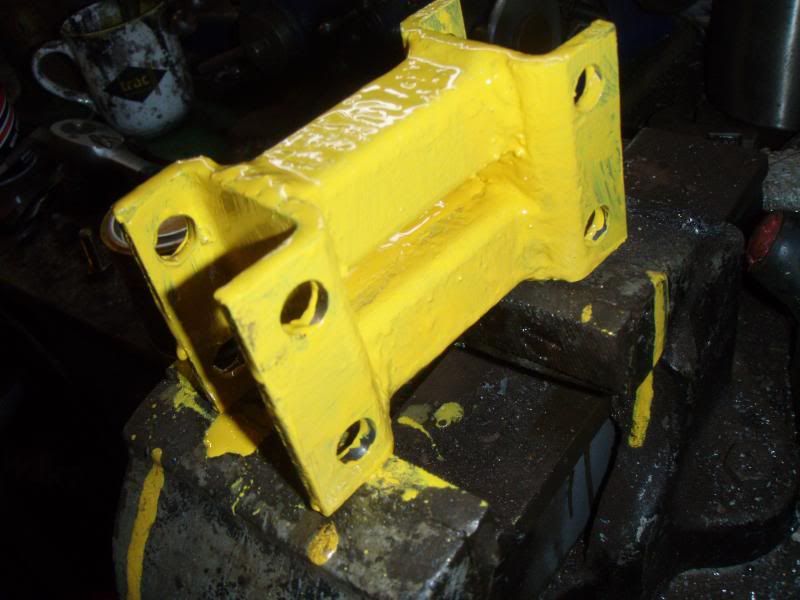 [/img] [/img]
last photo untill next update which will be the box section going in and rebuilding rear door entry
im currently fighting with the brake bias thing, thanks for looking[/img]
|
|
| Back to top |
|
|
recycler
Gate Opener
Joined: 09 Feb 2013
Odometer: 46
Location: West Lothian
|
| Posted: Sat May 25, 2013 8:35 pm Post subject:
|
|
|
its still going and not too far from being done
though i did make a boo boo, in my haste to get the box section in and have a look i forgot to trim the inner cill, i realized half way through welding the front
oh well, its going to be awkward trimming it from underneath but ive done worse
so here are the updates
[img]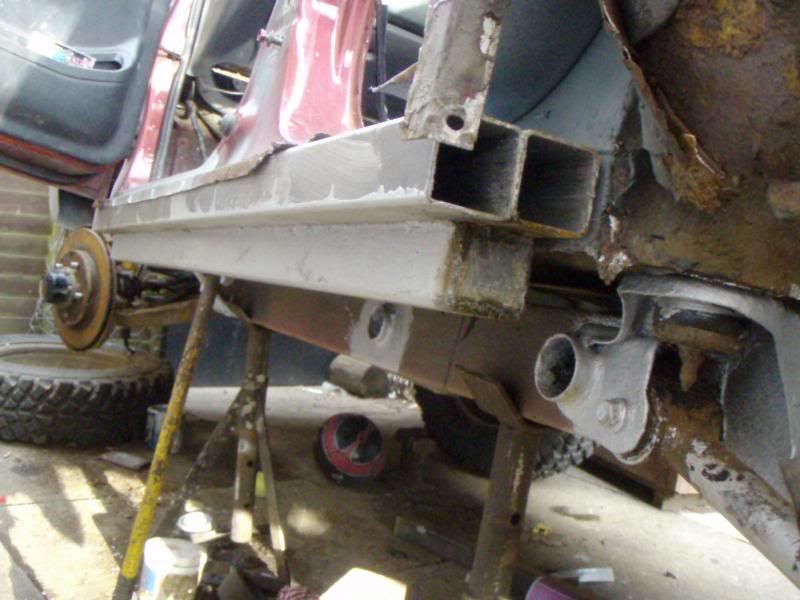 [/img] [/img]
the lower box is off set slightly
[img]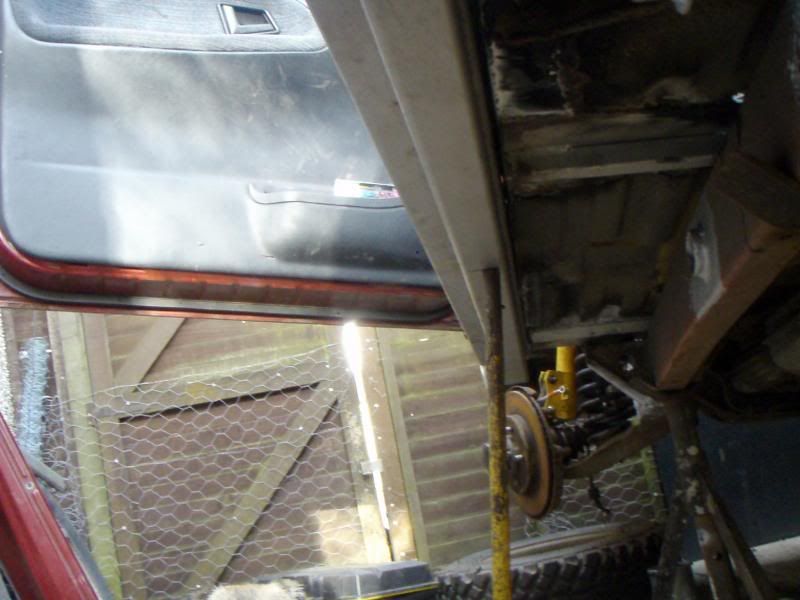 [/img] [/img]
[img] [/img] [/img]
[img] [/img] [/img]
this is the oops i forgot to trim the back
[img]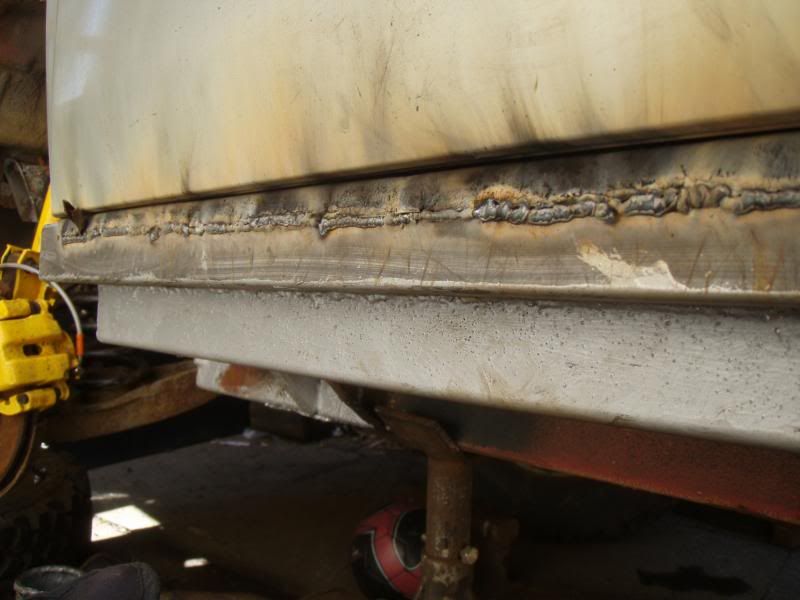 [/img] [/img]
front boxed in
[img]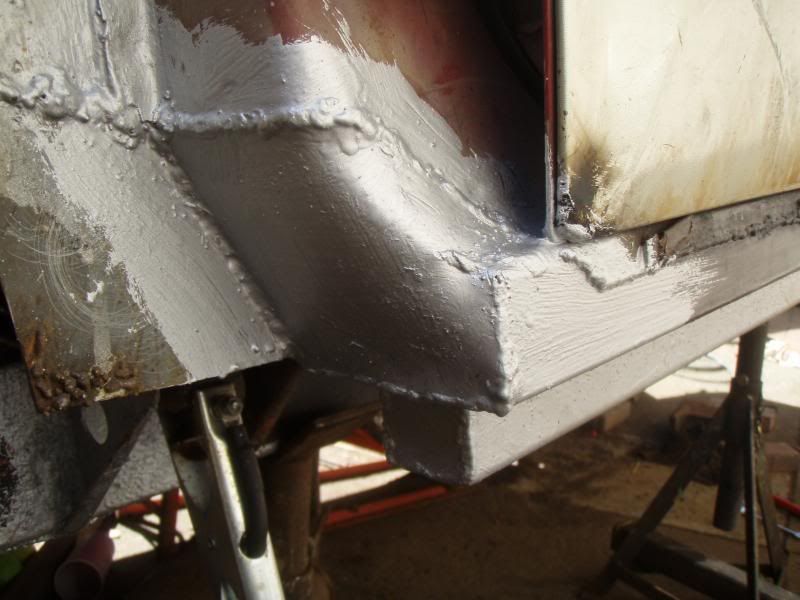 [/img] [/img]
time for the rear door entry
[img]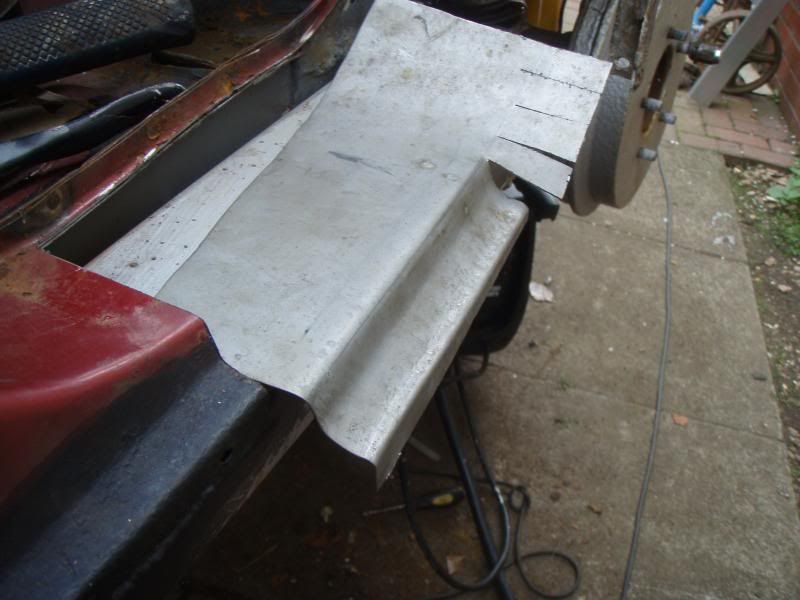 [/img] [/img]
i cut some of this out and redid it as the angle was off a few degrees
[img]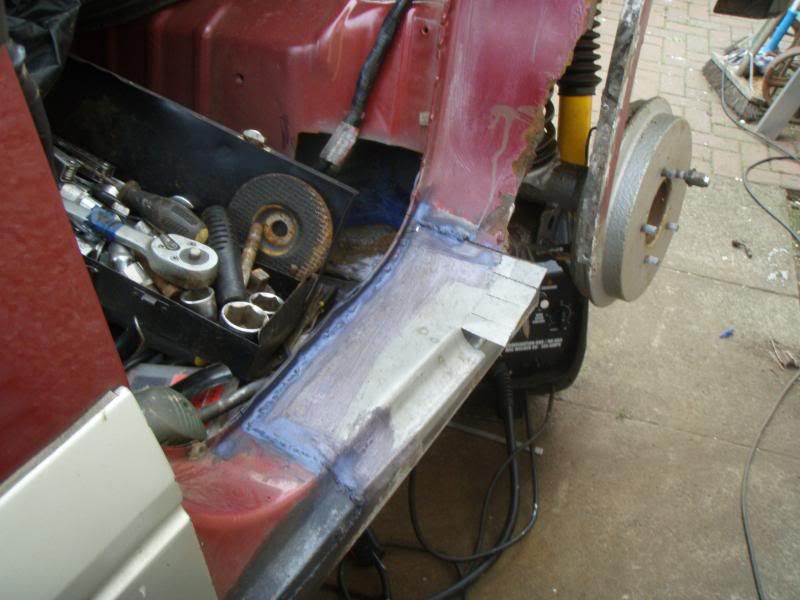 [/img] [/img]
[img]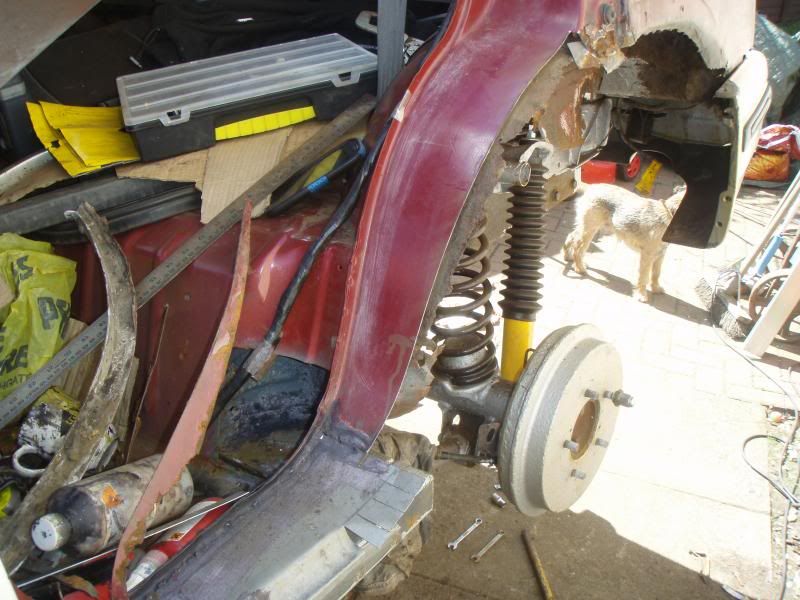 [/img] [/img]
[img]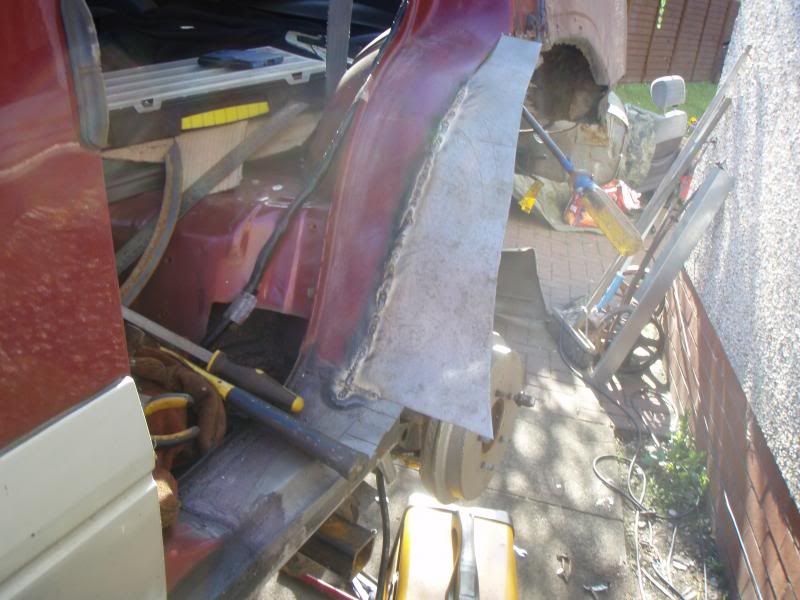 [/img] [/img]
|
|
| Back to top |
|
|
recycler
Gate Opener
Joined: 09 Feb 2013
Odometer: 46
Location: West Lothian
|
| Posted: Sat May 25, 2013 8:40 pm Post subject:
|
|
|
some more
[img]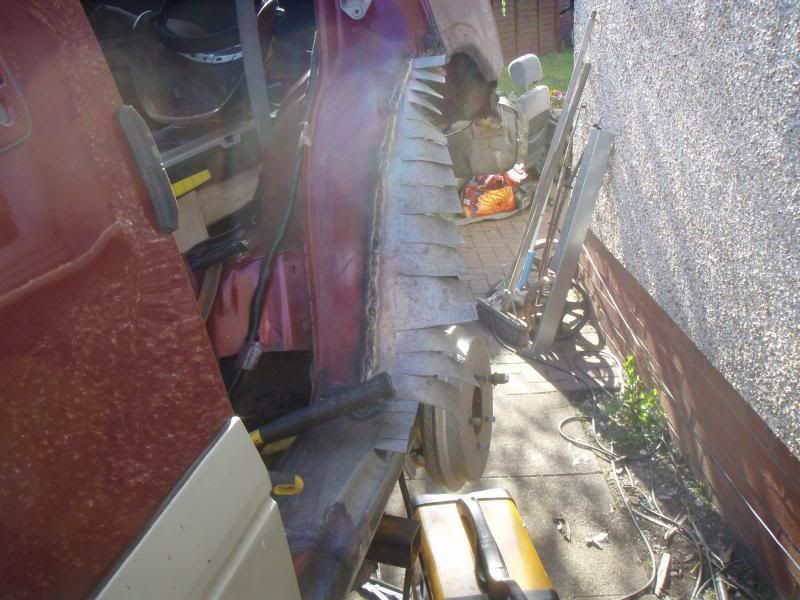 [/img] [/img]
[img]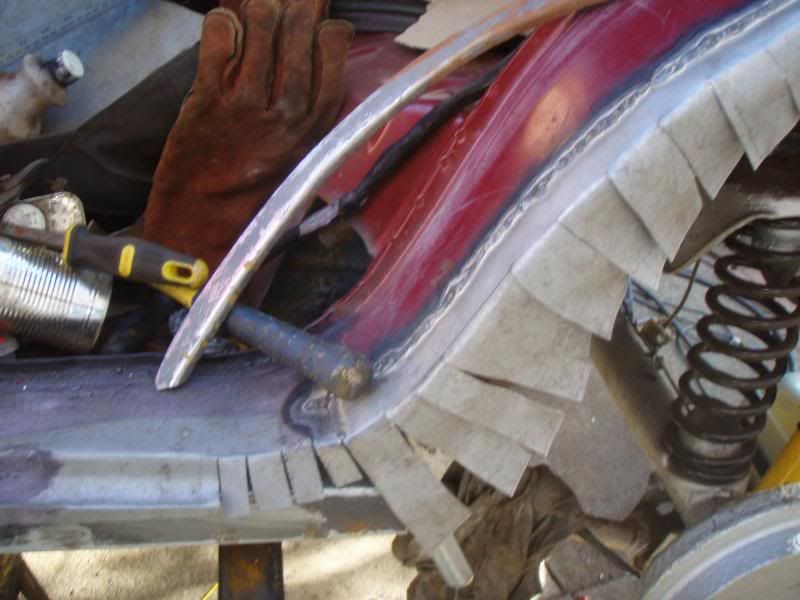 [/img] [/img]
[img]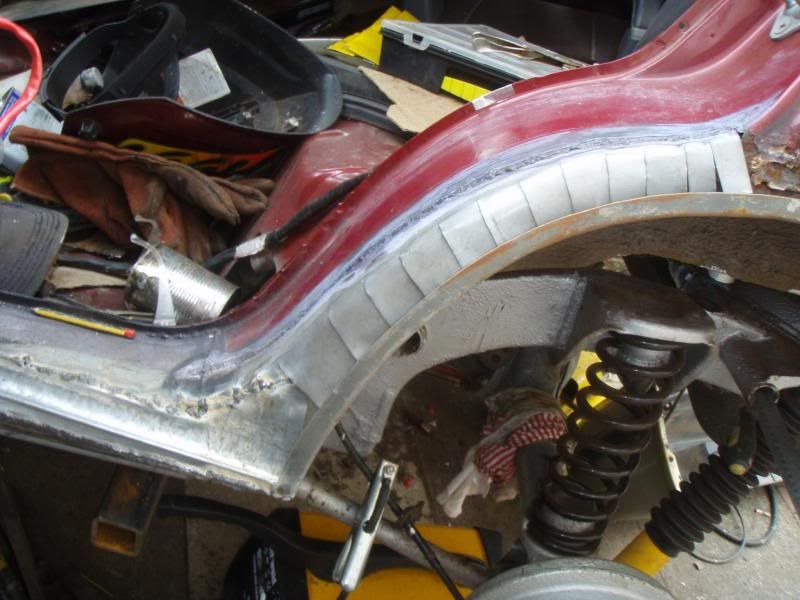 [/img] [/img]
[img]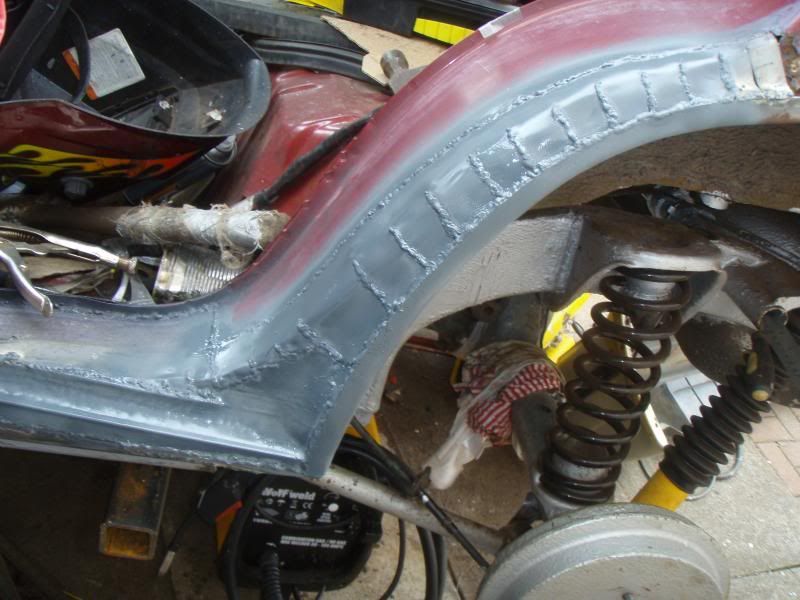 [/img] [/img]
it doesnt look pretty but im not going for pretty
trev
|
|
| Back to top |
|
|
recycler
Gate Opener
Joined: 09 Feb 2013
Odometer: 46
Location: West Lothian
|
| Posted: Sat May 25, 2013 9:48 pm Post subject:
|
|
|
here is the rear end
[img]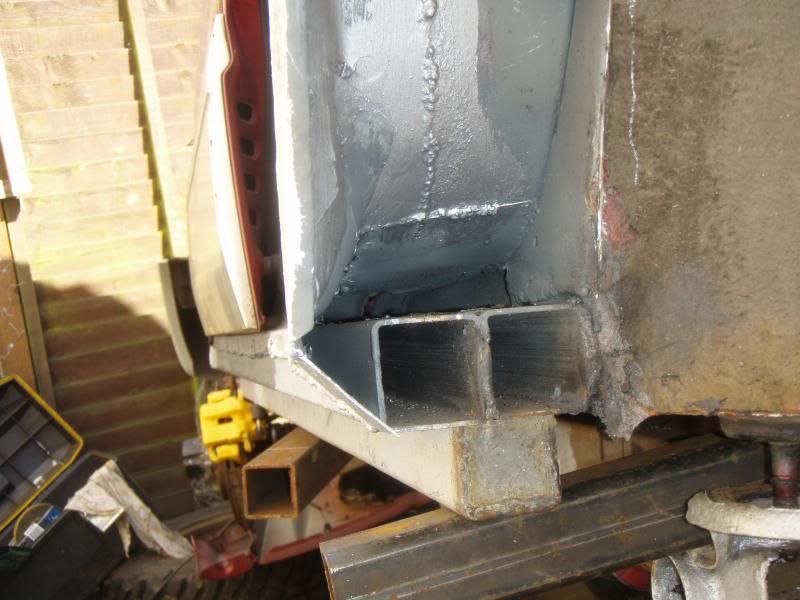 [/img] [/img]
[img] [/img] [/img]
[img]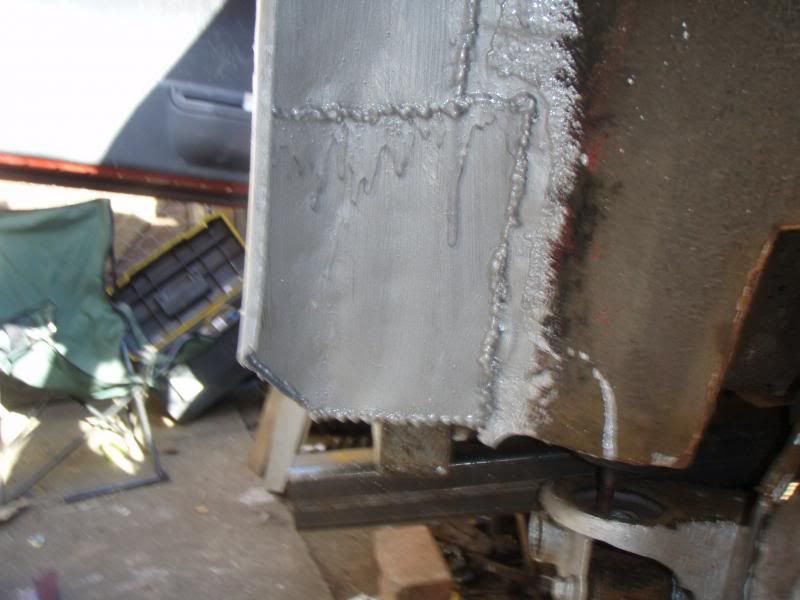 [/img] [/img]
no more for a while
|
|
| Back to top |
|
|
teamidris
Mud Obsessed
Joined: 24 Feb 2008
Odometer: 3372
Location: Staffordshire UK
|
|
| Back to top |
|
|
jeepmadmike
Mud Obsessed

Joined: 08 May 2005
Odometer: 4573
Location: between 6000+7000 rpm and Devon
|
| Posted: Mon May 27, 2013 12:17 pm Post subject:
|
|
|
The body on my 1949 jeep is less rotten, but I'm just going to replace it.
Looks like your winning now at least 👍
__________________________________
Land Rovers are the root of all evil!
Now i have gone and bought a D4!
one day i might buy a 86" series one like my dad had when i was a boy. |
|
| Back to top |
|
|
ordy
Just got MTs
Joined: 31 Dec 2008
Odometer: 109
Location: northeast england
|
| Posted: Mon May 27, 2013 8:31 pm Post subject:
|
|
|
Very good and keep going, you really have brought it back from the dead. That border terrerist are great little dogs we got two 
|
|
| Back to top |
|
|
recycler
Gate Opener
Joined: 09 Feb 2013
Odometer: 46
Location: West Lothian
|
| Posted: Mon May 27, 2013 9:50 pm Post subject:
|
|
|
cheers guys its been a marathon with this bloody thing and my deadline set by myself is for it to have its MOT in 4 days
aye, the border is a great companion, i bet hes just as eager to get into the zuk as i am as hes not allowed in the mrs car
so lots since last post, spent a day cutting out and rebuilding the area below headlights, i think its the crumple zone, just metal that didnt seem to serve a purpose but was rotten through and near the front body mounts so best repair, sorry no pics as i spent as much time scratching my head as doing the repair, lots of curves and angles
anyhow, nearly done here are some pics
the rear door had a nasty wee hole
[img]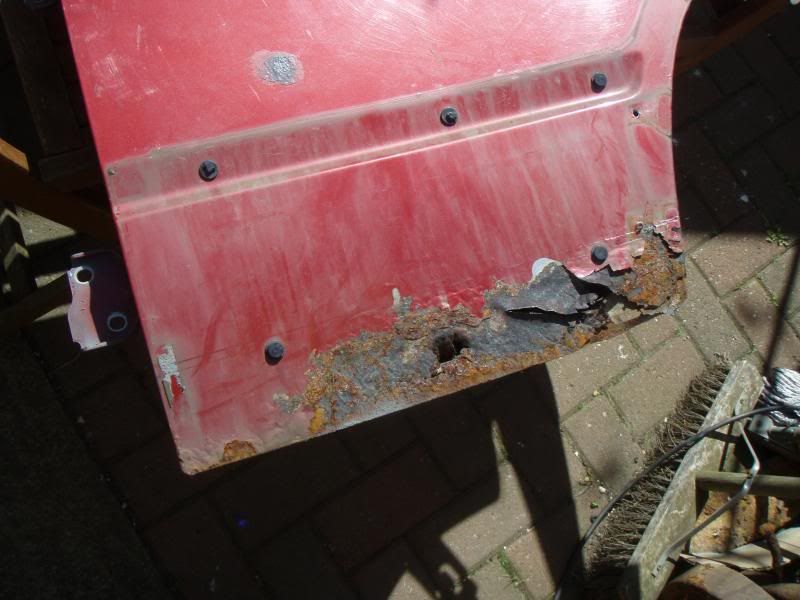 [/img] [/img]
as its under the plastic trim i wasnt too fussed with the repair
[img]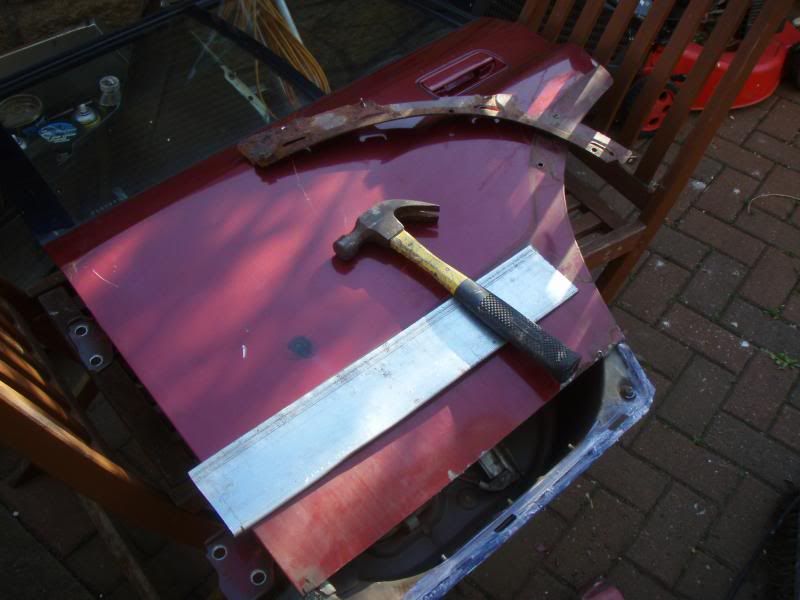 [/img] [/img]
and door finished on the car TAKE NOTE OF THE HAMMER
[img]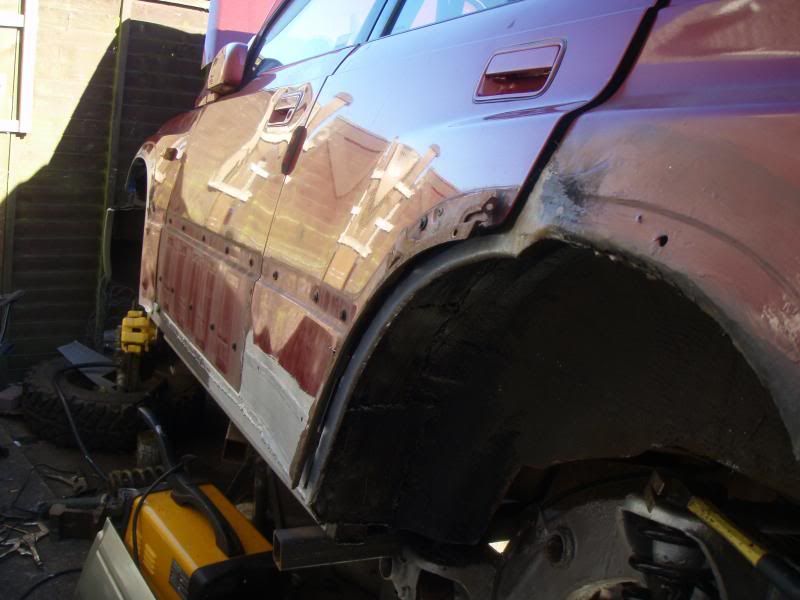 [/img] [/img]
i previously jacked the car off the bodymounts to repair the crumple zone
before pics of crumple zone sorry forgot after pics
[img] [/img] [/img]
then finish all that lower the car down, wheres my bloody hammer 
[img]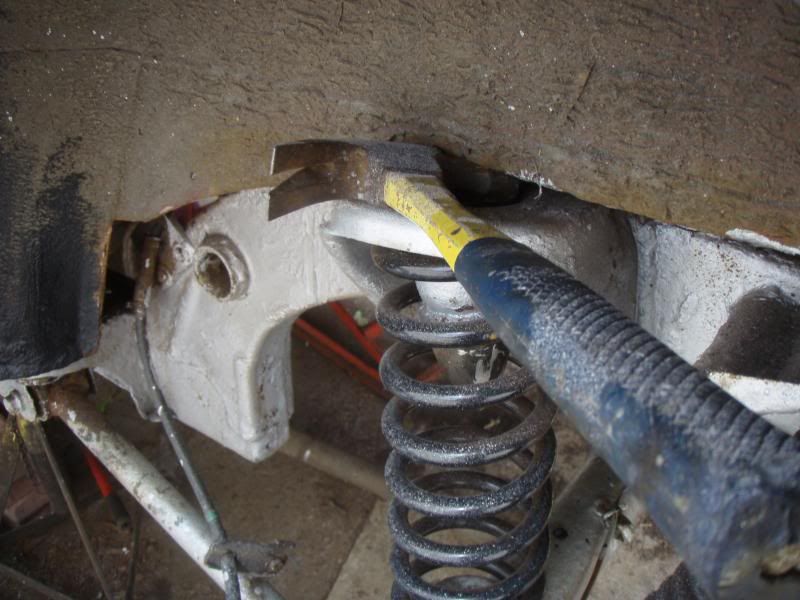 [/img] [/img]
anyway, i found it eventually, it took me a while
so started putting some plastic on and touching up and building up some of the scabs
[img]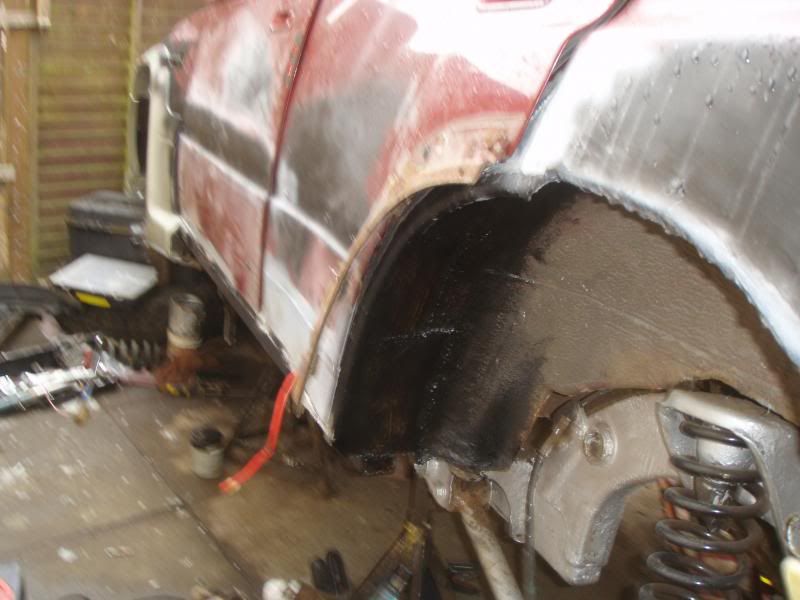 [/img] [/img]
also waxoiled everything i messed with to the underside
[img]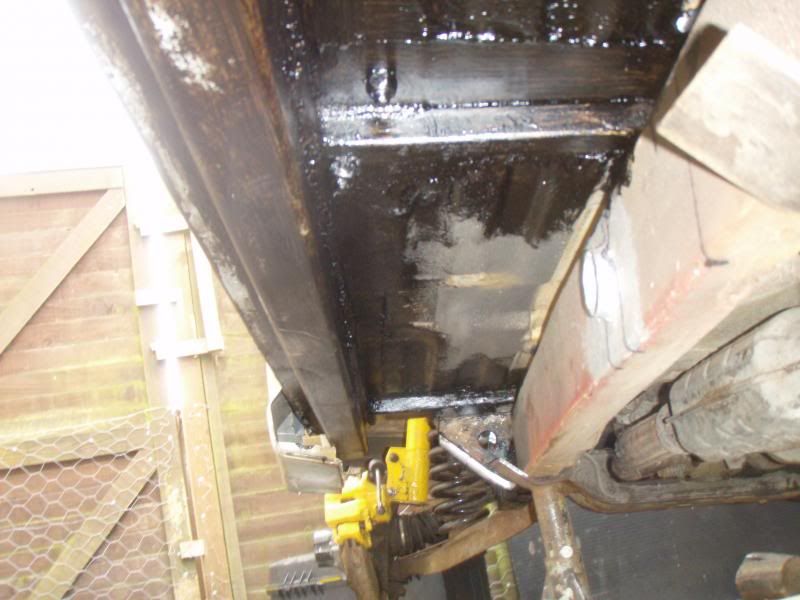 [/img] [/img]
some more plastic going back on
[img]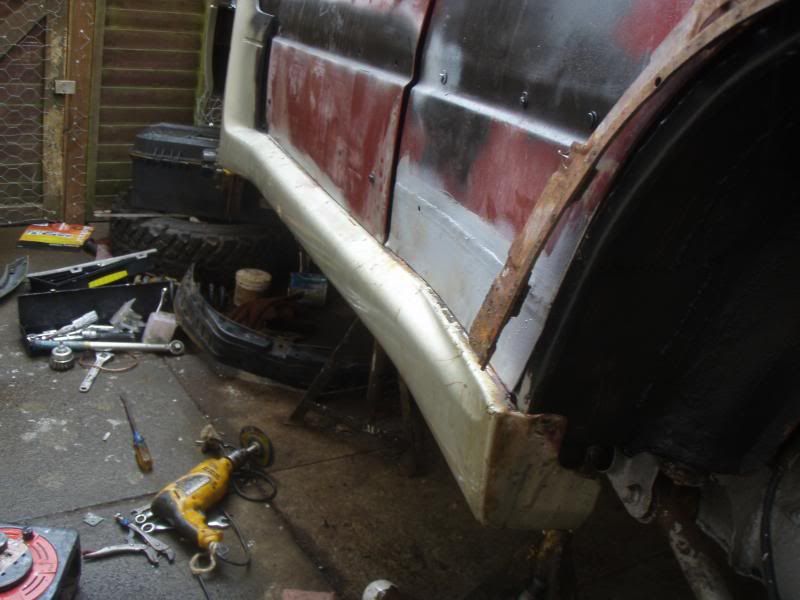 [/img] [/img]
perfect fit at the rear angle bit
[img]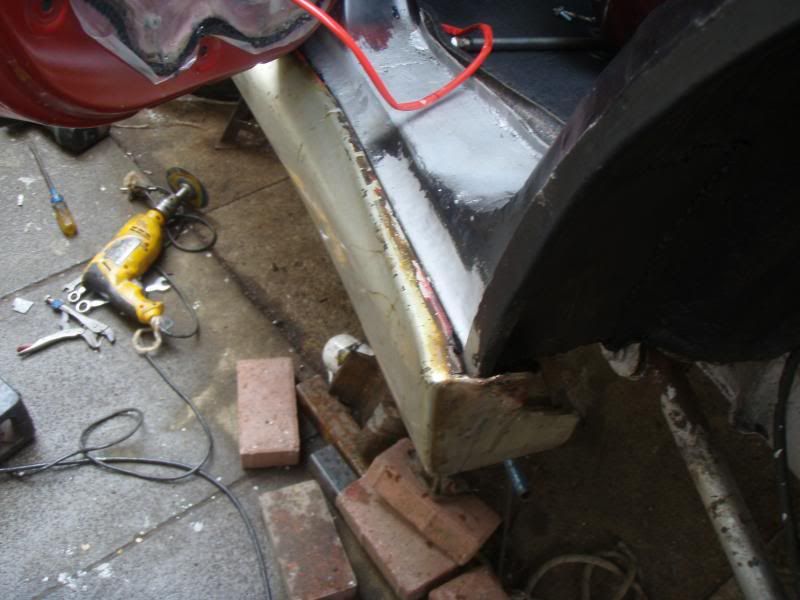 [/img] [/img]
more plastic
[img]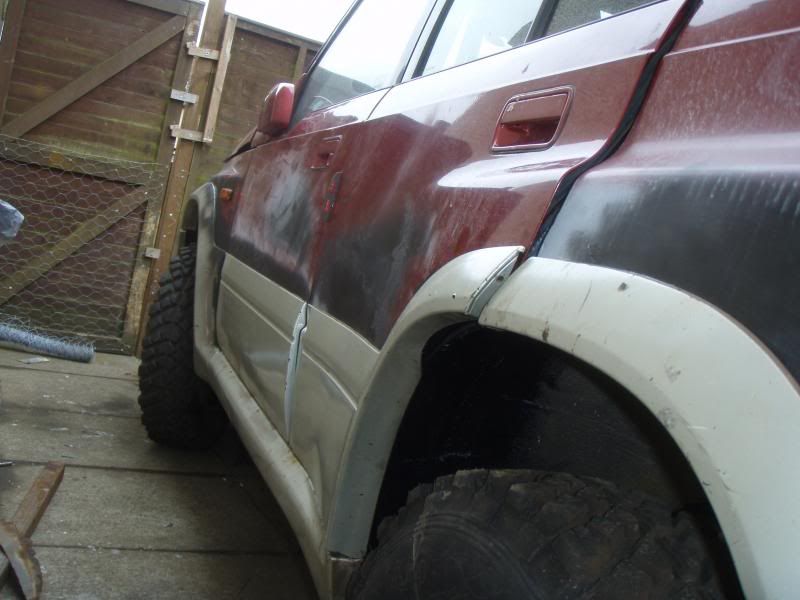 [/img] [/img]
more soon, im nakered
|
|
| Back to top |
|
|
recycler
Gate Opener
Joined: 09 Feb 2013
Odometer: 46
Location: West Lothian
|
|
| Back to top |
|
|
recycler
Gate Opener
Joined: 09 Feb 2013
Odometer: 46
Location: West Lothian
|
| Posted: Mon Jul 07, 2014 8:54 pm Post subject:
|
|
|
so, both inner wings were shot, the passenger side cut back to good metal and made good, the driver side was cut out completely and re-fabricated, both front body mounts cut out just leaving the headlight mounts in place, front member between mounts cut out and replaced
here are some more
driver side inner wing gone
[img]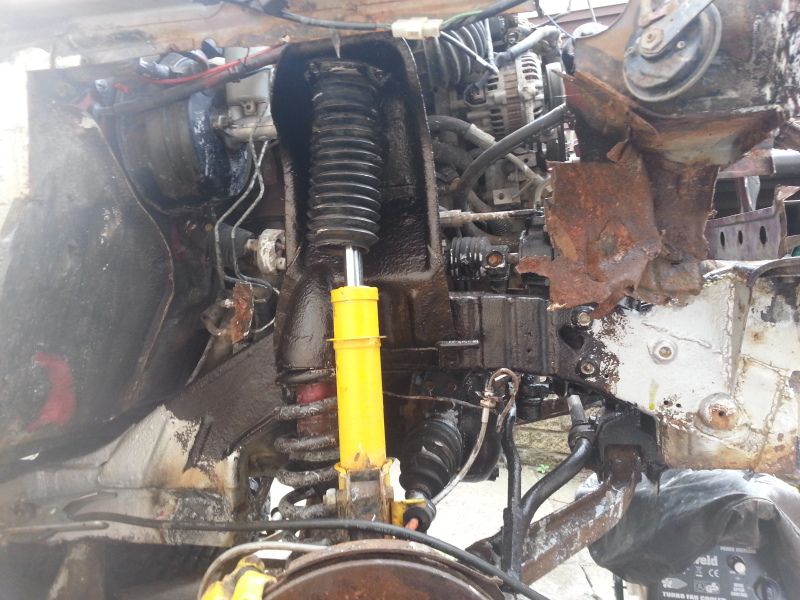 [/img] [/img]
passenger side inner wing
[img]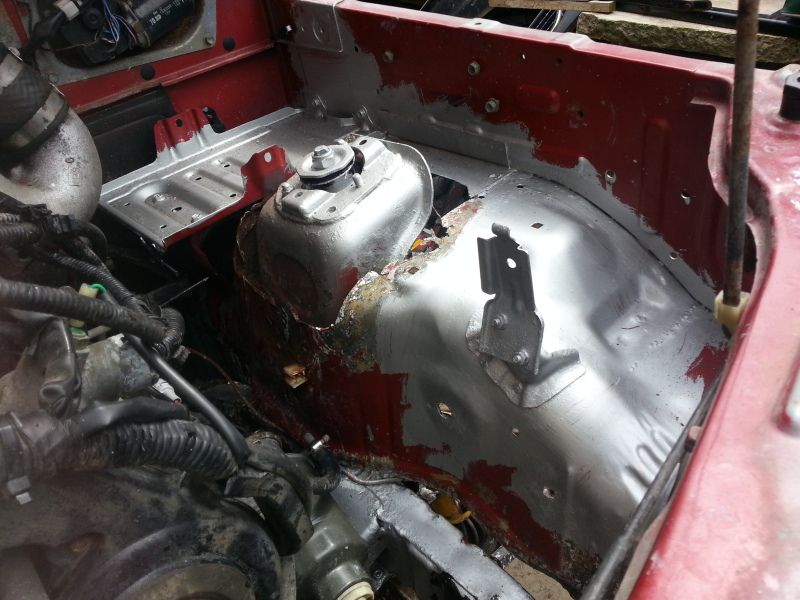 [/img] [/img]
front body mount
[img]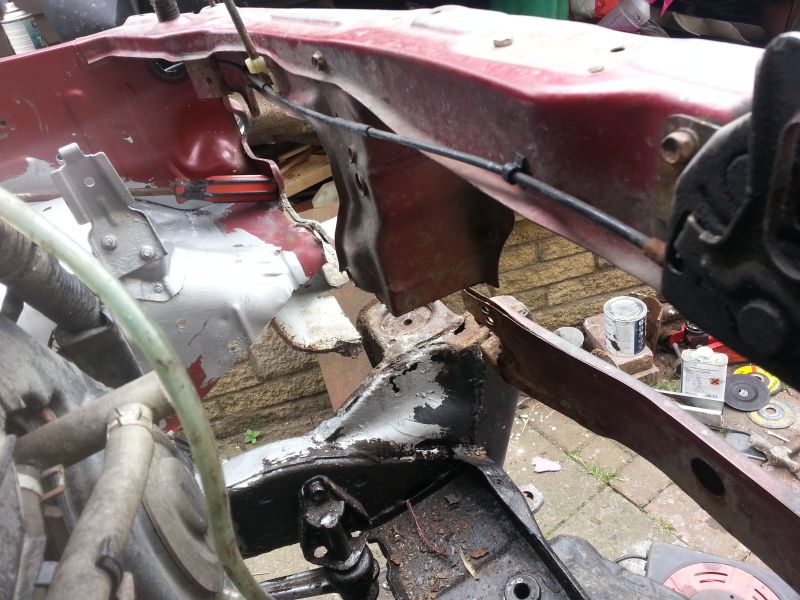 [/img] [/img]
100x100 3mm box section
[img]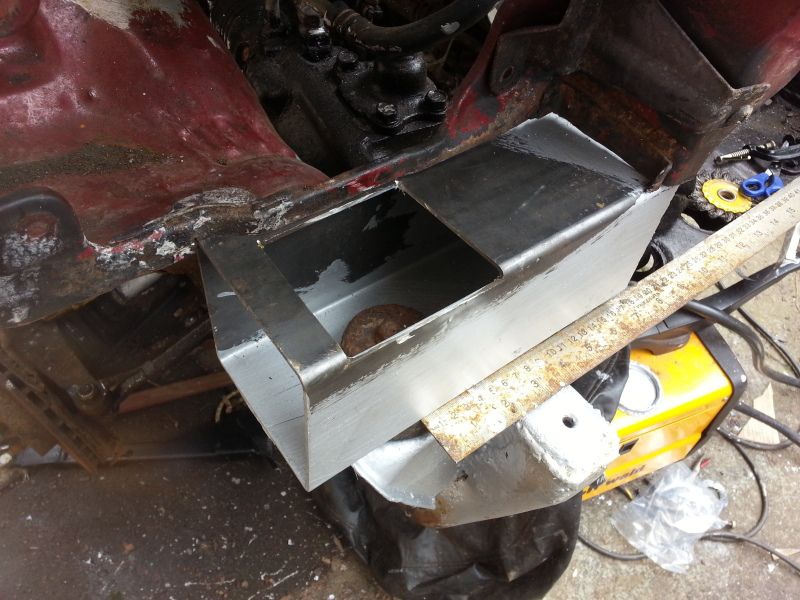 [/img] [/img]
more box section
[img]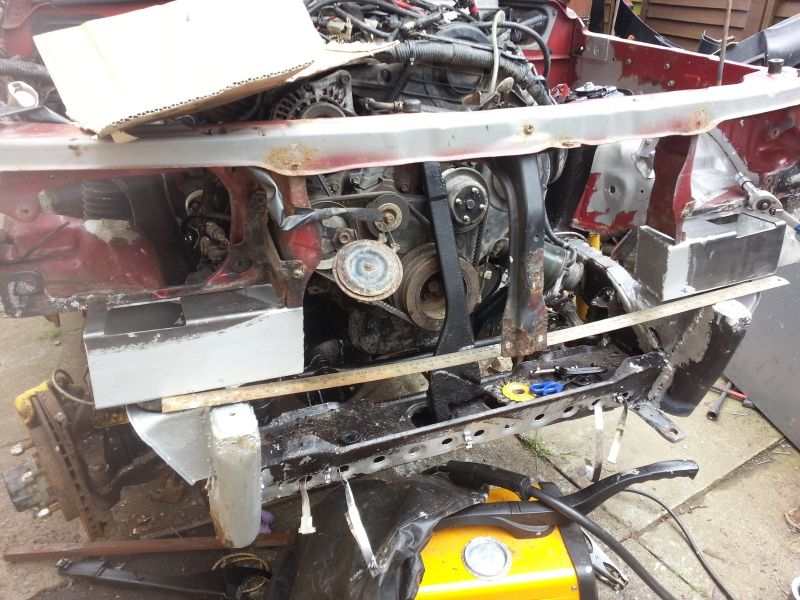 [/img] [/img]
some debris
[img]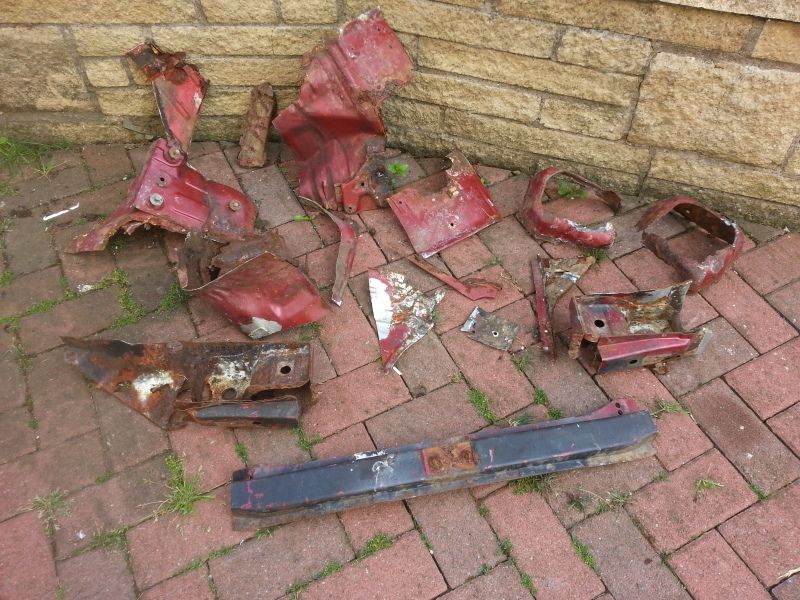 [/img] [/img]
passenger side
[img]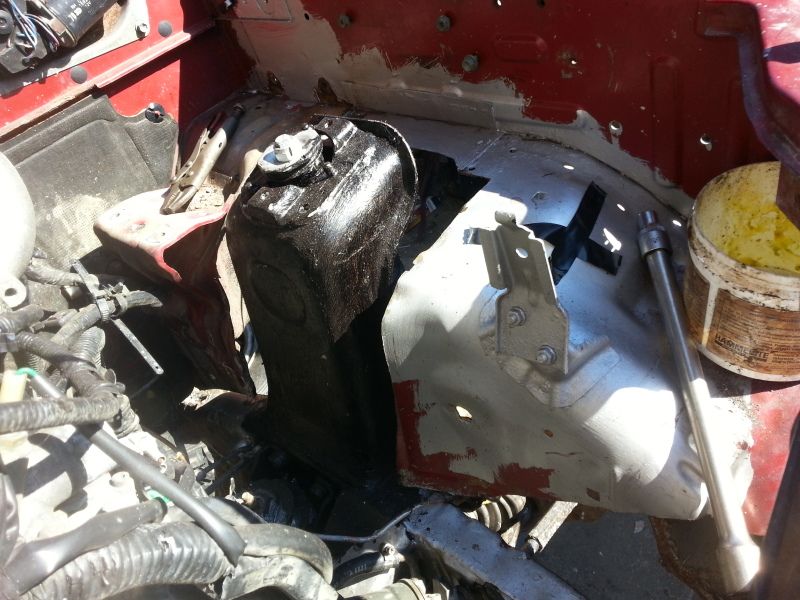 [/img] [/img]
again
[img]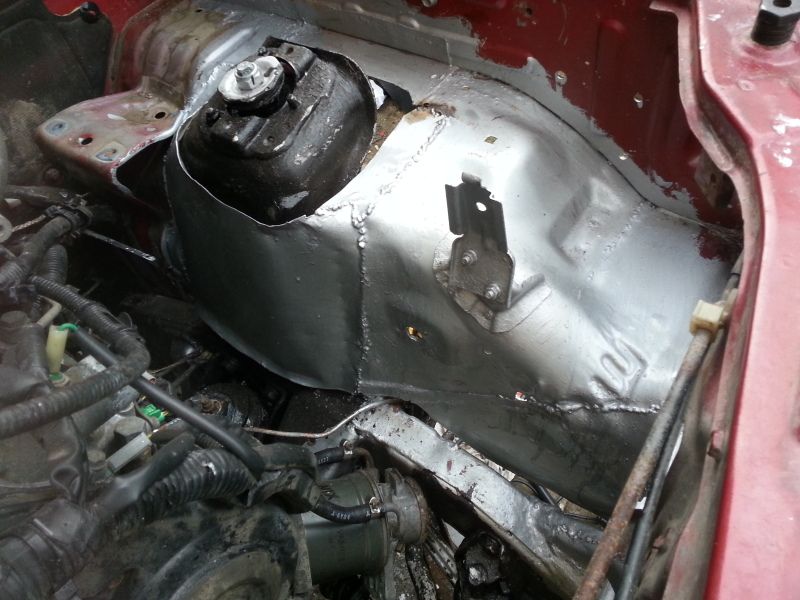 [/img] [/img]
need a new inner wing driver side
[img]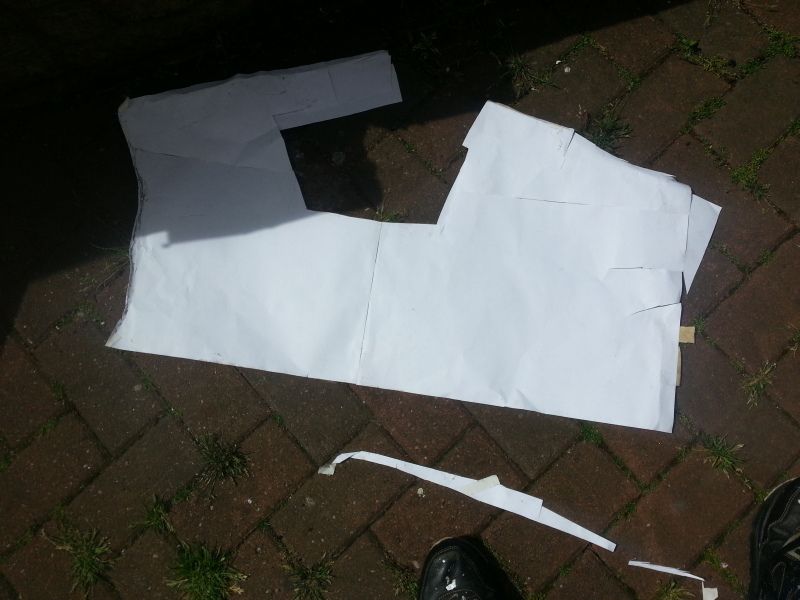 [/img] [/img]
[img]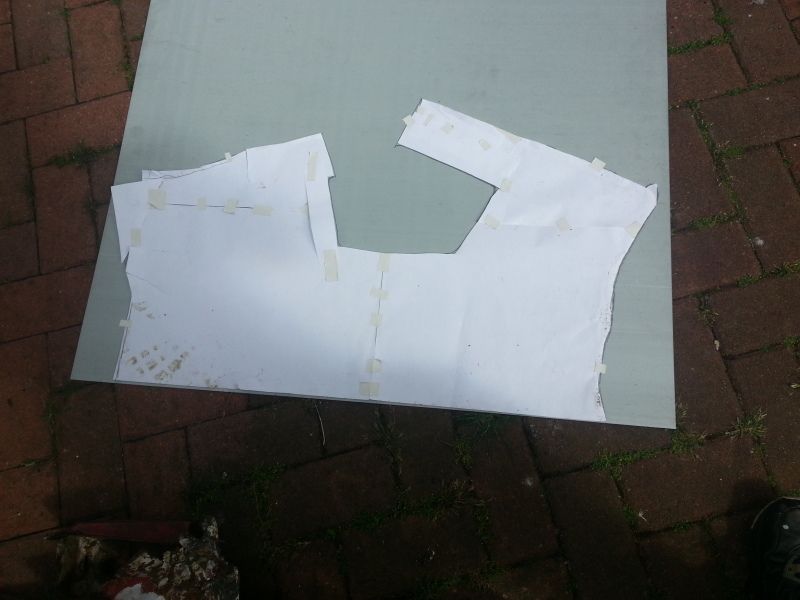 [/img] [/img]
|
|
| Back to top |
|
|
|
|
|


