| View previous topic :: View next topic |
| Author |
Message |
nj111
Just got MTs
Joined: 15 Dec 2010
Odometer: 166
Location: Forest of Dean
|
 Posted: Tue Mar 21, 2017 9:23 am Post subject: Posted: Tue Mar 21, 2017 9:23 am Post subject:
|
 |
|
Rear main hoop is the one with most bends and needed to follow the cab quite well. Thanks to BendTech software we got it right first time.
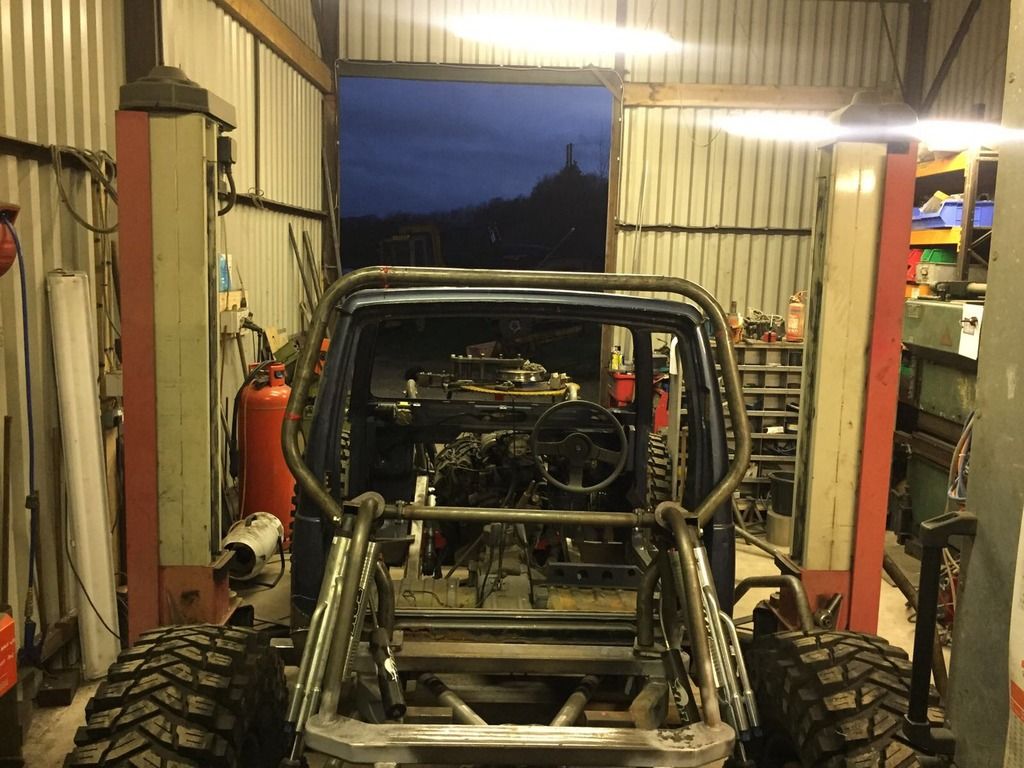
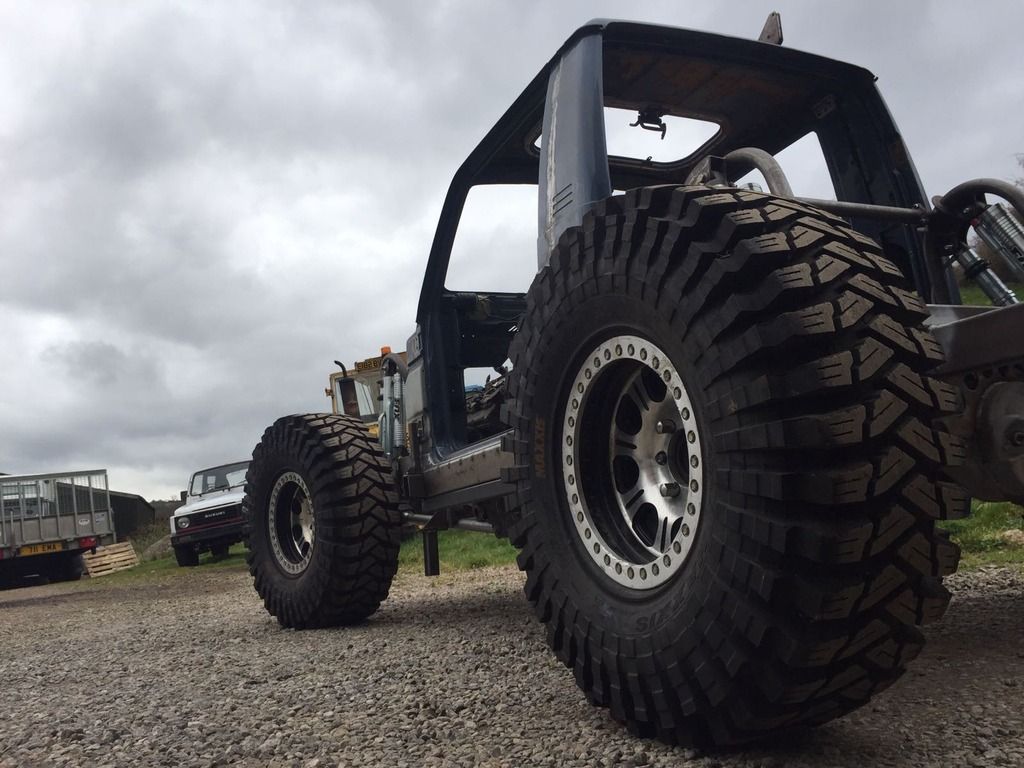
It was time for a trip into the yard, as we couldnt get a good look at the perspective of the thing from any distance inside the shop.
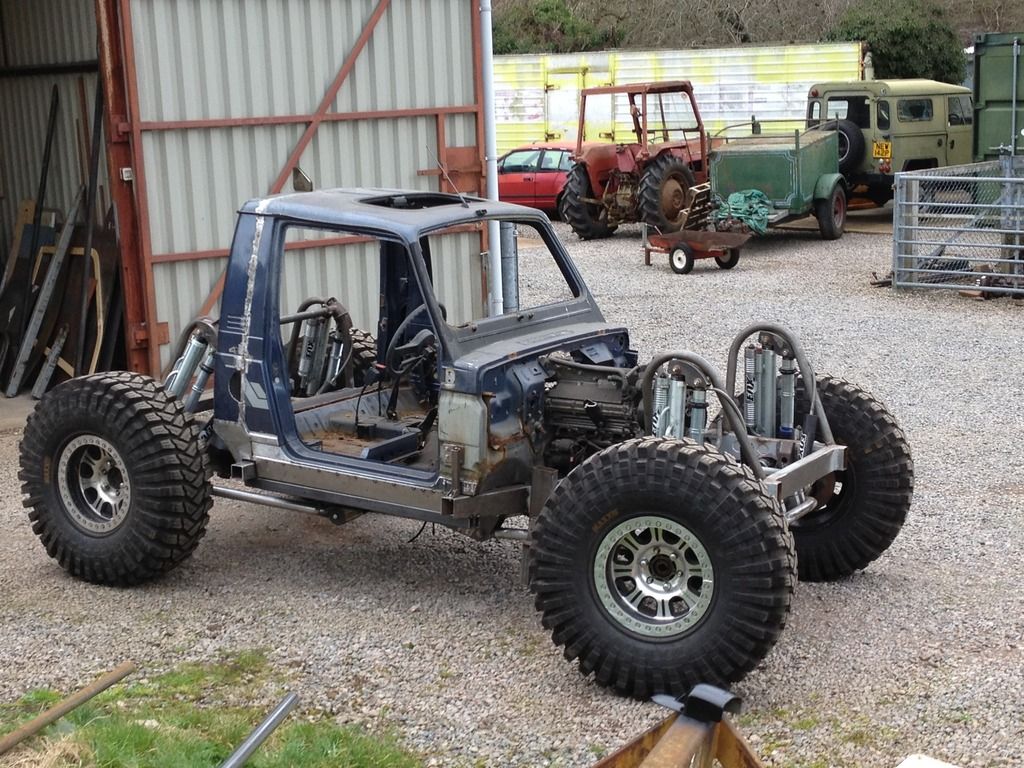

Adam machined the seven links from 50mm 7075T6 Ally and soon found this grade is strong when he tapped 14 1.25 UNF holes 80mm deep.
Note that one downside of this high strength grade is it wont stay looking bright for long.
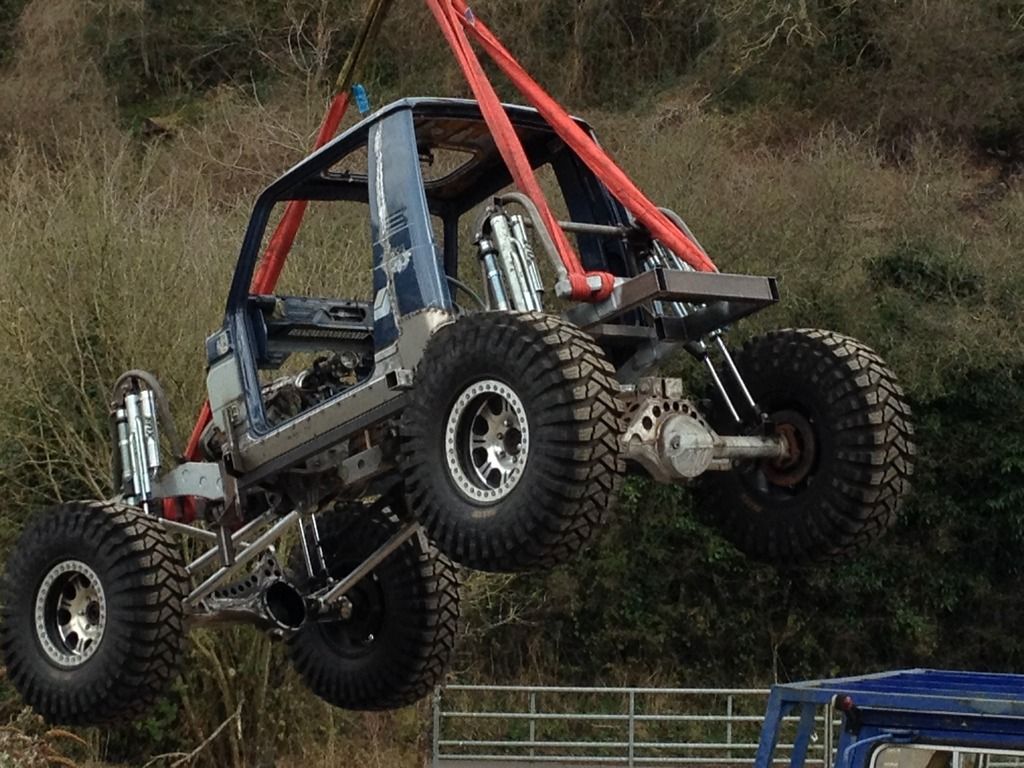
The wheelbase has been tweaked slightly so that a standard Patrol front Propshaft fits both front and rear (with short output adaptor to LT230 transfer box rear)
|
|
| Back to top |
|
 |
|
|
nj111
Just got MTs
Joined: 15 Dec 2010
Odometer: 166
Location: Forest of Dean
|
| Posted: Wed May 17, 2017 1:12 pm Post subject:
|
|
|
There were so many things to decide from this point.
Cab to chassis mounts, seat mounts (to chassis), seat positions (drivers multi adjustable and quick release), pedal box (what to use, its position, how to mount it). Bulkhead design, shape , material, large bore engine induction pipe route, Steering valve position, dry sump tank position, exhaust route, dash, side impact bars. So many decisions to take in one hit.
A buggy build would have made life so much easier to accommodate everything.
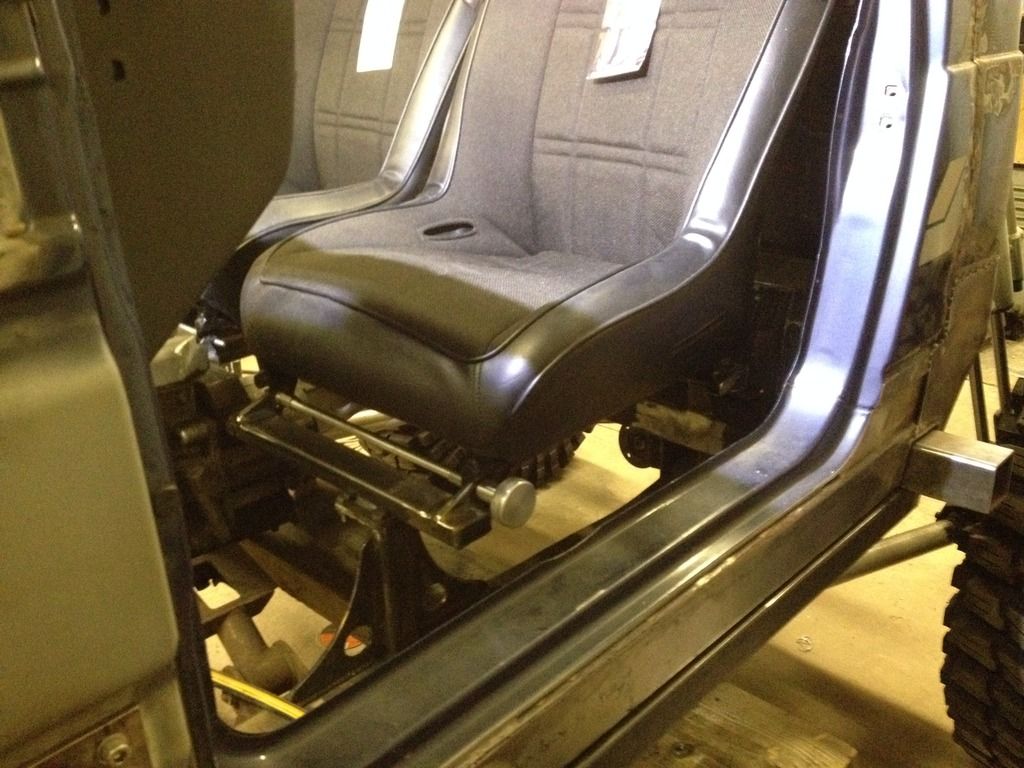
Seemed best to start with seating positions and here we have a wide range of potential drivers to accommodate, from about 5ft 2 to 6ft 2.
Weve mounted the Mastercraft suspension seats quick release style, pulling one full length pin at the front allows each seat to be lifted out of its rear location lugs.
Drivers seat has 3 positions. This played us up for a while, quick release is easy, but quick release at 3 positions and two very different heights is slightly tricky.
Hence the drivers side doesnt look quite so pretty but it seems to work.
Naturally the seats are fixed to the chassis not the cab floor, as will be the belts.
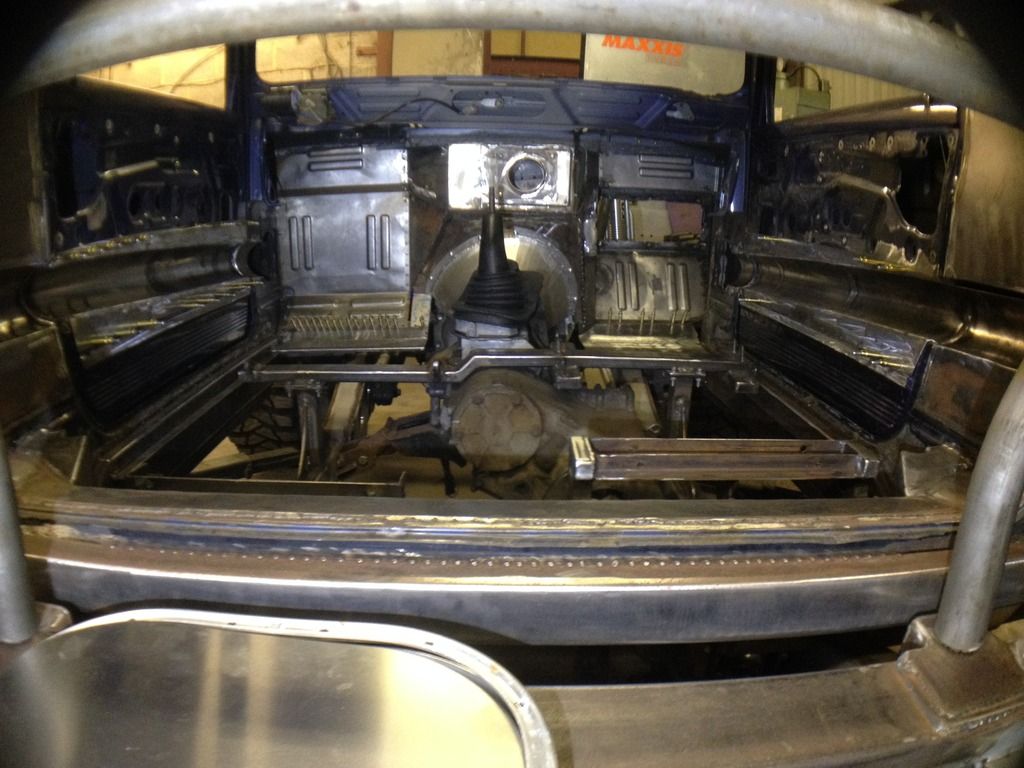
In fact the cab is now doing very little for us. It holds the dash board, steering wheel, windscreen, doors and pedal box and provides the necessary bulkheads, floor and roof.
Not sure how heavy it is but two of us can still lift it.
We wanted to be confident in the strength of the cab mounts to chassis so we renewed the entire length of its inner sills in 2mm plate right up to the door hinge pillars. This structure should act as a decent load spreader. We also beefed up around the door hinge pillars and the same at the rear cab mounts which are directly on top of a chassis cross member.
There are some rocksliders suitably placed to hopefully protect those nice new sills.
Having completed the seating the next hurdle was pedal box design and location. Sorting this out was a reminder of how far back the engine is situated!
To keep the build cost under control and for easy supply of parts in future I got hold of a Disco 1 pedal box, but they are huge. Handy though that its clutch master cylinder is the correct one for our LR R380 gearbox slave cyl.
Using its master cylinders and pedals I created a more compact version.
Whilst doing this I milled a press tool die set to form a pair of 6mm deep ribs into sheet material under about 15 Tons pressure.
This will be used on bulkhead and floor extensively.
The pressings make a massive difference to panel stiffness and have that factory look.
Designed this for 2mm ally but it seems to work ok on 1mm steel as well.
From the seating the pedal box was temporarily tacked in position with various offcuts and bulkhead construction began from pedal box working outwards.
We had now removed the entire SJ bulkhead right back to the flanged edges so had lots to go at here.
In the style of 1970s Alfas the pedals have ended up slightly offset to the right, but this is because of the LR bellhousing fouling the ideal position for clutch pedal. Well have to live with the slightly poor ergonomics.
Bulkhead is 1mm Mild steel, originally planned in ally but with this being permanently fixed there were some factors I didnt like.
Long term ally/steel corrosion issue being one and the fact that ally melts at just 625 degrees so wouldnt last many minutes with an engine fire.
The entire floor pan will be all in 2mm thick NS4 ally and quickly removable.
Lots of fabricated parts make up the bulkhead, a joint effort between myself and Adam.
It bears no resemblance to the SJ one we removed and it took a good few hours to create.
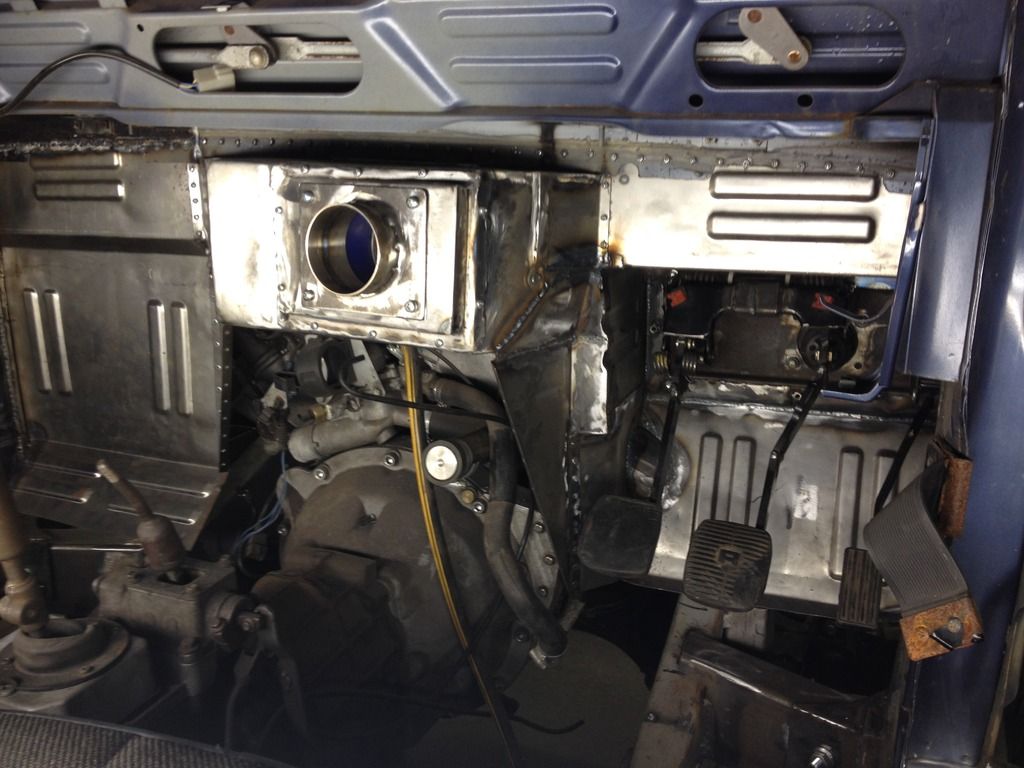
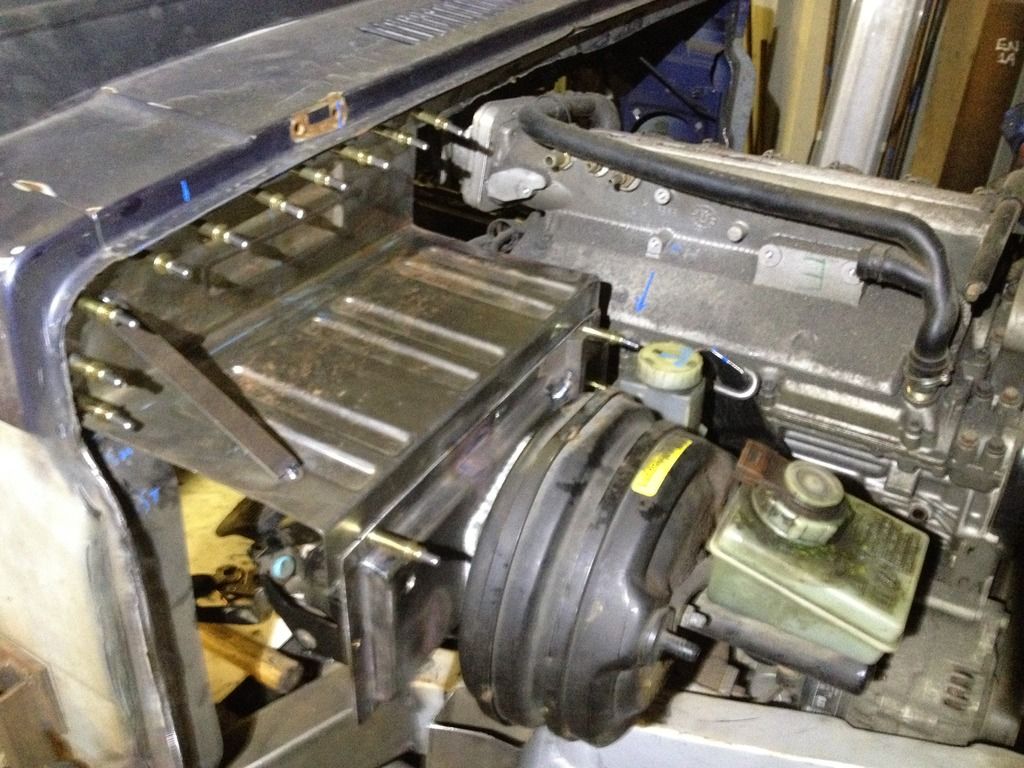
Weve ended up with a pedal box nearly half way up the drivers side of the engine, although access to starter motor and header removal is still ok.
On top of the pedal box looks like a decent place to mount that very weighty steering valve, rather than have four hydraulic hoses entering cab space.
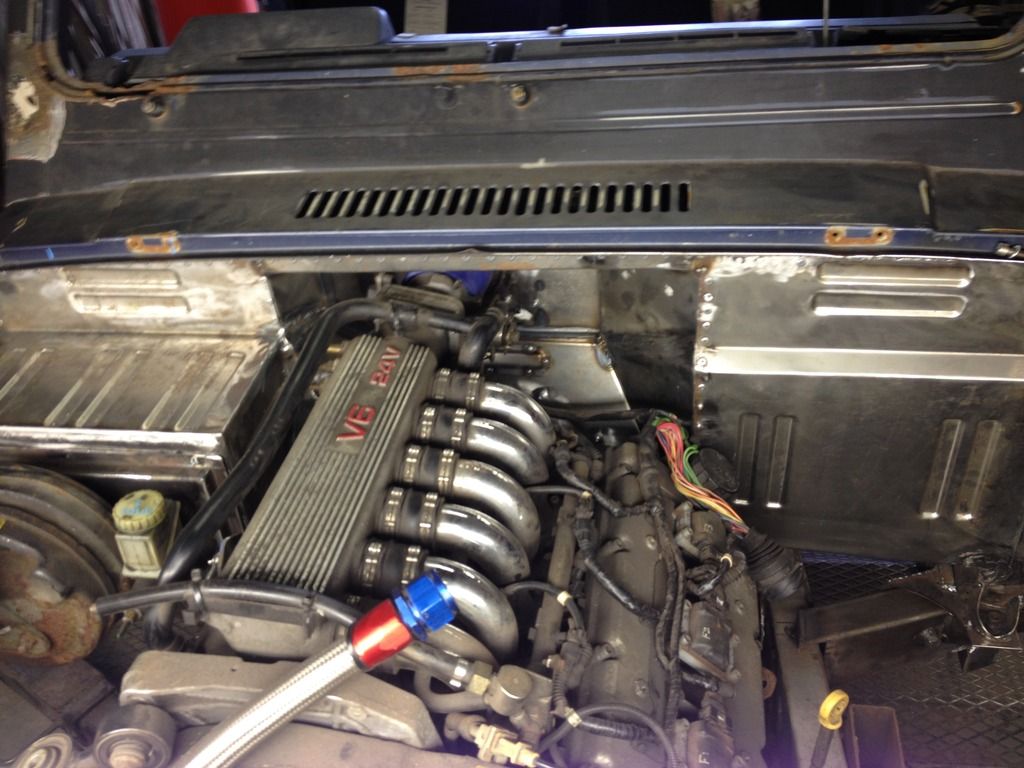
On the passenger side we have great space for a decent height dry sump tank, and its right next to the 5 stage pump pick up and return so thats working out better than expected.
Well also have loads of space on front of the motor, with great access to keep an eye on all those belts and pulleys.
Remember although the water pump is at the front, the stat housing and hoses come off the back of the Alfa motor. Having no water pipes at the front is looking neat for those rear radiator hose runs.
|
|
| Back to top |
|
|
nj111
Just got MTs
Joined: 15 Dec 2010
Odometer: 166
Location: Forest of Dean
|
| Posted: Wed May 17, 2017 1:16 pm Post subject:
|
|
|
Its nice to look at a few curves so the gearbox bellhousing cover is conical and in ally. Not having an appropriate set of rolls to form a cone in NS4 grade I had to coin it over in the press.
This can be easily removed to provide clearance for gearbox removal.
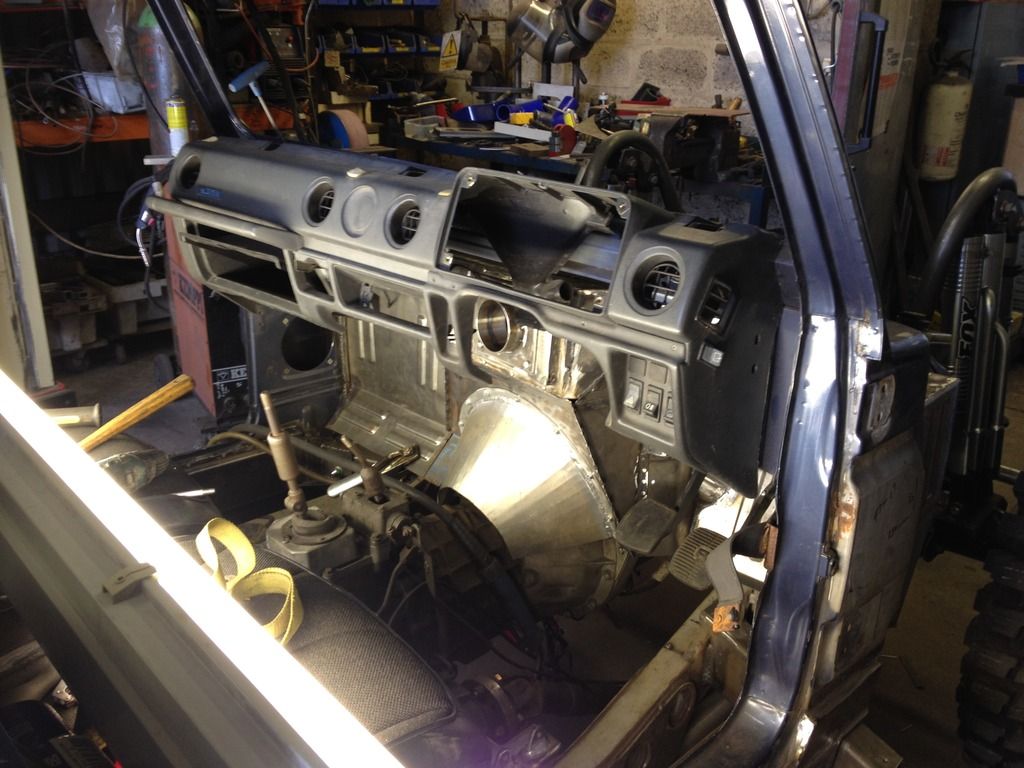
Weve designed the floor pan and central chassis cross members so that the transfer box and gearbox can be removed either from above or below.
We feel that during an event from above will be far more agreeable as the seats and floor should come out in just a few minutes.
Dash is original SJ we like it, it comes out quickly, hides induction pipe elbow, so thought why not retain some more SJ in this build.
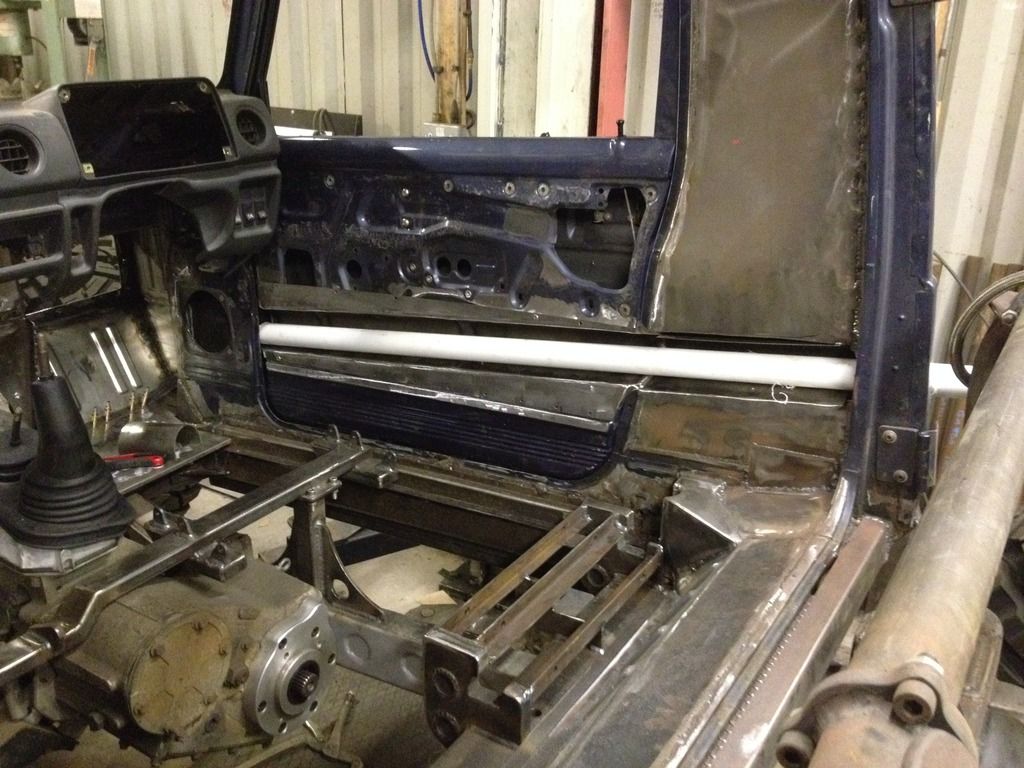
Side impact bars, a requirement for both MSA and Ultra 4 have to be from the same size tube as the main structural members. That being 2 diameter in our case.
They need to attach to front and rear main hoops or thereabouts.
But the SJ cab is so narrow and a pair of competition seats are pretty much as wide as the internal cab space so theres virtually zero remaining internal space and for the concept of this build we must retain SJ doors!
Solution was perhaps obvious but involved a lot of hours to make it happen neatly. Thats possibly why Ive not seen it before.
Here shown not completely finished. The concave fabrications (tidy work Adam) will be rivetted into the doors.
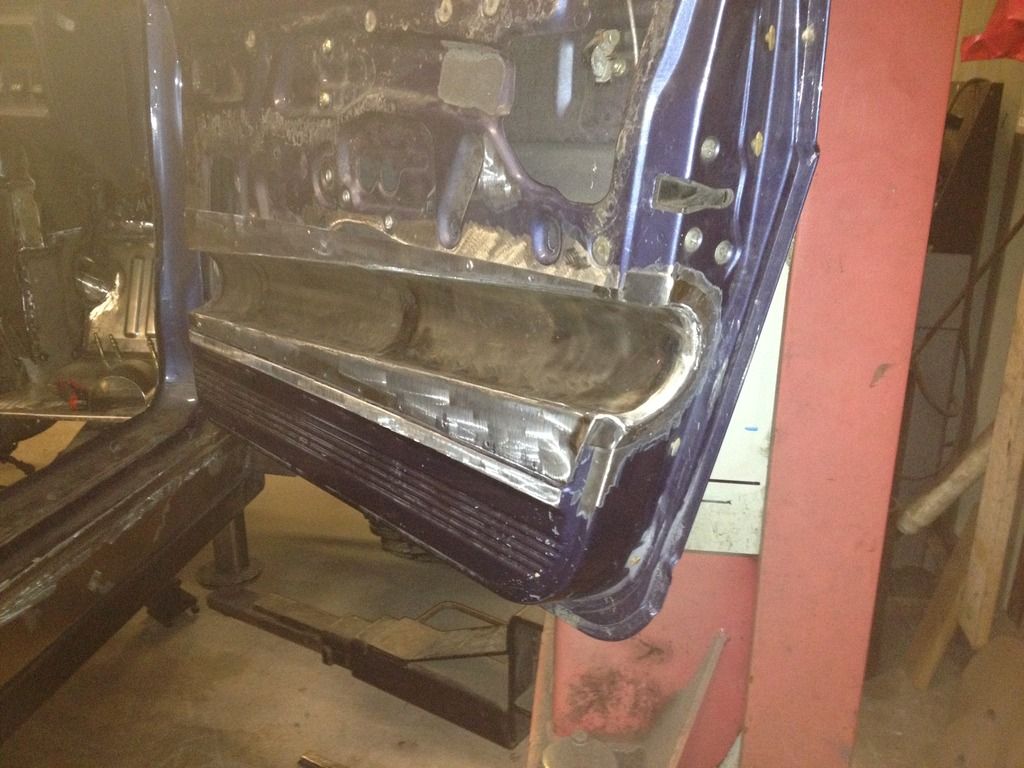
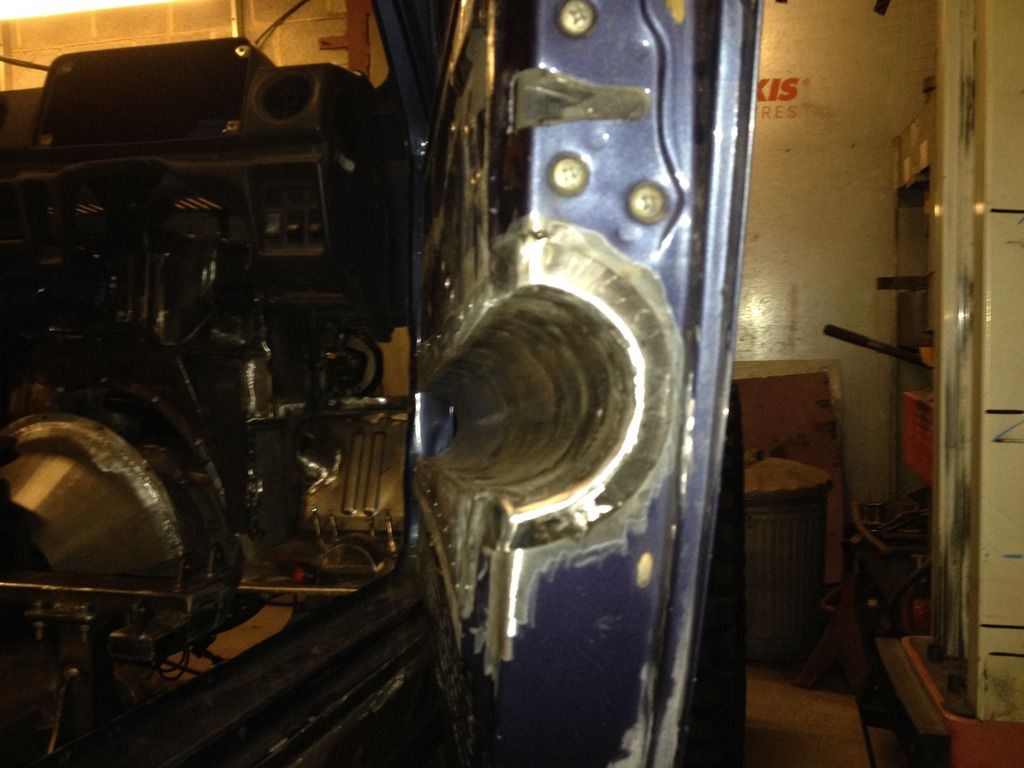
In the event of a door being damaged we can drill the rivets out and move these fabrications to another door pretty quickly, just two cuts being needed with a skinny disc down the inside of a fresh door and drill a few rivet holes, job done.
The (undersize) plastic waste pipe indicates approximate side impact bar position, - you get the idea.
Next to sort is battery box under passenger seat, so we can complete the floor panel structure.
Played around with many battery positions, to keep C of G low this seems the best.
Coming up soon
.
Fetch the cab off, paint it, put it back on and fit / build the rest of the cage. At this point we will be getting close to having a truck.
|
|
| Back to top |
|
|
Gavlad
Gate Opener
Joined: 14 May 2009
Odometer: 17
Location: Wirral
1994 Toyota Landcruiser
|
| Posted: Thu May 18, 2017 11:16 am Post subject:
|
|
|
 I do look forward to your updates!!! I do look forward to your updates!!!
__________________________________
Bonne vivanche
Gavlad |
|
| Back to top |
|
|
nj111
Just got MTs
Joined: 15 Dec 2010
Odometer: 166
Location: Forest of Dean
|
| Posted: Thu May 18, 2017 12:36 pm Post subject:
|
|
|
Pleased that at least one person still interested!
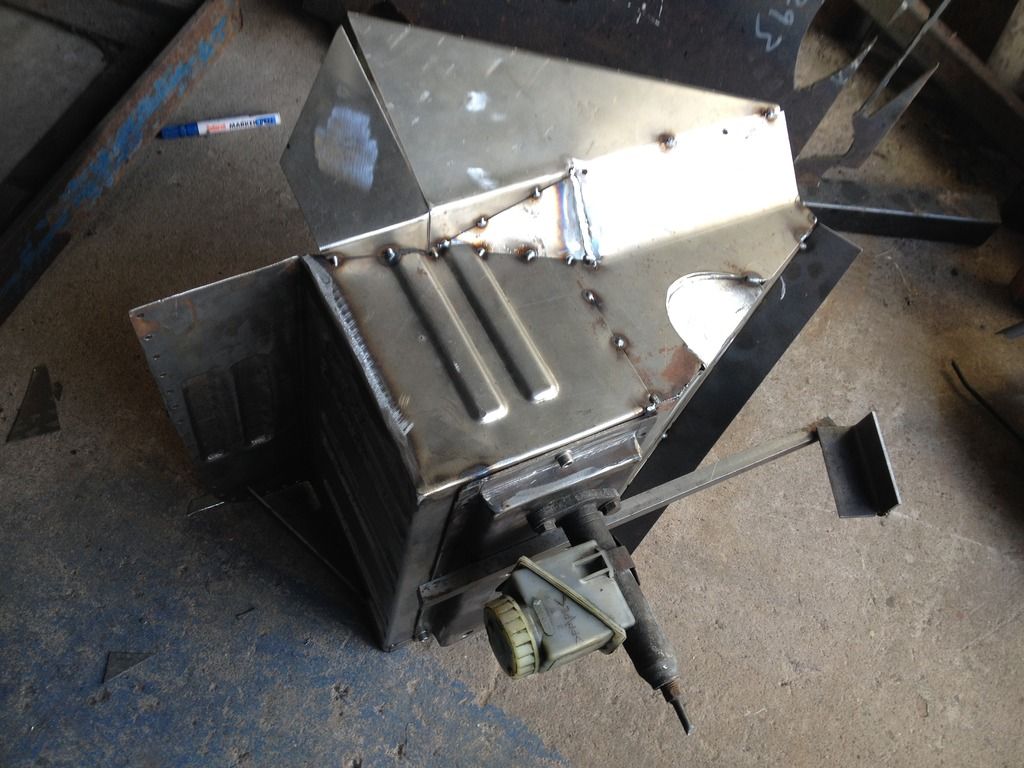
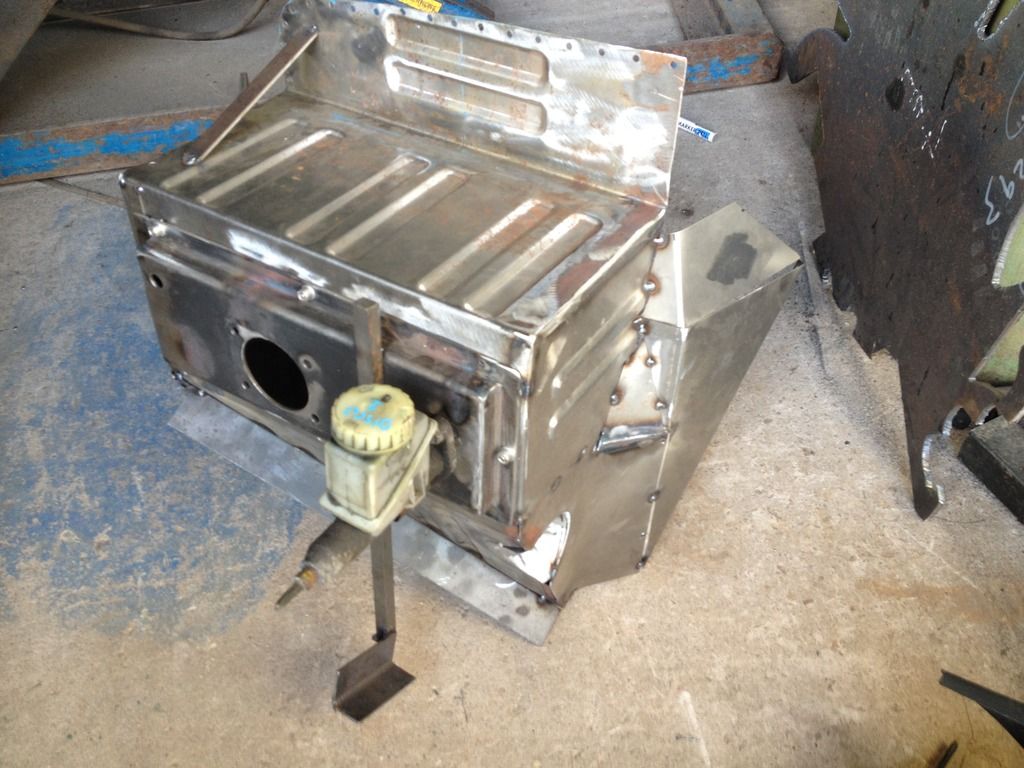
So heres a bit more, clearly these two pics were not taken on my phone as they are in focus and our work actually looks almost pro for once.
Heres the battery box steel frame which will be lined with NS4 ally after painting.
We tried various battery orientations but found to be able to remove the transfer box the battery box has to be removable.
So its bolted to the chassis and also to one of the two removable fabricated Weldox cross members which are beneath transmission.
The splines protrude about 120mm from the back of an R380 gearbox so lots of rear clearance is necessary to get that transfer box off.
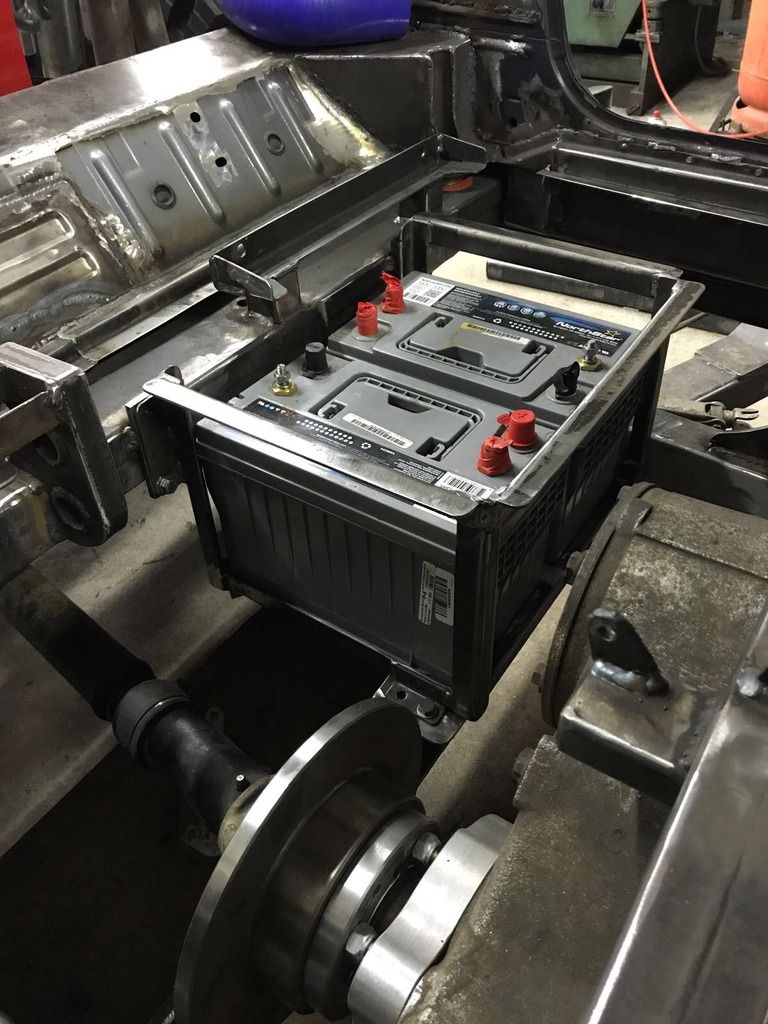
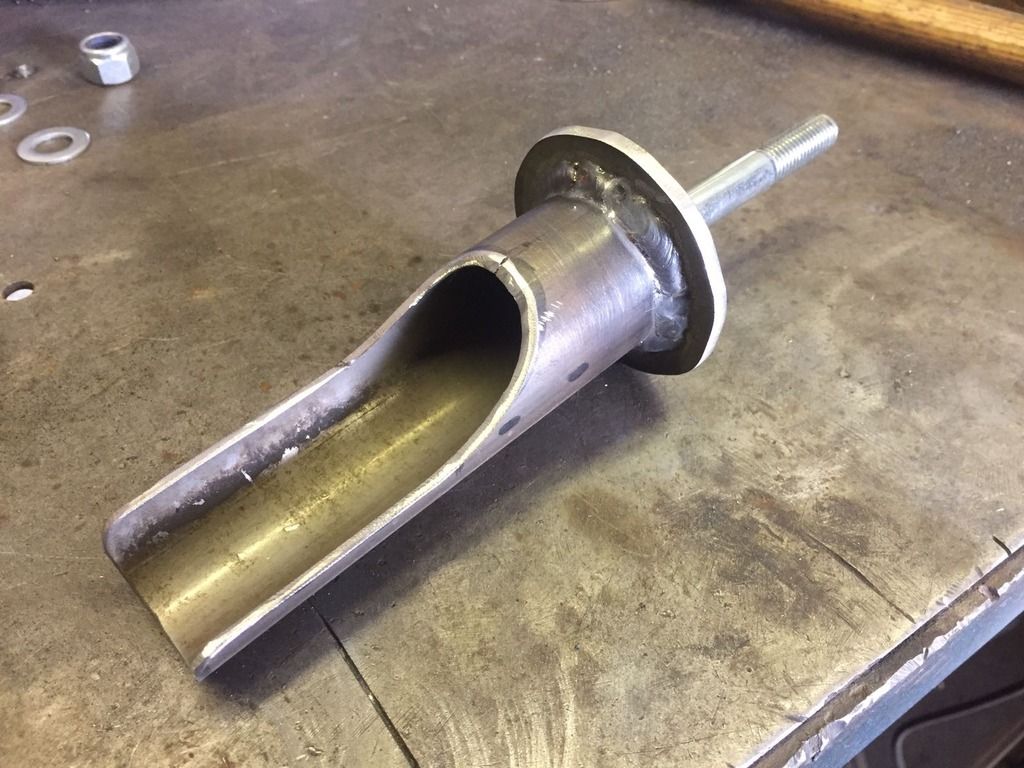
The handbrake disc brake which is Nissan micra bored out and redrilled to Y61 prop flange PCD.
Loving the price of doing it this way at £10 or so for the disc.
Its my own LT230 to Y61 prop flange adaptor, pretty much the same as I made for the front output except this one has an additional step to locate the brake disc through its bore.
As stated earlier rear prop is identical to front (both being standard 3 litre patrol front ones).
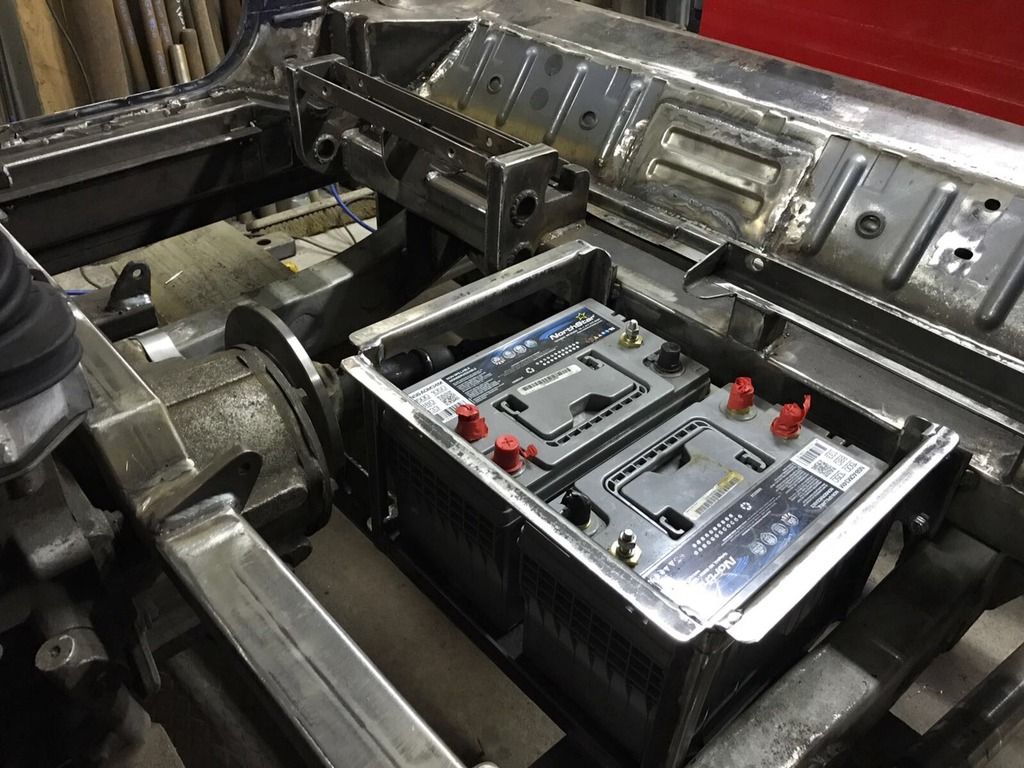
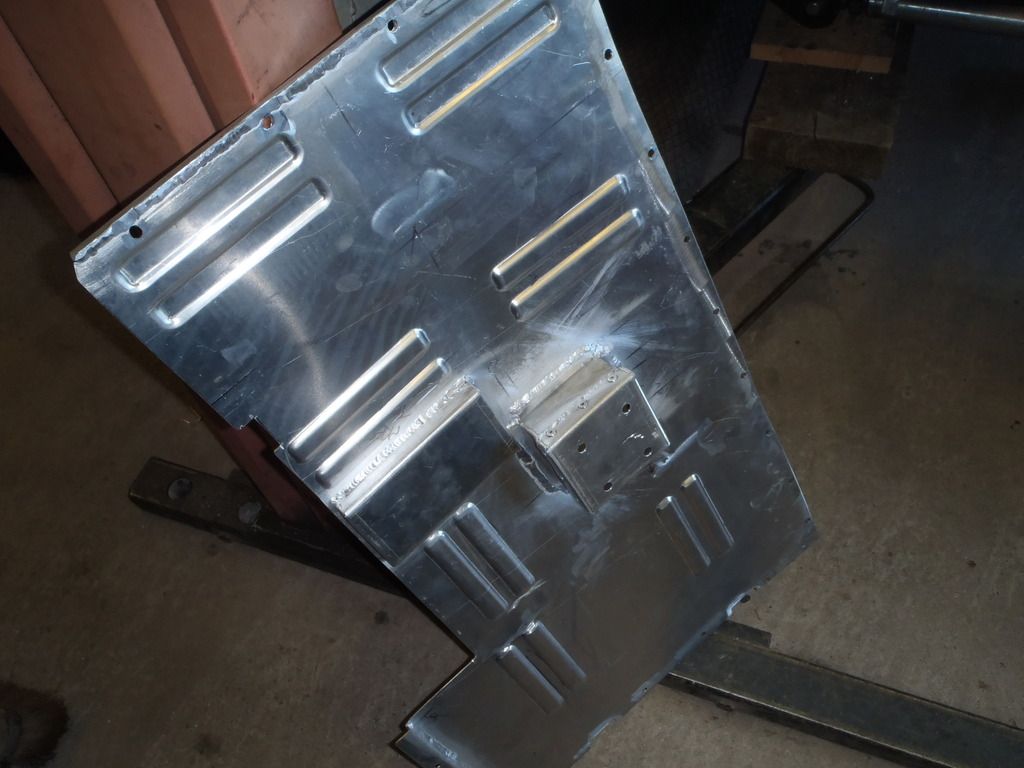
Now that we have a battery box the ally floor can be made and the cab will be somewhere near done.
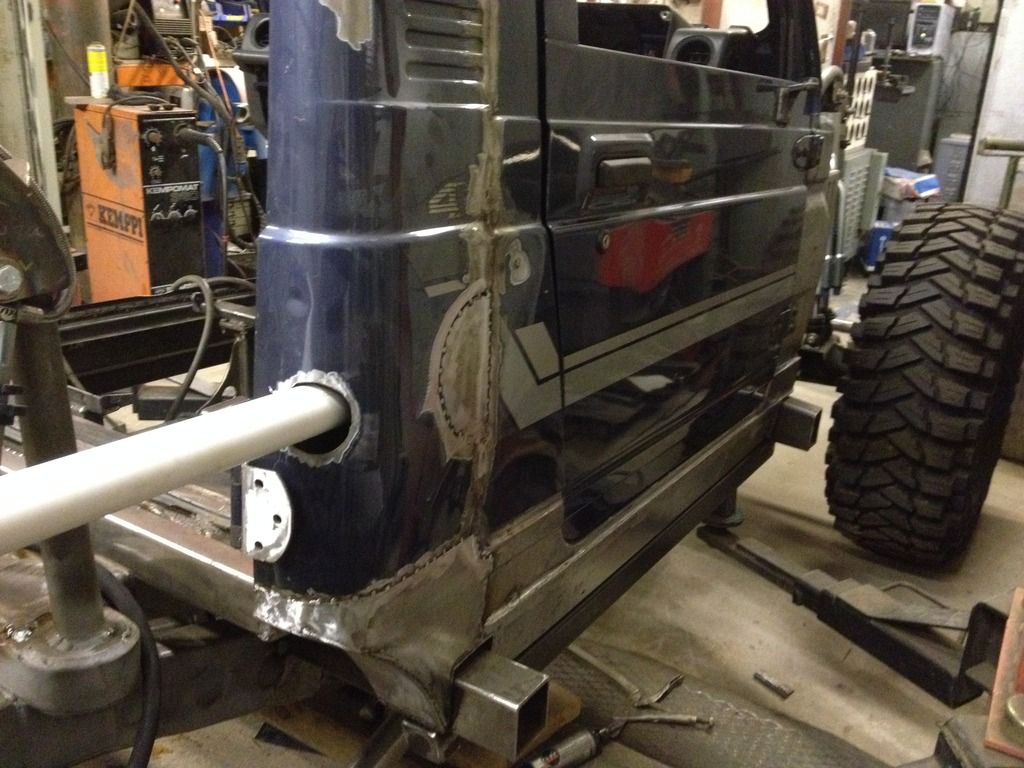
Notice also some fabrication work on the rear of the cab at the bottom under the door aperture.
We used our home made press tool in the middle section.
In the two corners the rear body mounts are just about visible, M12 bolts pass through two vertical tubes into the largest chassis crossmember on the vehicle. Its the one the top links of the rear 4 link also mount onto.
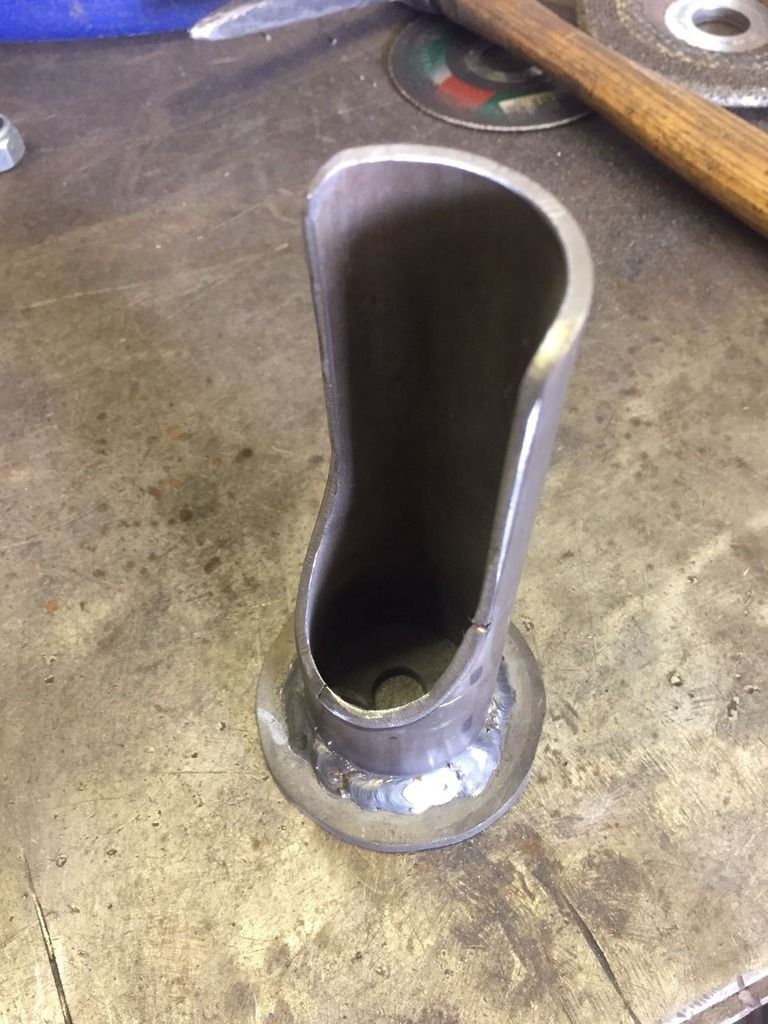
Here are those rear corner mounts before they became an integral part of the body.
The stock rear door less glass and other heavy bits will be re fitted and secured shut.
Batteries are a bit different as they are Northstar apparently in all the tests they outperform those red ones and quite a few people have had that other make go bad on them so we shall see what happens.
|
|
| Back to top |
|
|
Xpajun
Mud Obsessed

Joined: 22 Sep 2008
Odometer: 3245
1988 Mitsubishi Shogun
|
| Posted: Thu May 18, 2017 4:07 pm Post subject:
|
|
|
| nj111 wrote: | Pleased that at least one person still interested!
|
Make that at least two 
|
|
| Back to top |
|
|
jeremy
Just got MTs

Joined: 09 Jan 2006
Odometer: 467
Location: Lydd Kentshire
|
| Posted: Fri May 19, 2017 6:54 am Post subject:
|
|
|
Three 
__________________________________
Nissan patrol, Jimny. |
|
| Back to top |
|
|
randcook
Gate Opener
Joined: 06 Feb 2013
Odometer: 21
Location: Near Monmouth
|
| Posted: Fri May 19, 2017 8:43 am Post subject:
|
|
|
| You have had a couple of views
|
|
| Back to top |
|
|
nj111
Just got MTs
Joined: 15 Dec 2010
Odometer: 166
Location: Forest of Dean
|
| Posted: Wed Jun 07, 2017 4:44 pm Post subject:
|
|
|
Bit more progress, slightly slower than hoped due to more hurdles to get over,
Designed the floor to be able to wash the interior out quickly, as its no fun trying to clear 6 of mud from wells behind seats etc.
Access gearbox and transfer box is also simple.
Seat removal, just pull one pin and they lift clear.
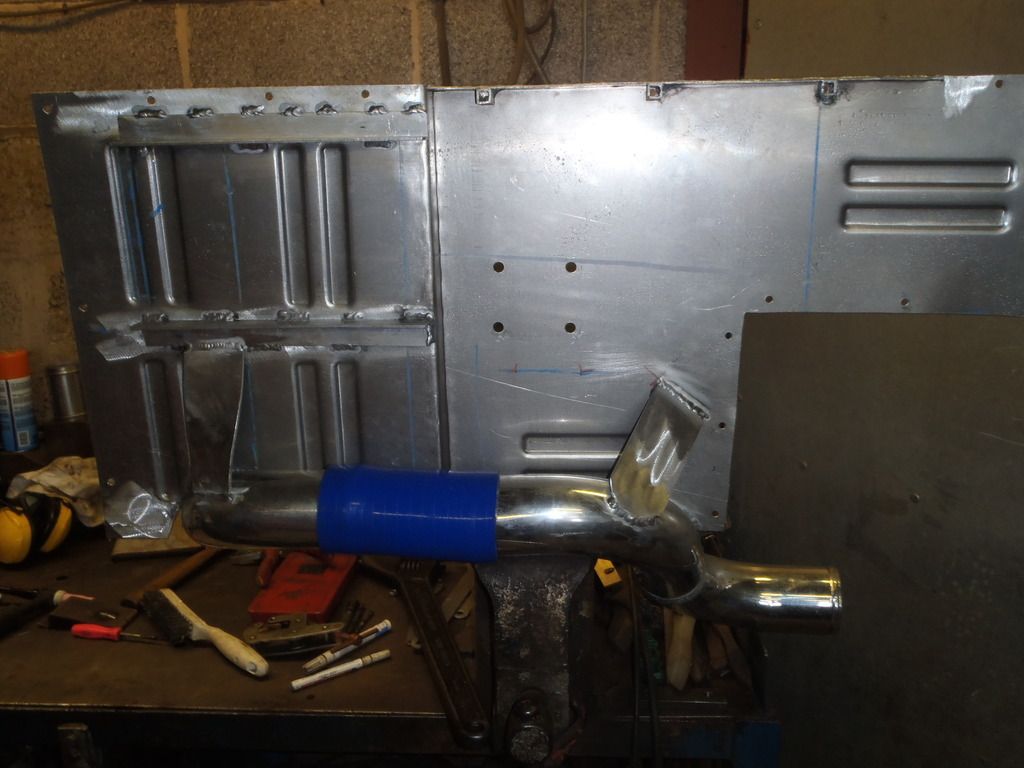
The ally floor sections consist of one piece each side, weight around 3.7kg per side. A number of M6 fasteners secure these into captive nuts.
Drivers side:
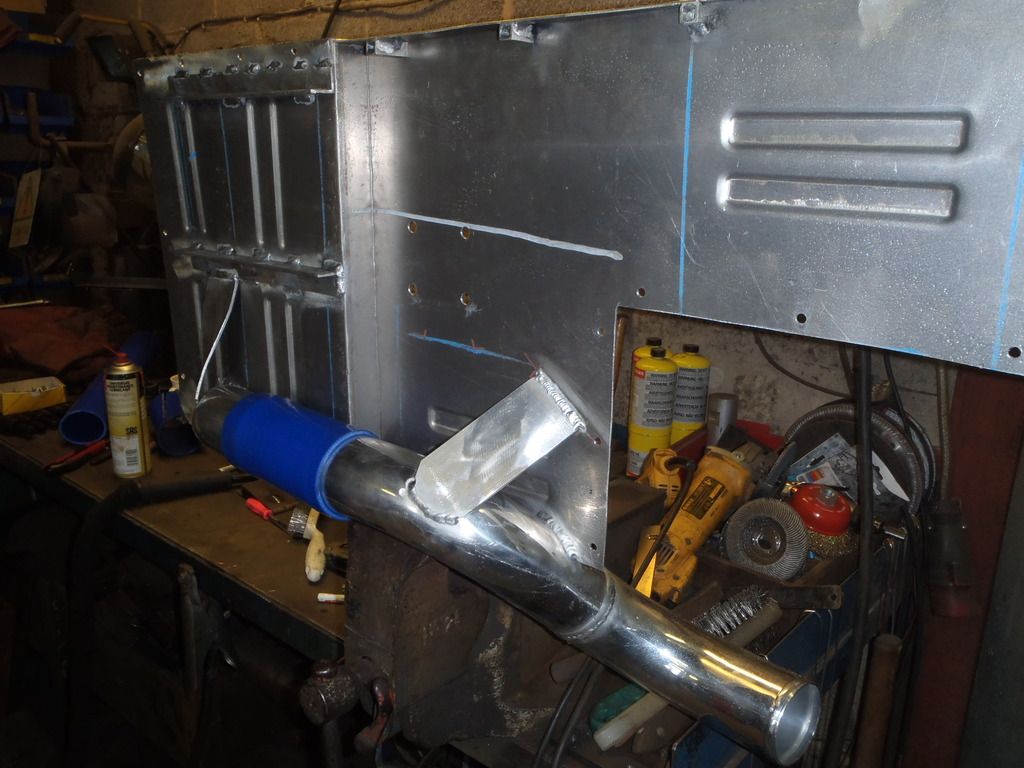
There was insufficient space between the seats (at the front) to route induction pipe between the seats so had to duck under floor and back up again. The induction pipe is a welded and integral part of the floor. The whole lot comes out as one piece pretty quickly.
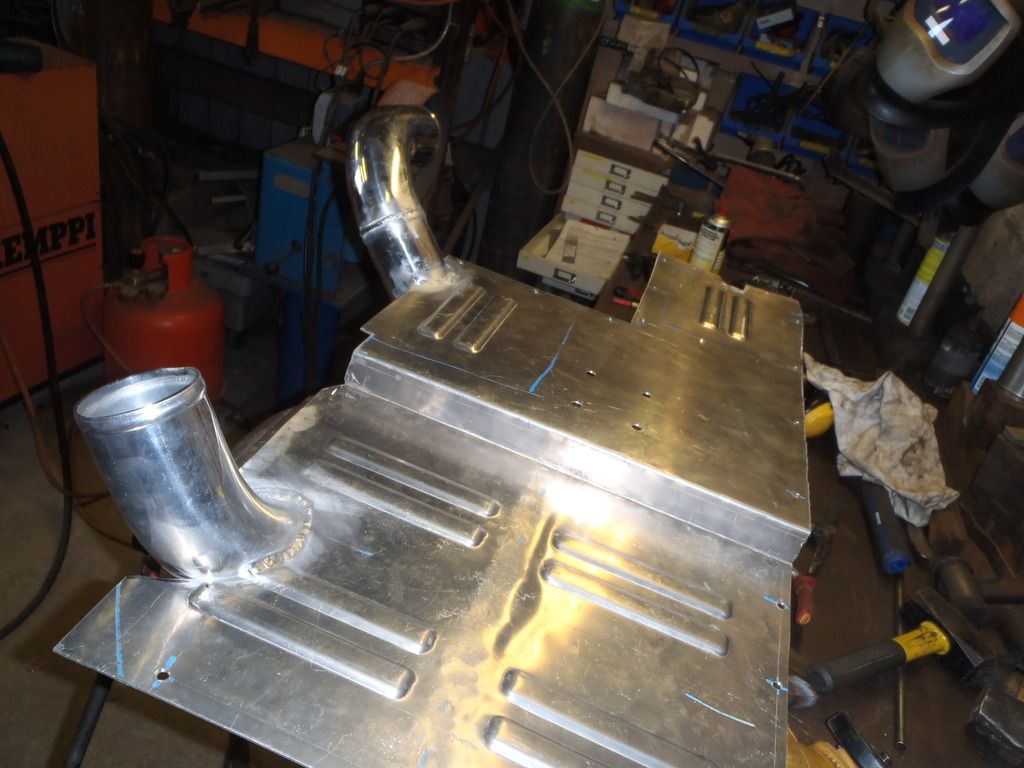
But the induction pipe also has a short section of flexi under the floor as a fully welded pipe could fatigue fracture.
Its not vulnerable from trees and rocks because below this there will be a HDPE bash plate.
Gearbox and tranny are removable both from above and below.
Looks like this when installed
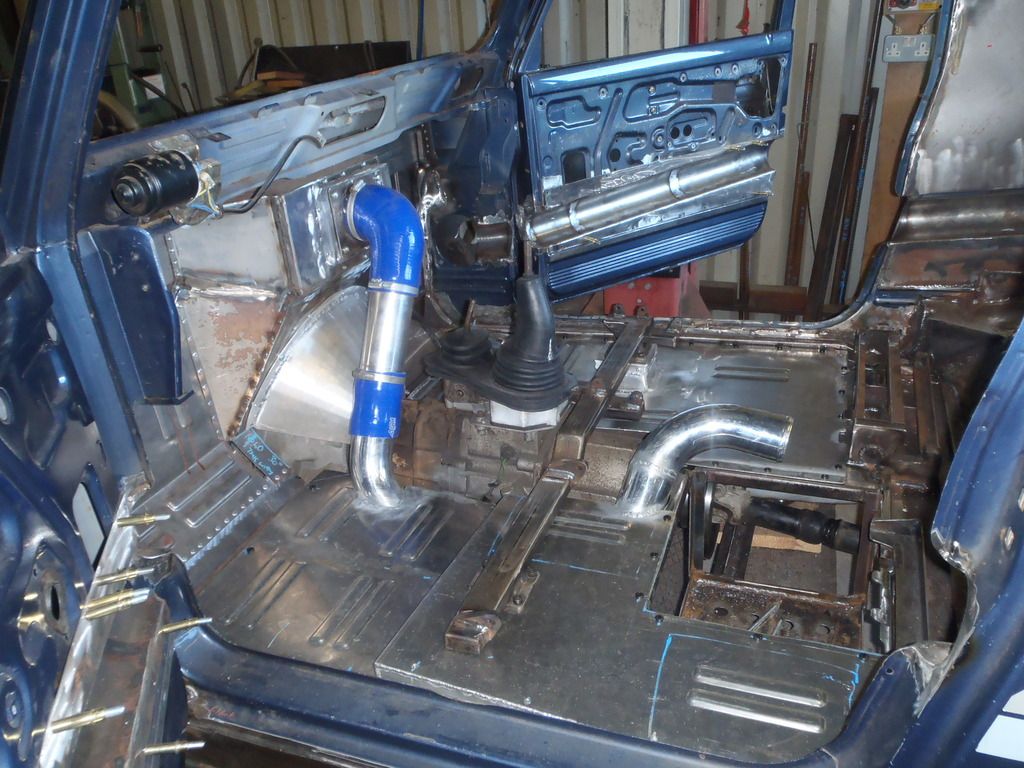

Just the ally section over gearbox to complete, hopefully that will be just a one piece affair. Then the cab is somewhere near ready for paint.
|
|
| Back to top |
|
|
Xpajun
Mud Obsessed
Joined: 22 Sep 2008
Odometer: 3245
1988 Mitsubishi Shogun
|
| Posted: Wed Jun 07, 2017 5:03 pm Post subject:
|
|
|
| nj111 wrote: | "below this there will be a HDPE bash plate."
|
I'm interested in how you get on with this concept - how thick will it be?
|
|
| Back to top |
|
|
|
|
nj111
Just got MTs
Joined: 15 Dec 2010
Odometer: 166
Location: Forest of Dean
|
| Posted: Wed Jun 07, 2017 6:20 pm Post subject:
|
|
|
| 20mm
|
|
| Back to top |
|
|
Wiggybum
Gate Opener
Joined: 27 Mar 2014
Odometer: 2
Location: Was in Forest of Dean, now in Suffolk
|
| Posted: Fri Jul 28, 2017 5:19 pm Post subject:
|
|
|
Your pictures have disappeared! I'm really enjoying your work so it's a shame I can't see it anymore 🤓
__________________________________
[i] Finished with Main Engines and Steering [i] |
|
| Back to top |
|
|
randcook
Gate Opener
Joined: 06 Feb 2013
Odometer: 21
Location: Near Monmouth
|
|
| Back to top |
|
|
nj111
Just got MTs
Joined: 15 Dec 2010
Odometer: 166
Location: Forest of Dean
|
| Posted: Wed Aug 09, 2017 11:38 am Post subject:
|
|
|
Bit of a problem - photobucket want $399 per annum off me to show the photos here!
Photobucket rolled out a new update to its TOS on June 26th with just a small, innocuous blog post as an announcement. Users have been finding out about it as their embedded images on other sites have turned into placeholders telling them to update their accounts, and as Photobucket has rolled out email notifications telling them that if they want to keep embedding images, they have to pay $399/year.
|
|
| Back to top |
|
|
Gavlad
Gate Opener
Joined: 14 May 2009
Odometer: 17
Location: Wirral
1994 Toyota Landcruiser
|
| Posted: Wed Aug 16, 2017 9:05 am Post subject:
|
|
|
Oh man, that's ridiculous... 
__________________________________
Bonne vivanche
Gavlad |
|
| Back to top |
|
|
Nightbar
Difflock Royalty

Joined: 30 Sep 2003
Odometer: 20799
Location: In a state of anticipation...
1999 Land Rover Defender
|
| Posted: Wed Aug 16, 2017 11:21 am Post subject:
|
|
|
Yep. Thieving toerags spring to mind.
Fortunately, unlike many, I didn't have too much on photosuck-it so it wasn't too hard to chop to a new provider (and many of those phots were on old forums I don't even remember posting on).
I really hope photofeck-it lose a huge amount of money for all the grief they have caused very many people.
__________________________________
The ex-Difflock Ambassador to Naples, Sir Nightbar DCJC DFS and 2 bars.
Plant a tree for the Difflock 3 |
|
| Back to top |
|
|
nj111
Just got MTs
Joined: 15 Dec 2010
Odometer: 166
Location: Forest of Dean
|
| Posted: Wed Aug 16, 2017 11:48 am Post subject:
|
|
|
yeah me too as it took many hours to upload all the photos on this thread.
At some point I'll see if I can create a link from here to some other place and do a brief recap the build so far and also see it finished off, and developed further. Any ideas where best to put this are appreciated.
|
|
| Back to top |
|
|
Gavlad
Gate Opener
Joined: 14 May 2009
Odometer: 17
Location: Wirral
1994 Toyota Landcruiser
|
| Posted: Thu Aug 17, 2017 2:08 pm Post subject:
|
|
|
Flickr is another photo hosting site I've seen used
__________________________________
Bonne vivanche
Gavlad |
|
| Back to top |
|
|
Nightbar
Difflock Royalty
Joined: 30 Sep 2003
Odometer: 20799
Location: In a state of anticipation...
1999 Land Rover Defender
|
| Posted: Thu Aug 17, 2017 7:31 pm Post subject:
|
|
|
I had a look around and now use postimg.org
__________________________________
The ex-Difflock Ambassador to Naples, Sir Nightbar DCJC DFS and 2 bars.
Plant a tree for the Difflock 3 |
|
| Back to top |
|
|
randcook
Gate Opener
Joined: 06 Feb 2013
Odometer: 21
Location: Near Monmouth
|
| Posted: Fri Aug 18, 2017 5:59 am Post subject:
|
|
|
| Good find
|
|
| Back to top |
|
|
|
|
Nightbar
Difflock Royalty
Joined: 30 Sep 2003
Odometer: 20799
Location: In a state of anticipation...
1999 Land Rover Defender
|
| Posted: Fri Aug 18, 2017 8:58 am Post subject:
|
|
|
| randcook wrote: | | Good find |
Happy to help 
__________________________________
The ex-Difflock Ambassador to Naples, Sir Nightbar DCJC DFS and 2 bars.
Plant a tree for the Difflock 3 |
|
| Back to top |
|
|
Wiggybum
Gate Opener
Joined: 27 Mar 2014
Odometer: 2
Location: Was in Forest of Dean, now in Suffolk
|
| Posted: Sat Jan 25, 2020 12:23 pm Post subject:
|
|
|
Any progress you can share with us? This build was so close to completion when the photobucket thing happened!
__________________________________
[i] Finished with Main Engines and Steering [i] |
|
| Back to top |
|
|
nj111
Just got MTs
Joined: 15 Dec 2010
Odometer: 166
Location: Forest of Dean
|
| Posted: Mon Jan 27, 2020 9:50 am Post subject:
|
|
|
| It did get finished, nearly two years ago. Very pleased with how it performs (and looks). It will be out for the third time at the Welsh 150 (Walters Arena) at the end of May. Shame about the photobucket situation.
|
|
| Back to top |
|
|
Gavlad
Gate Opener
Joined: 14 May 2009
Odometer: 17
Location: Wirral
1994 Toyota Landcruiser
|
| Posted: Thu Mar 12, 2020 3:50 pm Post subject:
|
|
|
I too would love to see some pictures of the finished thang...
__________________________________
Bonne vivanche
Gavlad |
|
| Back to top |
|
|
Gavlad
Gate Opener
Joined: 14 May 2009
Odometer: 17
Location: Wirral
1994 Toyota Landcruiser
|
| Posted: Wed Mar 03, 2021 10:15 am Post subject:
|
|
|
Your photos are back btw 
Any chance of seeing how it turned out?
Cheers
Gav
__________________________________
Bonne vivanche
Gavlad |
|
| Back to top |
|
|
|


