| View previous topic :: View next topic |
| Author |
Message |
Preid
Gate Opener
Joined: 09 Nov 2013
Odometer: 45
|
 Posted: Sat Nov 09, 2013 1:10 pm Post subject: Newbie - Advice wanted on range of issues. Posted: Sat Nov 09, 2013 1:10 pm Post subject: Newbie - Advice wanted on range of issues.
|
 |
|
Im new here and new to LR's.
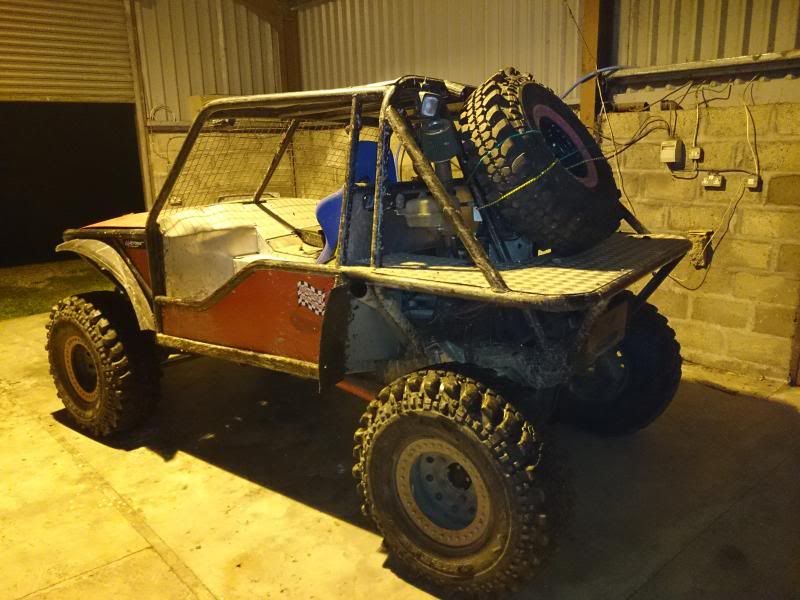
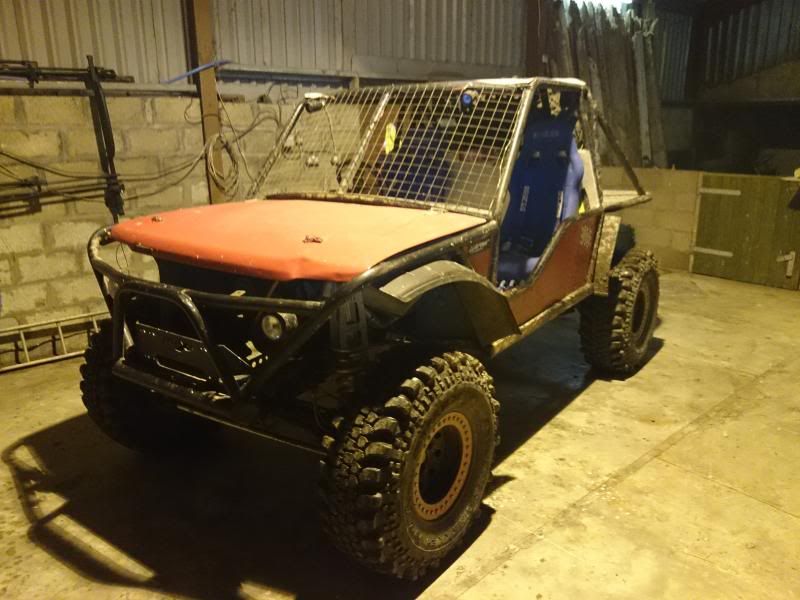
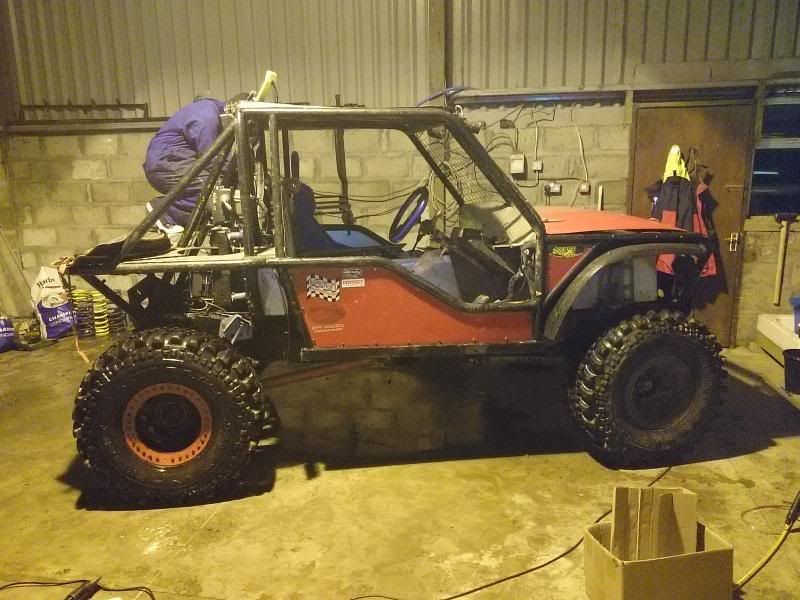
For the last four years I've been off roading with Pajero's but their setup has limitations. So I purchased this which was a 1993 Disco Classic Vogue for RTV events. Im electrical through and through and know the basics of mechanics so excuse my ignorance.
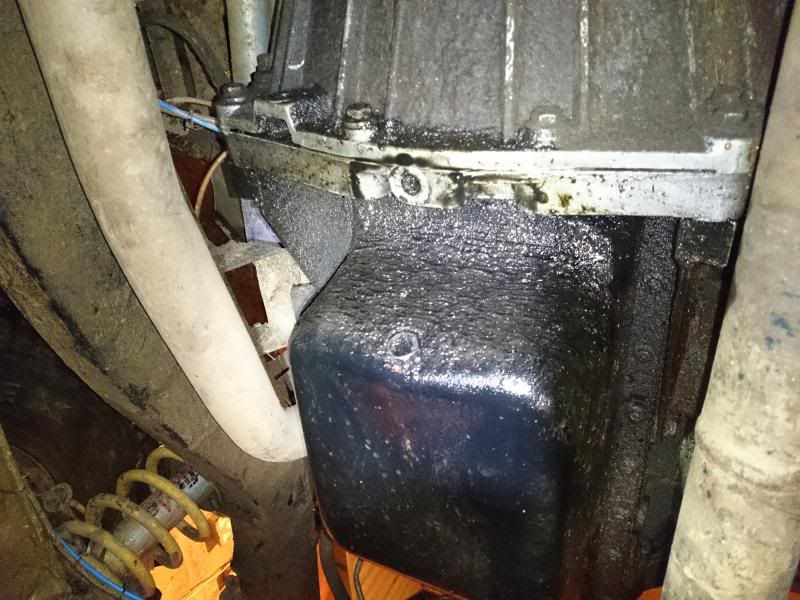
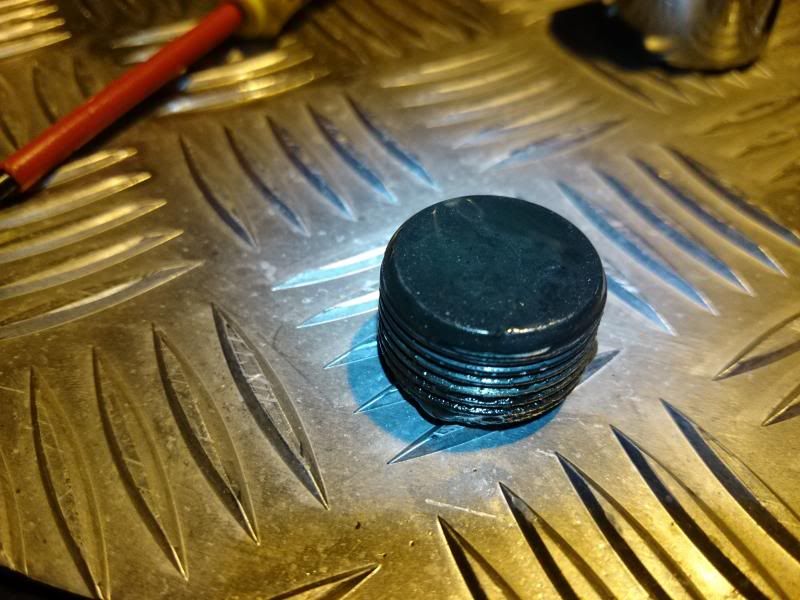
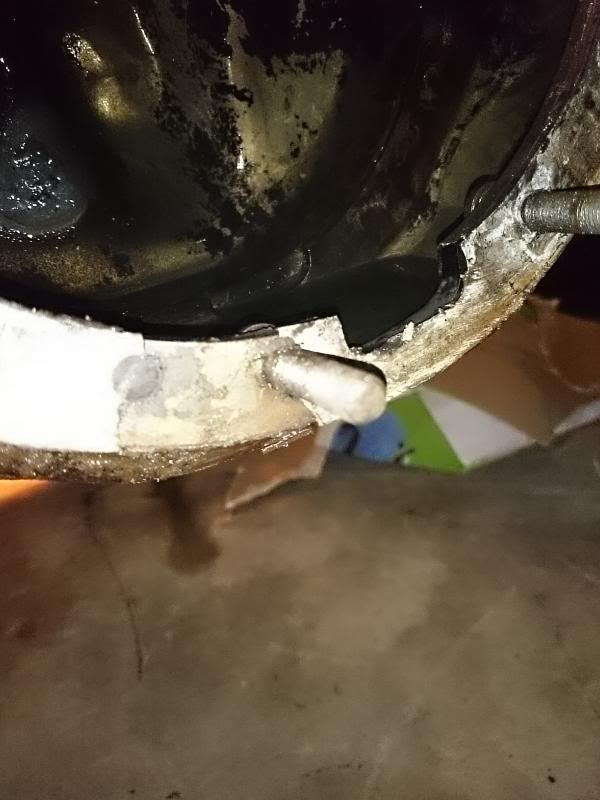
I got the truck last night and when I fired it up it had this horrible high pitched clinking coming from what sounded like the sump. Moved it into the corner to see a very small patch of oil on the floor. Checked oil levels and there was nothing in the auto box and about a handful in the engine. Slid underneath to find a bolt missing, is that the transmission drain plug thats missing? If so does anyone know what size bolt it is?
Ordered 7 litre's of 15/40 for the engine and 3 litres of ATF. I was thinking of running some ATF in with the engine oil at the first event then replace the engine oil and engine filter. I was going to change the ATF filter then top it up with ATF oil and leave it at that. The engine is a TDI3, swapped out after the 3.9 blew up.
Also, I have a rear mounted transmission oil cooler that sits above the rear mounted intercooler. Whats the best way to bleed the air out the system?
Any advice welcomed! 
|
|
| Back to top |
|
 |
|
|
Nightbar
Difflock Royalty

Joined: 30 Sep 2003
Odometer: 20799
Location: In a state of anticipation...
1999 Land Rover Defender
|
| Posted: Sat Nov 09, 2013 2:45 pm Post subject:
|
|
|
Welcome to the Forum and you've found the right place to ask a questions like that. I'm also looking forward to seeing some phots of the truck in action!
As to the questions - I haven't a clue but the clever people will be along soon sometime this weekend no doubt.
See you around in here.
__________________________________
The ex-Difflock Ambassador to Naples, Sir Nightbar DCJC DFS and 2 bars.
Plant a tree for the Difflock 3 |
|
| Back to top |
|
|
lambert
Articulating

Joined: 21 Nov 2009
Odometer: 751
Location: the crown subsistancy of yorkshire
|
| Posted: Sat Nov 09, 2013 3:06 pm Post subject:
|
|
|
That is the bell housing breather hole and should only have a bolt in if you are doing a lot of wading.
__________________________________
Oh, really? That is a pity. |
|
| Back to top |
|
|
Preid
Gate Opener
Joined: 09 Nov 2013
Odometer: 45
|
| Posted: Sat Nov 09, 2013 4:52 pm Post subject:
|
|
|
Thank you for the welcome!
A breather hole on the bottom? Seems odd to me. I have a bolt kit in the car and failing that Halfrauds.Any idea why there's engine oil surrounding it?
I'm still puzzled as to where all the ATF and engine oils went. I'll upload a video of the noise as it may help identify the issue. On a unrelated note I came across a False Widow in the barn the trucks residing in!
|
|
| Back to top |
|
|
Preid
Gate Opener
Joined: 09 Nov 2013
Odometer: 45
|
| Posted: Sat Nov 09, 2013 5:03 pm Post subject:
|
|
|
https://www.youtube.com/watch?v=5l61pOFOmO8&feature=youtube_gdata_player
Clip of noise.
I was going to buy a Haynes manual but there's not much really on it thats standard. The book would apply to 5% of the truck, if that 
After giving it some thought the only conclusion I can come to is there's oil leaking out the breather hole. Or its leaking from between the engine and gearbox. I havent changed ATF in ages and I forgot its red colour, I'll try locate the drain plugs for both engine and box and see what comes out. I'll also measure it to see what I get quantity wise.
|
|
| Back to top |
|
|
cynic-al
Mud Obsessed

Joined: 14 Nov 2006
Odometer: 6062
Location: scunthorpe
1989 Suzuki SJ
|
| Posted: Sun Nov 10, 2013 6:30 am Post subject:
|
|
|
The hole looks like the bell housing drain, there's usually a bolt near it that you can put in when your wading then take out again so that any water that might get in isn't trapped. The threads are stripped on mine so I never put it in and haven't had a problem yet. The gearbox breather is usually on the top with a 6mm pipe coming to the bulkhead in the engine bay then it's just looped over.
If there's engine oil coming out I would guess at the rear crank seal.
Checking the gearbox oil level is a funny one, it's something like with it cold and the engine running but look it up. By all means change the oil and filter but I wouldn't try flush the box.
I don't know a lot about the diesels but it sounds to be running ok aside from the rattle so I would start with thinks like the tensioners. I've heard people complain about those before.
I have to say I'm not a huge disco fan but that's the best looking one I've ever seem!
__________________________________
I know enough to be dangerous. |
|
| Back to top |
|
|
teamidris
Mud Obsessed

Joined: 24 Feb 2008
Odometer: 3372
Location: Staffordshire UK

|
| Posted: Sun Nov 10, 2013 12:13 pm Post subject:
|
|
|
I would think the auto oil cooler would bleed itself? Does it get warm at all?
I wouldn't ATF in the engine oil, you'll disturb all sorts of junk if it works 
The bell housing drain could have some clear plastic tube rammed in. Keeps water out, but you can see when it has got in.
Rear intercooler? I bet that has some wicked turbo lag? Normaly its about making all hoses as short as possible, or it gets thrown and a charge cooler replaces it. (or nothing).
__________________________________
https://m.youtube.com/channel/UC3l3zoaCabKrgBSULSV1YgA |
|
| Back to top |
|
|
Preid
Gate Opener
Joined: 09 Nov 2013
Odometer: 45
|
| Posted: Sun Nov 10, 2013 2:49 pm Post subject:
|
|
|
Ok so thats a breather hole. I'll get a plug for it and plug if whenever im going into the wet stuff.
Rear crank seal sounds a big job! I'll look into how to check the level's properly and report back on my findings, After which I'll clean the bottom of the engine and see where the oil starts appearing from.
I'll also look into the tensioners.
Im not much of a Disco fan either, originally I was going after a Defender but this thing caught my eye.
Bleed itself? Fantastic. When I get the oil levels sorted I'll give it a good run and see if it warms up. Ok, I'll keep the ATF out the engine incase I cause more damage than good.
Its funny you should say that Teamidris, on the quick test run up and down the path. I did notice a ton of turbo lag. You can gun it for a good 3-4 seconds before the turbo decides to join in. When it does finally decide to join in, what a brilliant noise it makes!
Thank you for the replies, its given me something to look into. Once I get to the bottom of this i'll be after help with identifying a few of the rear suspension components.
Another few questions. I bought the truck with a front ARB locker and Ashcroft HD everything else on the front end. The rear has a stock diff, stock shafts and the rests uprated. I also have a superb Gigglepin manifold which is also kitted out.
Now I can afford a pegged Ascroft diff but not much else this coming payday. So I was thinking why not install fiddle brakes on the rear and run them with the front locker? As I see it, it having a locked front and the truck being permo 4wd, if I lock one of the rears going round a corner that would mean all the other tyres are being driven. The brake lines are already setup for fiddle brakes. I just need to get the two master cylinders, levers and such and get it all rigged up.
Milners 4x4 have a nice looking kit, costing £200. This would leave me enough to get a decent Goodwinch winch. Further down the line moving this winch to the rear and replacing it with a more substancial winch.
|
|
| Back to top |
|
|
teamidris
Mud Obsessed
Joined: 24 Feb 2008
Odometer: 3372
Location: Staffordshire UK
|
| Posted: Sun Nov 10, 2013 5:55 pm Post subject:
|
|
|
The best fiddle brakes I've seen are mini-metro, as you get vacuum assisted fiddle brakes. Just replace the pedal with a hand lever 
Have you got four callipers on the back? Otherwise you would need the Milner ones, as they split the single foot brake pipe line into two, for two normal brake callipers.
The front locker and rear fiddle brakes work very well for trialling. Especially as the front of the truck is the heavier end.
We recon the front locker actually helps the fiddle brakes work, as the fight between the tyres help breaks traction, pulling the front round.
For winch challenge I'd say a locker in the rear is better, as there is a lot of climbing, where weight transfers onto the rear axel. The fiddles are still very useful for turning in tight areas.
__________________________________
https://m.youtube.com/channel/UC3l3zoaCabKrgBSULSV1YgA |
|
| Back to top |
|
|
Preid
Gate Opener
Joined: 09 Nov 2013
Odometer: 45
|
| Posted: Mon Nov 11, 2013 9:20 am Post subject:
|
|
|
Glad to hear the setup is approved from trailling, the first event is an RTV which will hopefully require no winch work!
I do know that each caliper on the rear has its own brake line. So tonight when I go out to get pics for the Mongol rally, I'll track them to see where they end up. I also have to rip all the lights off, take them home and see whats working. Also the oil issue will be looked at.
I'll upload a few pics in my update later on tonight.
|
|
| Back to top |
|
|
|
|
Preid
Gate Opener
Joined: 09 Nov 2013
Odometer: 45
|
| Posted: Tue Nov 12, 2013 10:36 pm Post subject: Leaks, squeaks and so many wires.
|
|
|
Apologies for not posting last night. I ended up working away on the truck until around eleven. After which I had to gather a few pic's for my teams Mongol Rally sponsor sheet. We're not taking the Landy, only using it for pictures as it looks the business on our sponsor application. My decent camera phone was left in a friends car who drove away so all pics taken on the works Iphone.
Right, on with the findings!
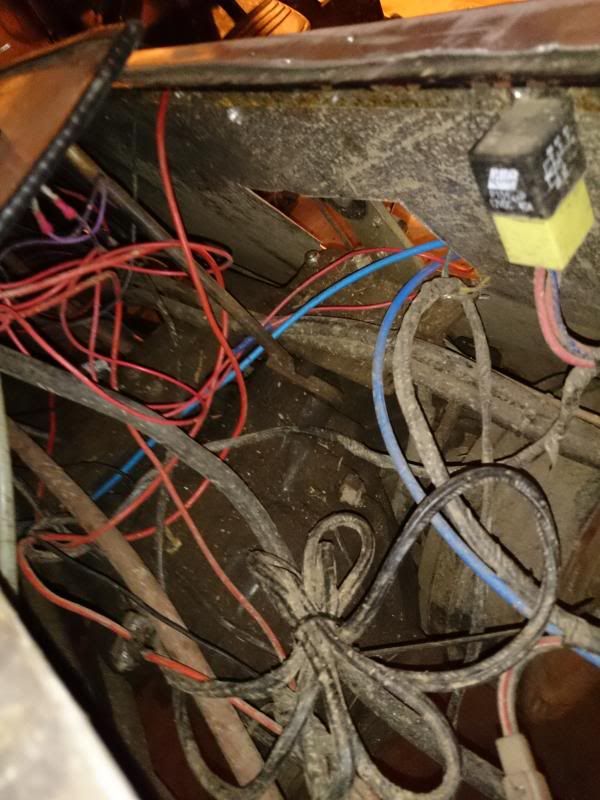
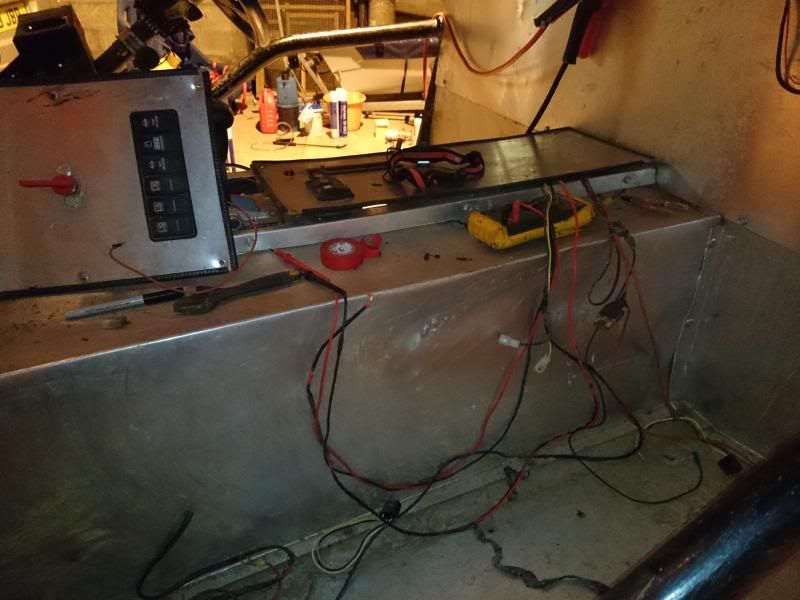
I spent the majority of the night ripping out a ton of useless/redundant wiring. There was all sorts of wires running in all sorts of directions. A few head scratchers but all sorted now. The front spots are wired, I've got the cage lights wired and two more defender spots to mount and wire. Oh and all the rear spots. Ignition will be torn out and done away with. I'll run a set of hidden switches out to act as the ignition as currently any nobber with half a brain could figure out how to hot wire it.
The illuminated switches glow is a touch bright.
Next I topped up the engine oil. It swallowed around two litres before it reached halfway between the high and low marks on the dipstick. I took a note of it and placed a bucket under the engine.
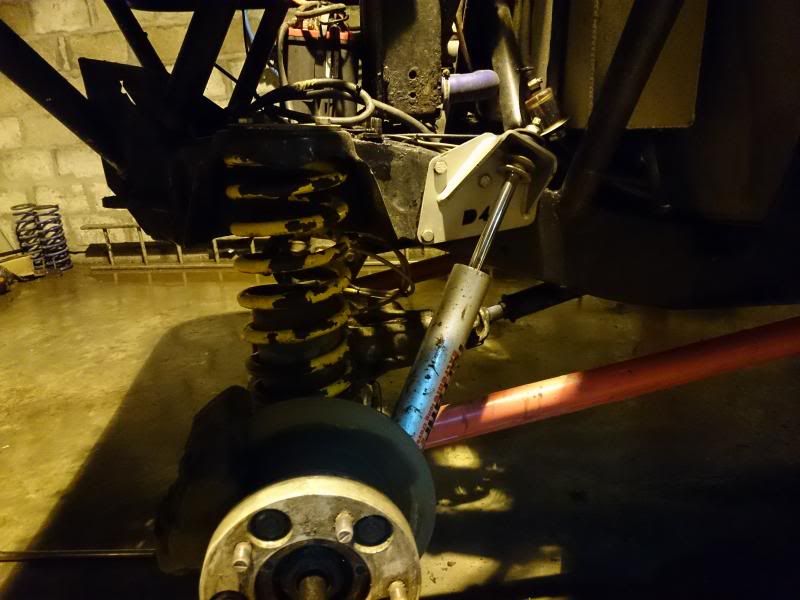
Next was the transmission ATF. Now I read online how to change it over so out with the allen keys, under I go. I slide up to see that the drain plug is a bolt. I thought 'its probably a replacement' so I start looking for the fill plug. Nothing. I scraped off all the crap on the sump and I couldnt find anything that resembled a fill hole. I then decided to rip the switch panels up above the transmission. Looking down at it all I can see are more stray wires I need to sort and the return from the rear mounted oil cooler. I decided to not bother with trying to get the hose off and fill it from there. Instead I called it quits on the fluids and decided to have a good look at what else needs done. I then noticed a leak from the front right hub 
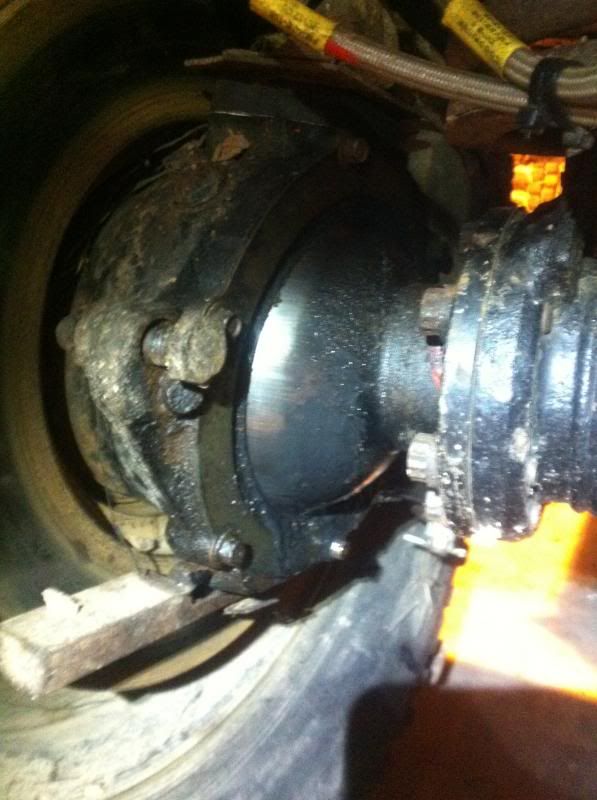
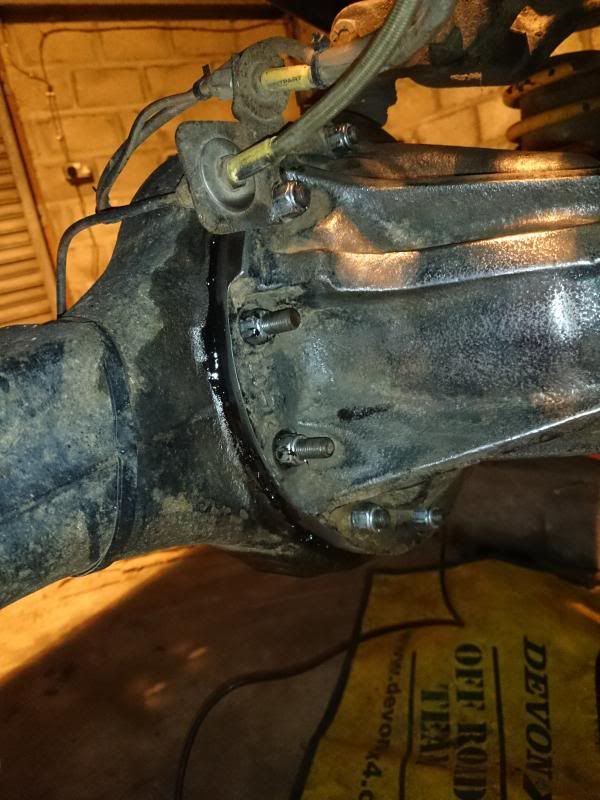
And then another leak from the rear diff
So in total I have a three leaks to sort. The diff I can do no problem, I'll try seal it with silicone. The rear crank seal after running the engine for a good ten minutes only dropped drips of oil so I can live with that. The hub however spewed a fair bit. I also noticed the compressor is coming back on every 4-5 minutes. Would the active compressor force more oil out the leaky seal? Is replacing the seal a hard job?
That rattle I linked to in the vid is still present!
Onto some good news now. I believe I've found the water temp sender so I'll order a LR gauge off ebay. It, a turbo boost and volt meter gauge will be the first in the truck.
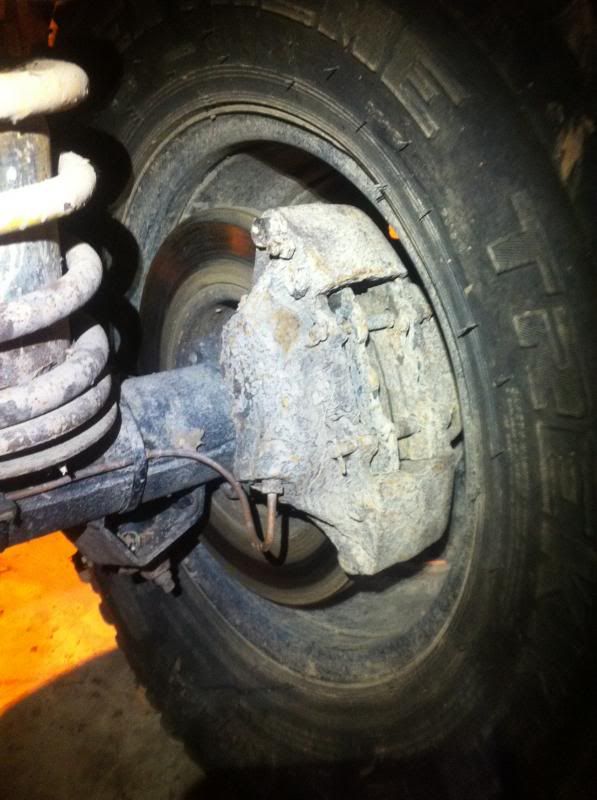
Fiddle brakes!
How do you like these badboys? Look upto the job? Lines already ran!

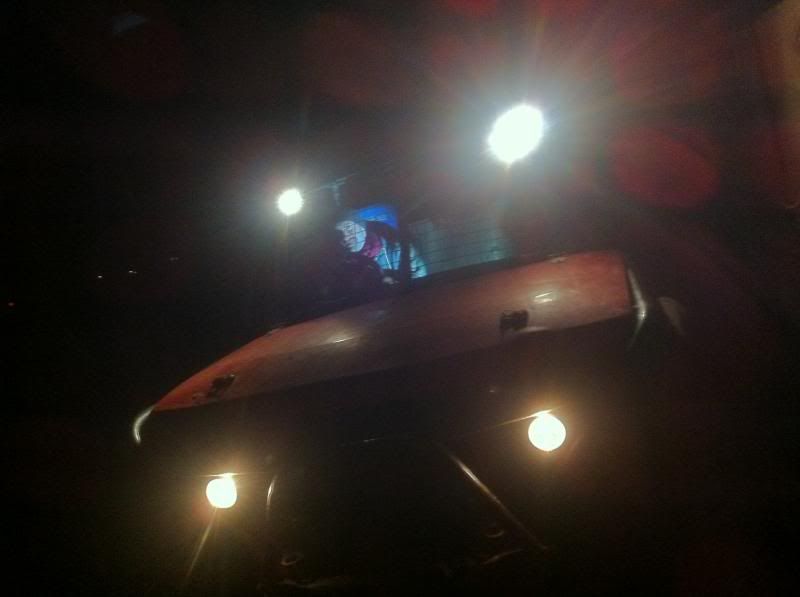
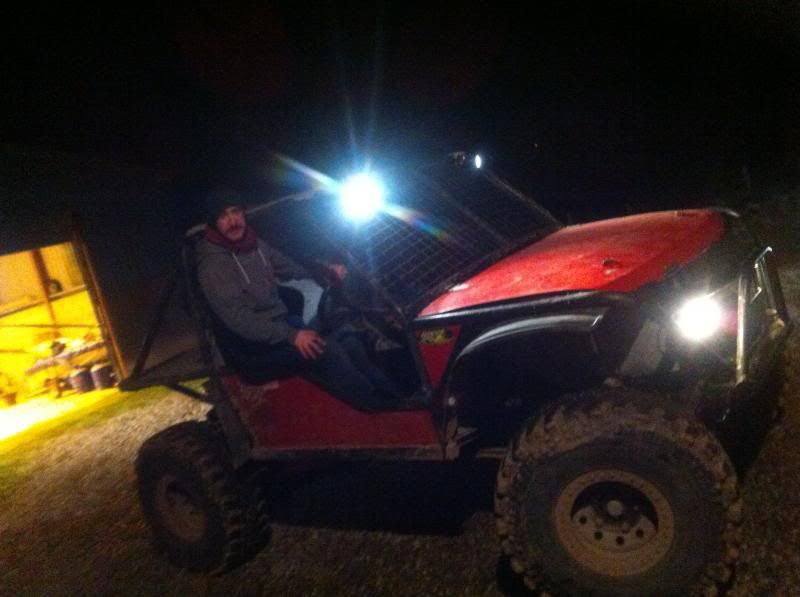
And finally, here's me sitting on the body (due to not being able to be pictured in the cab because of low light) showing off my Movember tache. The power hose is coming out with me this weekend for an overdue clean, sand and seal session. The bead lockers are actually red under all that mud. Anyone tried Dynax's sealant?
|
|
| Back to top |
|
|
teamidris
Mud Obsessed
Joined: 24 Feb 2008
Odometer: 3372
Location: Staffordshire UK
|
| Posted: Wed Nov 13, 2013 7:09 am Post subject:
|
|
|
Those are front calipers on the rear, which is the standard modification to make milner fiddle brakes work properly. I say milner, as the fiddle brake set needs to split the brake line from the front to these two calipers. Looks like most of the work has been done for you. - Unfortunately you cannot have the metro system unless there are four separate fiddle brakes on the back! (unless you are real cunning or dodgy) So it looks like wallet time
For a trailer I'd de-rust the chrome swivel, whack some hard paint on, new seal, and stuff landy CV Greece back in there. (unless it needs king pin bearings).
Auto box fills through the dipstick tube. (tedious but effective)
__________________________________
https://m.youtube.com/channel/UC3l3zoaCabKrgBSULSV1YgA |
|
| Back to top |
|
|
Preid
Gate Opener
Joined: 09 Nov 2013
Odometer: 45
|
| Posted: Thu Nov 14, 2013 10:39 pm Post subject:
|
|
|
Discovered your ongoing build/progress thread teamidris. Wow! Thats one kitted out truck.
On your advice I'll get the Milner dual handle for the fiddle brakes. I'm hoping the current setup will be enough to pull the front around. My only worry is the 36's will be a bit too much for fiddle brakes. The standard steering pump is also struggling with the tyres and working both at the same time could be a fair workout especially at slow speeds!
Im new to the whole swivel setup so these questions may be daft. I've spotted a swivel service kit on devon4x4. Would the bearing be something I could swap out myself? I noticed both the swivels have been stripped of their paint by what appears to be wear, is it worth painting them? Whats the usual cause of failure for the seal? I'll find a swivel service guide online and if any other questions appear I'll post away.
Fills through the dipstick tube?  Well its not like ive got much planned for the rest of Friday. Well its not like ive got much planned for the rest of Friday.
|
|
| Back to top |
|
|
teamidris
Mud Obsessed
Joined: 24 Feb 2008
Odometer: 3372
Location: Staffordshire UK
|
| Posted: Fri Nov 15, 2013 8:06 pm Post subject:
|
|
|
Thanks
Only 20 years work
poor old truck  Anything else at 41 years would be in a car show. Anything else at 41 years would be in a car show.
36's ought to work with the smallest bore Milner set and those callipers. Normally the steering is full over before you go "Oooh, need more" and yank on the relevant lever. But I am changing two clutch pedals to be fiddle brake pedals instead of arm operated, to reduce the work load.
Maybe they are Teflon coated balls? Not sure what to do with them? But the work is kind of driveway with a brass punch and a big hammer. Hardest part is the shimming of the kingpins and there is plenty written up on here and on LR4x4. It could be chipped Teflon coating that ragged the seals?
__________________________________
https://m.youtube.com/channel/UC3l3zoaCabKrgBSULSV1YgA |
|
| Back to top |
|
|
Preid
Gate Opener
Joined: 09 Nov 2013
Odometer: 45
|
| Posted: Sun Nov 17, 2013 12:12 am Post subject: Tyring work.
|
|
|
There's still time yet! Im no where near the level of engineering you two are at. Thank you for the ongoing advice, its clear you know what your doing. Looked up a few threads on swivel servicing, I think I can do it with minimal fuss. I've no idea if they're teflon, I hear that word and think microwave. Dont ask me why.
Small bore setup, gotcha. Pedal brakes for the fiddle setup would be a lot better than the levers. Im pretty sure after the RTV im lined up for that im going to have a sore left arm the day after. The console to which the levers will be mounted is also super high which could pose a problem. When im in the seat my arms at full stretch just to reach the gear lever!
So an update on todays emotional up's and down's. After sorting out some more paperwork for the Mongol Rally. I went past Halfrauds and picked up a few bits including Hammerite's 'straight to rust' paint. I wont be putting it directly onto rust FYI, im not that rough. It looked the most heavy duty paint they sell.
Headed out to the barn and spent ages unloading all my gear. In hindsight I should of just opened the boot, reversed in at speed and hit the brakes hard. That would of saved some time and looked just as neat.
I first checked on the leaks. The rear crank seal is hardly leaking at all
Lucky if there were two table spoons sitting in the bottom. So for now that can be left as is. I got one of those weed sprayer things from B&Q and loaded it up with ATF. Made my life so much easier. The ATF fluid that appeared on the dipstick was a golden brown colour Next I started removing the seats. I blasted the underside of the truck with the power hose to clear the muck off the nuts. A few minutes later and they're out and sitting on the floor. They've got mud in the fabric and im not sure the best way to go about removing it. Then again they're only going to get muddy again so perhaps a good hoover.
I then removed the side panels so I could power hose the crap out the cab. I noticed quickly that there isnt anywhere for the crap to go. So on the list is to grind a 2 by 4 hole under the pedal surround. There's an inch gap between the floor and this black pedal surround. Once done I should be able to simply hose behind the seat and blow all the crap towards the hole where it'll just fall to the deck. Instead of having to blow it out all over myself and the adjacent range rover 
A friend of mine then showed up, travelling a fair distance to see the truck. Now I had cleaned some of it but he couldnt leave without getting a run about in it now could he? Off we went down the path and it was very noticeable the autobox was a lot happier. What else was noticeable was the steering felt like crap. I thought something on the leaky hub had gone so homeward we went. On our return we removed the seats again, spare tyre and I set about giving it a good hose down.
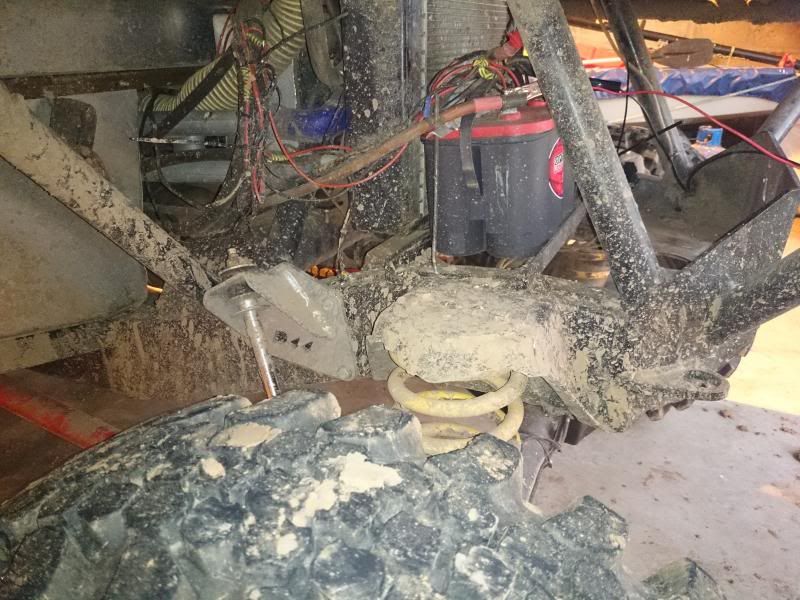
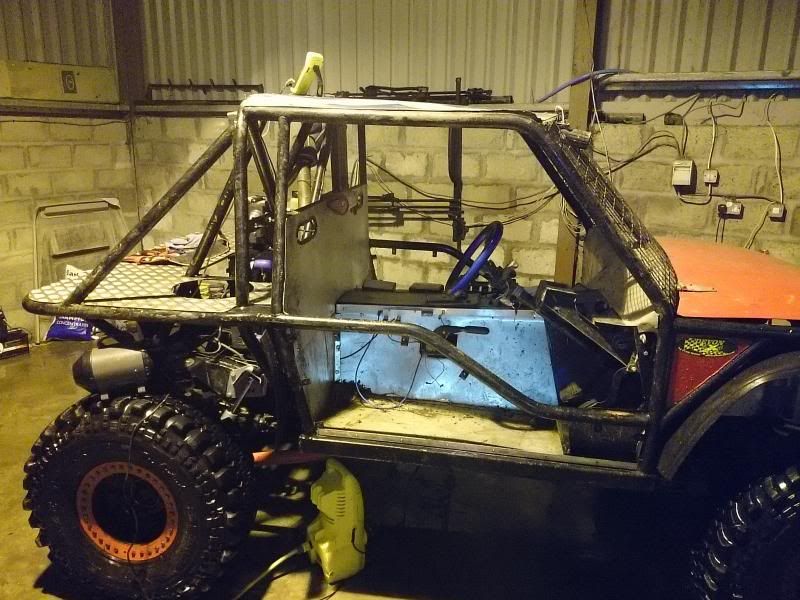
Post trip mud and some of the awful wiring I've to sort out.
The trayback is just so convenient.
Afterwards using an Atom drier I removed the worst of the water and its currently air drying.
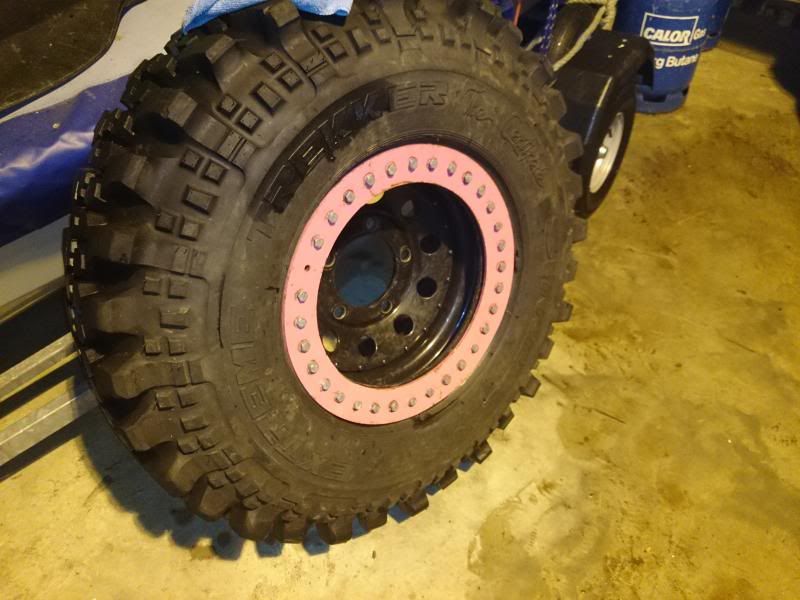
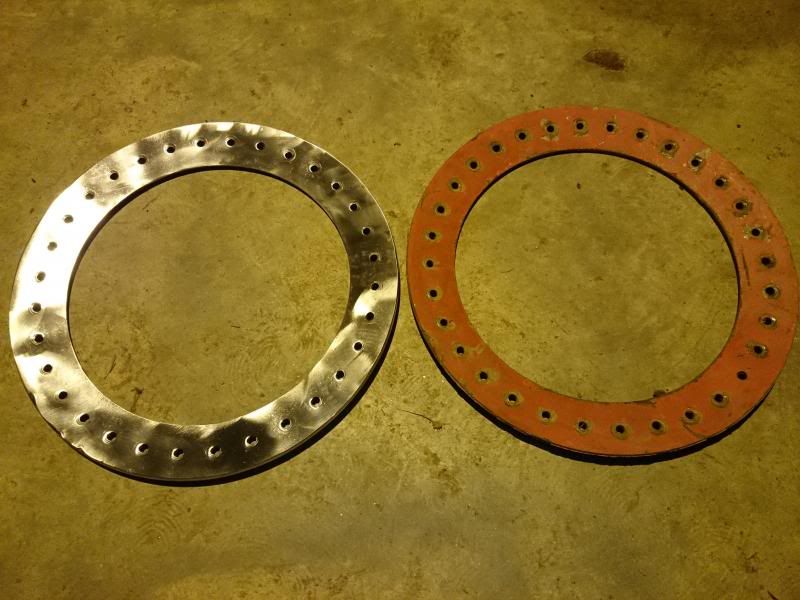
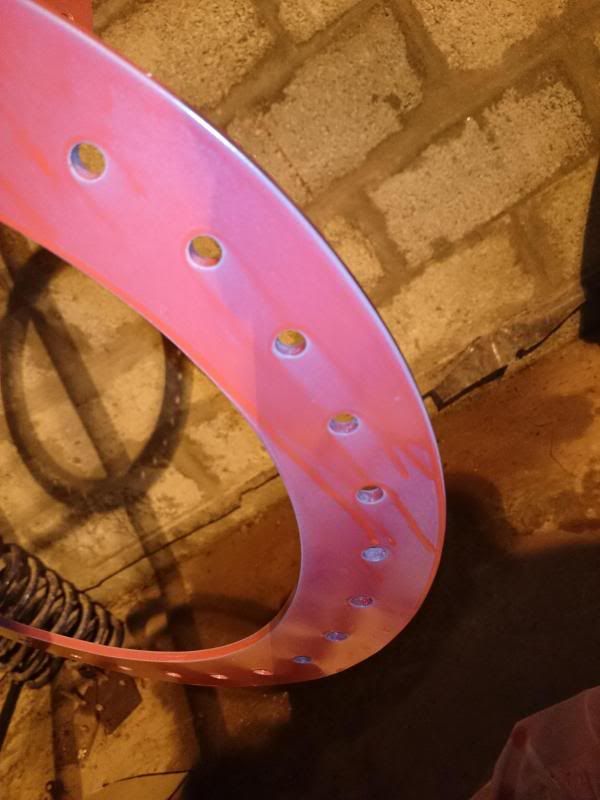
I washed it inside the barn because it was windy outside and the barn floor needed a scrub. Next was a case of deciding which end to jack up and remove the tyres from as im repainting all the bead locking plates. Apart from being very tatty, they could do with being resealed. Also the spare is bright pink...
Since I was going to be taking the rear diff out I thought the rear would be the best place to start. It quickly became apparent that normal axle stands and my old bottle jack were not suited for such a high vehicle. I had to draft in a few breeze blocks. Not entirely safe I know as they can split but there wasnt much else around. Once on the stands we removed the tyres. What a weight! Some of the bolts were a breeze to take off but a couple required the both of us working the same ratchet spanner. I threw a bucket under the diff and drained it. The oil looked green and had heaps of particles in it Not overly fussed about the particles, its an open diff and its still working.
Volume wise maybe two cup fulls? I know the fill hole isnt that high but I was expecting more oil to come out. Next I removed the bolts that hold in the half shafts. One side just slid out gracefully with no effort whatsoever but the other was a rattle about job to free it. I called it quits on the diff removal as the floor was still soaking.
Bit tatty but nothing I cant tidy.
Next I started removing the bead locker bolts... oh my god why has no one invented a quick release bead locker setup! 
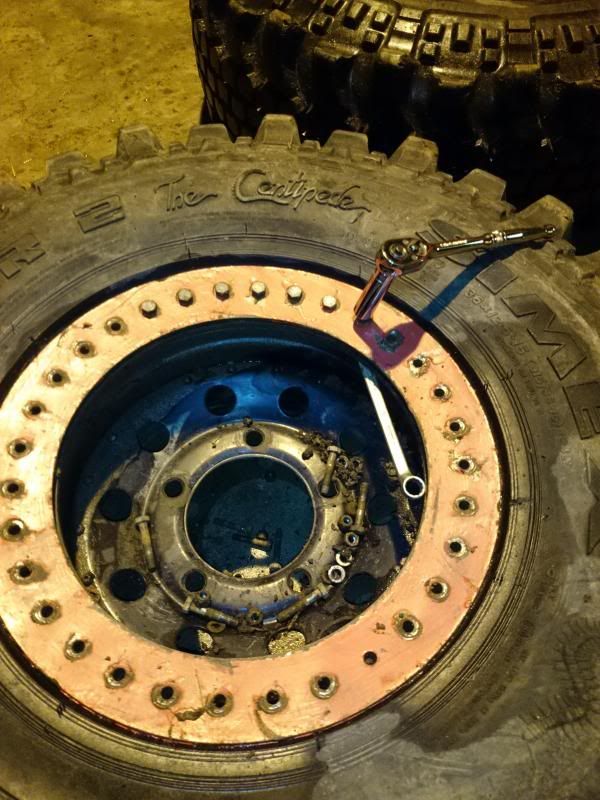
Nylon nuts, bolts jammed in where the rims been deformed through impact and choked up threads making nut removal a pain. After battling with the first rim, the pink suddenly didnt look so bad. I managed four or five bolts on the second tyre and after having no luck tracking down a drill socket bit I thought f*ck it, lets go home'.
Before I left for the night I thought I'd release the front tyres nuts. Two nuts on the rear were a pain and not having a very long ratchet spanner I had to get my mate to help. I would pull and he pushed and it worked great. As he wasnt going to be there tomorrow I thought best get them loose now. Got the ratchet, knelt down and as I was away to fire it onto the first nut. I noticed none of them were sitting against the rim
All the times we had been out the front tyres had not been bolted on. Every single nut was loose, not even finger tight. No wonder the steering felt crap. Its lucky we didnt loose one while on a tour down the path. I'd hate to have had to wrestle a Simex out the ditch in the dark.
Well thats it so far. Back tomorrow to get the rear diff out and get it silicone sealed back in. Hopefully by the end of the day the lights wiring will be finalised.
Bed time!
|
|
| Back to top |
|
|
Biffo
Just got MTs
Joined: 24 Mar 2008
Odometer: 214
|
| Posted: Sun Nov 17, 2013 12:23 am Post subject:
|
|
|
As others have said, the hole in the bottom of the bellhousing is the drain hole to see if the engine rear seal or g/box front seal is leaking bad enough to need doing. If you intend going into deep water / mud, you need to fit a wading plug into this, there is also one in the bottom of the timing case, same thread etc, your local landrover dealer will have them for a few bob or on ebay here. http://www.ebay.co.uk/itm/Land-Rover-Timing-Cover-Flywheel-Wading-Plugs-x-2-/250375668347
The autobox should be checked when cold, engine running on tick-over, with selector in "park" you fill it through the dipstick tube (Dextron 2) Make sure the oil cooler for the autobox is out of the way from getting full of mud, keep it clean or your box might not like being cooked!
Also don't forget to check the oil level in the transfer box (EP80)
The swivel joints ALLWAYS leak! providing they don't actually **** it out, just keep you eye on it, wipe it off prior MOT test, you can drain them then refill with moly-grease again, (This used to be 80/90 EP oil in these, but it didn't stay in long enough, so they now use this one-shot moly-grease instead) http://www.ebay.co.uk/itm/Land-Rover-Swivel-Houseing-Grease-X2-STC3435-/320861915828 providing there is no play in the bearings / swivel, then it's OK, as its other function is to protect the UJ inside it, that's what the lubrication is for.
If you're off-roading with this, make sure that you have spare poly bushes for the Panhard rod, they eat these off road, Britpart rubber ones are worse than useless they don't last a day off-road! You'll also go through track-rod ends, especially if you don't grease them often.
The noise on your engine could possibly be the belt idler bearing, they are prone to go knackered, changing the belt & the idler pulley is easy enough.
Remember, Landrovers DON'T leak! They just mark their territory!
|
|
| Back to top |
|
|
teamidris
Mud Obsessed
Joined: 24 Feb 2008
Odometer: 3372
Location: Staffordshire UK
|
| Posted: Sun Nov 17, 2013 7:48 am Post subject:
|
|
|
I don't know the truck, but it looks like a high end build that was used and then de-rated to be sold, with all the expensive stuff being removed and going onto the next build. Difficult to tell if it was used hard in this half-build state by the next owner? (auto oil) Looking at the bits that are left on it, I would say you had a 'relatively' low amount of work to do to get it ready, and then it will work really well
__________________________________
https://m.youtube.com/channel/UC3l3zoaCabKrgBSULSV1YgA |
|
| Back to top |
|
|
bigbuggy
Just got MTs

Joined: 12 Dec 2010
Odometer: 260
|
| Posted: Sun Nov 17, 2013 5:32 pm Post subject:
|
|
|
| teamidris wrote: | | I don't know the truck, but it looks like a high end build that was used and then de-rated to be sold, with all the expensive stuff being removed and going onto the next build. Difficult to tell if it was used hard in this half-build state by the next owner? (auto oil) Looking at the bits that are left on it, I would say you had a 'relatively' low amount of work to do to get it ready, and then it will work really well |
i know who built the truck originally, & i then know the chap that bought it from him & im assuming sold it to Preid,
you are right in regards to it having all the gear & being slowly stripped as its gone....
__________________________________
Big Tyres, Big Turbo, Big noise
Go big or go home |
|
| Back to top |
|
|
Preid
Gate Opener
Joined: 09 Nov 2013
Odometer: 45
|
| Posted: Mon Nov 18, 2013 12:32 am Post subject:
|
|
|
Thanks Biffo, very helpful post. Added the bushes and track rod ends to the list of kit to be ordered. One guy I went out to see who had another truck of similar spec also mentioned the track rod ends. He recommended I go for the cheap ones as he couldnt tell much difference durability wise between the cheap and not so cheap ones. As for cooking the autobox, there's a rear mounted oil cooler that sits on top of the intercooler. I was told it was thermostat controlled but one trend with the truck is the wiring isnt great. Still, its not a big job to sort.
Bigbuggy you make it sound like its been torn to bits and sold off as a ruin!
Stripped is how I wanted it. I was originally going to buy it without any lockers, HD kit or compressor as I wanted to build it to my spec. The rear locker and shafts had already been sold on, the front locker, shafts and compressor were due to be sold but the buyer went silent. So I ended up buying those too as it made more sense in the long run.
I was originally going to buy another truck, another disco infact. It had all the kit and then some but it wasnt anywhere as clean as the disco I've got now.
Ok to send you a PM to get a little history on the build?
So, tonights progress!
I didnt have much time today with taking care of this and that but I did get some work done. First up was getting the second bead lock rim off. Not as emotional as the first but still a pain. Afterwards I sanded it down and fired it into the 'to be painted' pile. Came up like new!
After which I set about the leaky rear diff. Didnt take me long to get the UJ off and the diff loosened up. I was by myself for this so rigged up this ghetto lowering mechanism.
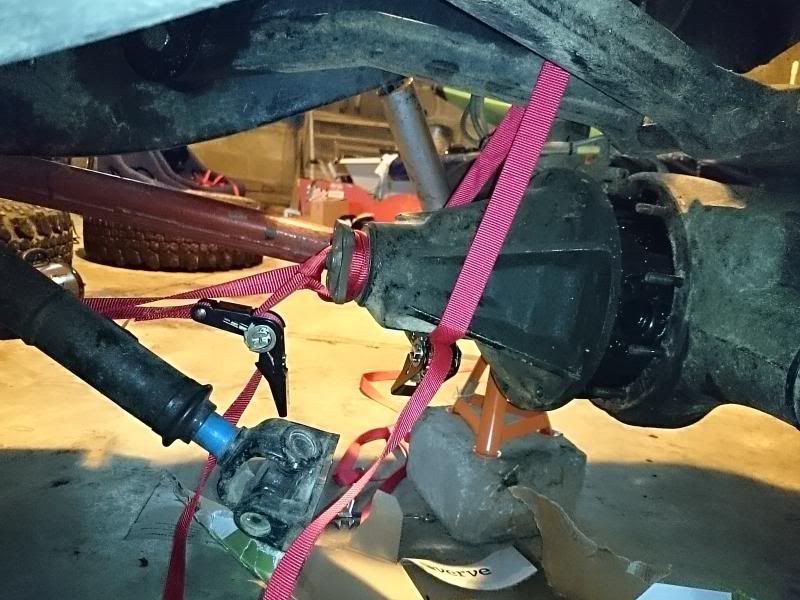
Worked great - also notice the cleanliness of the frame and such.
Diff came out no bother at all and I was surprised at how light it was compared to my old Shog locker. The Shog weighed an absolute ton but it did look a fair bit more heavy duty in comparison. I mean the Landy diff isnt light by any standard but it was a lot easier to work with.
Straight away I spotted the problem.
Quick sanding session later and its all clean, quick wipe down with thinners before being dried.
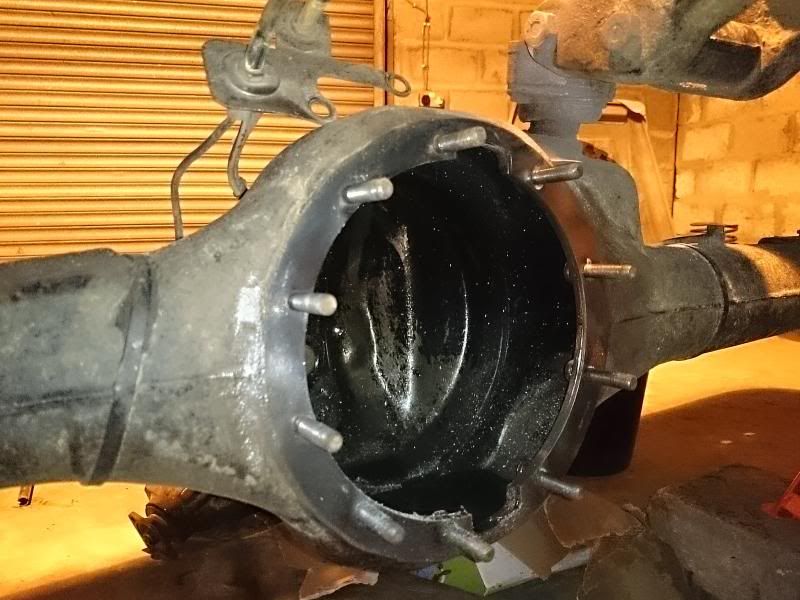
After which I applied a dose of silicone. Same treatment for the diff but this time I only put a small amount of silicone around the cut outs for the crown as they look like a weak point. Put a blob onto the frame and left it for twenty minutes, I spent the time looking at the front bead locks feeling sorry for myself knowing i'll have to suffer them too in the near future.
I poked at the test blob on the frame and it was starting to cure. So a few cuss words later and its back on. Tightened and cleaned off the worst of it. I also cleaned the diff housing while I had it on the deck.
Now I know you can see a few specs inside the diff housing, thats the remains of the old gasket. The oil also looks like it was removed when the old locker was in and then reused once the stock diff was put back in. I left the drain cap off which will let the air in to help it cure. I'll get some fresh oil in and change it after the first event.
Thats all for now. Tomorrow's plan to top the diff up, clean the callipers and a few other bits. I'll get the frame held up at the rear and remove the coils as they look awful. They'll be getting thrown in the respray pile.
Cant wait to get some parts ordered at the end of the month!
|
|
| Back to top |
|
|
mudplugga
Mud Obsessed

Joined: 23 Oct 2004
Odometer: 2798
Location: Shropshire mostly, and Mid Wales
|
| Posted: Mon Nov 18, 2013 7:16 pm Post subject:
|
|
|
I used fiddle brakes with a welded front diff - Range Rover axles and Series diff's - and kept blowing rear diff's, even after pegging them. The strain the fiddle brakes put on the only working diff' was just too much. Once I went back to open diff' in the front the rear held together just fine.
I made the Metro twin servo setup for my trialer and it works very well, but it is completely independent from the normal brake circuit and I have an extra set of 4 pot calipers on the back. The servo's mean I can use a shorter handle with less movement, and the pressure is way more than the usual fiddle brake setup that is commonly sold. By linking the dual circuits of each servo master cylinder together I get all the hydraulic pressure that goes to a Metro's 4 wheels on the individual 4 pot caliper.
The main reason for using Metro servo's is that they are vertical, so they take up less space and it's very easy to arrange the levers.


__________________________________
http://www.ipernity.com/home/294337
"Roof, doors, wheels. It's the way I drive." |
|
| Back to top |
|
|
|
|
Preid
Gate Opener
Joined: 09 Nov 2013
Odometer: 45
|
| Posted: Mon Nov 18, 2013 8:52 pm Post subject:
|
|
|
| mudplugga wrote: | | I used fiddle brakes with a welded front diff - Range Rover axles and Series diff's - and kept blowing rear diff's, even after pegging them. The strain the fiddle brakes put on the only working diff' was just too much. Once I went back to open diff' in the front the rear held together just fine. |
Not what I wanted to hear! Did the diffs go while under a lot of power? I'll still install the fiddles but on your advice I wont get the front locker involved while using them.
I guess with a locked front and centre, when braking one side if the free side has a nice grippy tyre there's going to be some torque build up before starts to spin.
Thanks for the warning!
| mudplugga wrote: |
I made the Metro twin servo setup for my trialer and it works very well, but it is completely independent from the normal brake circuit and I have an extra set of 4 pot calipers on the back. The servo's mean I can use a shorter handle with less movement, and the pressure is way more than the usual fiddle brake setup that is commonly sold. By linking the dual circuits of each servo master cylinder together I get all the hydraulic pressure that goes to a Metro's 4 wheels on the individual 4 pot caliper.
The main reason for using Metro servo's is that they are vertical, so they take up less space and it's very easy to arrange the levers. |
I dont need any more temptation to go down the twin metro path! I already have a load of work to get on with to get the truck ready for the next event. I'll try out the Milner levers first, get a feel for those and if I fall out with them I'll metro it up. I've a arc welder that im itching to use but havent found a project for it yet. Must... not... eBay... metro... brakes.
I'm having a night off from the truck tonight. Spent all day on a freezing boat sorting out wiring so by five o'clock I had had enough. Tomorrow though if its not too cold I'll get back on it. The only thing I've done tonight is put all the nuts and bolts in Hammerites derust solution. I would of used the battery charger and baking soda method but Halfrauds car charger cannot be trusted.
|
|
| Back to top |
|
|
mudplugga
Mud Obsessed
Joined: 23 Oct 2004
Odometer: 2798
Location: Shropshire mostly, and Mid Wales
|
| Posted: Mon Nov 18, 2013 9:52 pm Post subject:
|
|
|
It certainly isn't a power problem that kept breaking the diff's, and I think I broke about 6 or 7 before I took the welded front out. My trialer uses an old Subaru 1600cc engine out of the very ancient Brat pickup, if there's 60 bhp in it I'd be amazed. It then goes through an even older Daihatsu 4 speed gearbox, which isn't as low geared as I'd like but it's not bad. I like my trialers light and agile with just enough power.
But when I was doing tight turns with a fiddle brake locking one rear wheel the pegged rear diff's would explode, dramatically sometimes with oily bits coming through the case! but with the low power I do tend to drive it like it's stolen
__________________________________
http://www.ipernity.com/home/294337
"Roof, doors, wheels. It's the way I drive." |
|
| Back to top |
|
|
Preid
Gate Opener
Joined: 09 Nov 2013
Odometer: 45
|
| Posted: Fri Nov 22, 2013 1:08 am Post subject:
|
|
|
Exploded? I'll put a post-it on the dash as a reminder to make sure the fronts open. My style of driving is take it canny until I either start to sink or feel im not going to make it. If I cant get enough distance taking a shunt, i'll reverse as far as I can go and just plant it. Mixed success with that method.
Right an update.
Last night I removed the tray from the trayback to give me better access to the wiring. How in hell they got it in there in one bit I do not know. Must of bolted it on and welded the last two pillars in.

I'll have to grind two sections out the side of the tray to get it back in without tearing the paint to bits. Removed the air intake pipe and sanded, cleaned and applied two layers of primer to it and my bead lock rims.
Called it quits.
Tonight I wanted to get through the wiring. So much crap just going everywhere. Removed all the redundant and unnecessary wiring, marked up what was left and I'll tidy and refit everything tomorrow.
I thought I spotted a small fuse block which would of been ideal. But on further inspection it wasnt suitable.
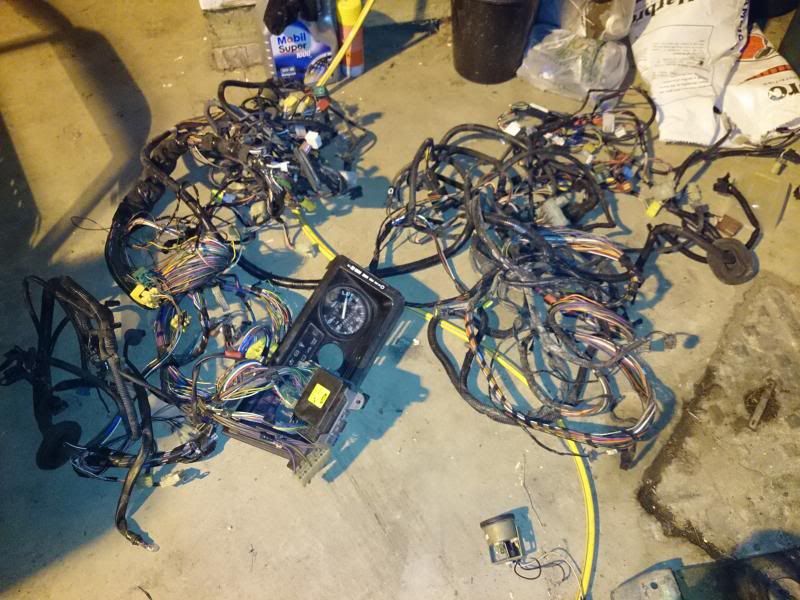
Found an oil temp and voltage gauge, does anyone know what the big hole in the gauges are? At first I thought they were bulb holders but there appears to be a connector of some sorts in there. I looked over the looms but nothing fit the holes.
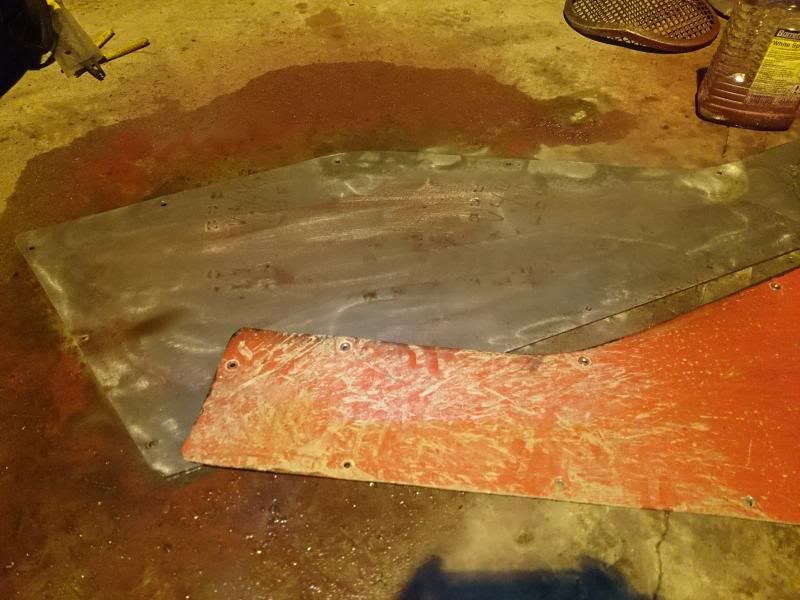
Sanded down the primed parts with 800 paper, cleaned and tried to spray it with Hammerites 'straight to rust' paint. It was like rain water, no idea where I've went wrong but it looks awful. The air intake pipe has came out ok so far but the thickness im putting it on at it'll need about ten coats. Im half tempted to sand it back down to the primer and get red primer instead. A sort of matt red look. Any idea's where I've went wrong? Can I leave it just as primer?
If anyone could recommend a good heavy duty paint im all ears.
That wasnt even a proper coat, that was just spraying lightly.
Had enough for today. Tomorrow i'll finish off the wiring through a nice tidy fuse box. I'll hopefully figure out how to wire in the gauges and worse yet try find a way to mount them!
|
|
| Back to top |
|
|
Xpajun
Mud Obsessed

Joined: 22 Sep 2008
Odometer: 3245
1988 Mitsubishi Shogun
|
| Posted: Fri Nov 22, 2013 9:18 am Post subject:
|
|
|
| Probably the answer's in the name - Hammerite is nothing like what it used to be - to be honest it wasn't that good when it first appeared either, but it dried in 15 minutes which is what we needed in factory maintenance. When they took out the "dangerous" thinners it got worse but now the EU has stepped in and said you can't use the almost harmless thinners, it (and every other paint) became nigh on useless
|
|
| Back to top |
|
|
Winnet
Difflock Royalty

Joined: 03 Dec 2003
Odometer: 14725
Location: Aberdeen
1985 Land Rover
|
| Posted: Fri Nov 22, 2013 11:00 am Post subject:
|
|
|
This is a good thread, keep it up.
G.
__________________________________
Bored......
All these questions and more after the tea break. |
|
| Back to top |
|
|
bigbuggy
Just got MTs
Joined: 12 Dec 2010
Odometer: 260
|
| Posted: Fri Nov 22, 2013 1:34 pm Post subject:
|
|
|
| Preid wrote: | Exploded? I'll put a post-it on the dash as a reminder to make sure the fronts open. My style of driving is take it canny until I either start to sink or feel im not going to make it. If I cant get enough distance taking a shunt, i'll reverse as far as I can go and just plant it. Mixed success with that method.
Right an update.
Last night I removed the tray from the trayback to give me better access to the wiring. How in hell they got it in there in one bit I do not know. Must of bolted it on and welded the last two pillars in.
I'll have to grind two sections out the side of the tray to get it back in without tearing the paint to bits. Removed the air intake pipe and sanded, cleaned and applied two layers of primer to it and my bead lock rims.
Called it quits.
Tonight I wanted to get through the wiring. So much crap just going everywhere. Removed all the redundant and unnecessary wiring, marked up what was left and I'll tidy and refit everything tomorrow.
I thought I spotted a small fuse block which would of been ideal. But on further inspection it wasnt suitable.
Found an oil temp and voltage gauge, does anyone know what the big hole in the gauges are? At first I thought they were bulb holders but there appears to be a connector of some sorts in there. I looked over the looms but nothing fit the holes.
Sanded down the primed parts with 800 paper, cleaned and tried to spray it with Hammerites 'straight to rust' paint. It was like rain water, no idea where I've went wrong but it looks awful. The air intake pipe has came out ok so far but the thickness im putting it on at it'll need about ten coats. Im half tempted to sand it back down to the primer and get red primer instead. A sort of matt red look. Any idea's where I've went wrong? Can I leave it just as primer?
If anyone could recommend a good heavy duty paint im all ears.
That wasnt even a proper coat, that was just spraying lightly.
Had enough for today. Tomorrow i'll finish off the wiring through a nice tidy fuse box. I'll hopefully figure out how to wire in the gauges and worse yet try find a way to mount them! |
im still curious about you saying it had a rear intercooler, i cant remember it having one on the past,
__________________________________
Big Tyres, Big Turbo, Big noise
Go big or go home |
|
| Back to top |
|
|
teamidris
Mud Obsessed
Joined: 24 Feb 2008
Odometer: 3372
Location: Staffordshire UK
|
|
| Back to top |
|
|
bigbuggy
Just got MTs
Joined: 12 Dec 2010
Odometer: 260
|
| Posted: Fri Nov 22, 2013 9:20 pm Post subject:
|
|
|
in regards to painting beadlock rings, i do mine in green with a brush,
considering the abuse they take & the fact the wheels dont last more than an outing i dont really worry about the paint finish
__________________________________
Big Tyres, Big Turbo, Big noise
Go big or go home |
|
| Back to top |
|
|
Preid
Gate Opener
Joined: 09 Nov 2013
Odometer: 45
|
| Posted: Sat Nov 23, 2013 1:47 pm Post subject:
|
|
|
Bigbuggy,
I may of confused intercooler with radiator in my previous post I often write these updates late at night when im tired so slips ups can happen.
Im aware my painting efforts will probably get trashed after a few events. I was removing the bead locks to look at the tyres as the previous owner mentioned they could do with being resealed. Not entirely sure what he was on about as they didnt start leaking air until I was nearly halfway round removing the locking plate. Anyway, as they were off I thought I'd give them a paint.
Went back to Halfrauds and had another look at their fine selection of paint. Since hammerite was out the question it was either their own brand paint, some 'great for artwork' matt paint, camo paint, glow in the dark paint and glitter paint.
I thought about taking one of the four shades of camo paint but it didnt appeal to me. The artwork paint looked cheap and the glitter paint, although it would of went great with my pink spare, wasnt the look I was going for.
Decided just to buy Halfrauds own brand 'toolbox red' paint and what a good choice it was! Sanded/scrapped off the Hammerite gunk, in 24 hours it had hardly gone off at all. Ended up taking thinners to it and it just wiped off with ease.
Cleaned, dried and started with the Halfords paint. Just superb! Only one tiny run and the paint dried enough to get another coat on within half an hour. I did 4-5 coats over the night and im very pleased with the result.

Most tedious part of the night was getting the stickers off the side panels. Thinners, power tools and a lot of swearing involved. The Ashcroft big flag logo is by far the most resilient sticker I had to deal with.
Today, i'll bolt the bead locks back onto the rims. Finish painting the side panels then its onto finishing up the rear of the chassis. Think I may brush paint that as I cant be assed masking up everything. Once the tyre's are on I'll jack up the chassis and get the rear coils out for painting.
I've got to get washers for the bead locks. I got a fuse i'll mount on the dash and after that it's off with the front tyres.
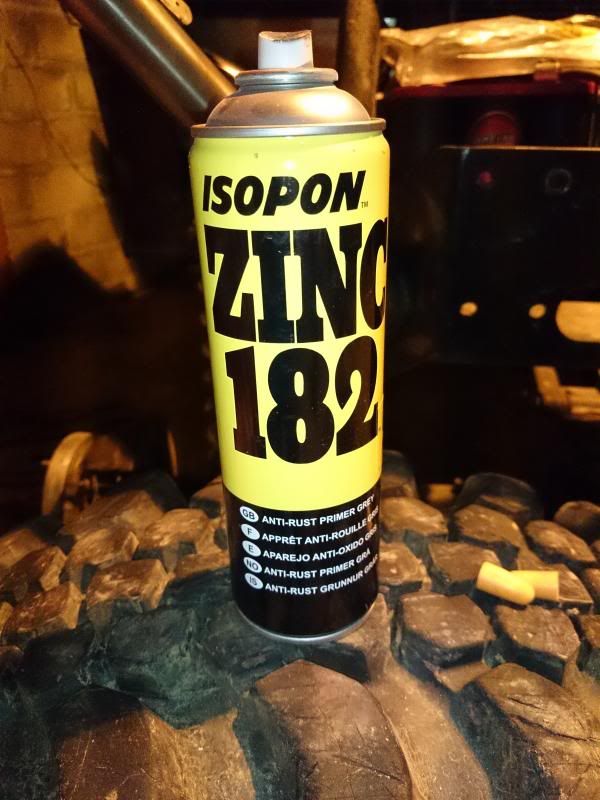
This is the primer im using Idris. No complaints, sticks well and dries pretty quick.
|
|
| Back to top |
|
|
mudplugga
Mud Obsessed
Joined: 23 Oct 2004
Odometer: 2798
Location: Shropshire mostly, and Mid Wales
|
| Posted: Sun Nov 24, 2013 12:08 am Post subject:
|
|
|
You can get a rubbery sanding disc type thing to get stickers off, if you're careful it doesn't damage the paint.
I like the paint our local agricultural dealers sell for tractors and implements, it brushes very nicely. But I can't remember the brand of it. 
__________________________________
http://www.ipernity.com/home/294337
"Roof, doors, wheels. It's the way I drive." |
|
| Back to top |
|
|
|
|
|
|
You cannot post new topics in this forum
You cannot reply to topics in this forum
You cannot edit your posts in this forum
You cannot delete your posts in this forum
You cannot vote in polls in this forum
You cannot post calendar events in this forum
|
|
|


