| View previous topic :: View next topic |
| Author |
Message |
trailer guy
Articulating

Joined: 19 Feb 2009
Odometer: 787
Location: Hampshire

1994 Land Rover 110
|
 Posted: Fri Aug 21, 2009 8:38 pm Post subject: Sankey's nemesis! A response to Jonkem's trailer... Posted: Fri Aug 21, 2009 8:38 pm Post subject: Sankey's nemesis! A response to Jonkem's trailer...
|
 |
|
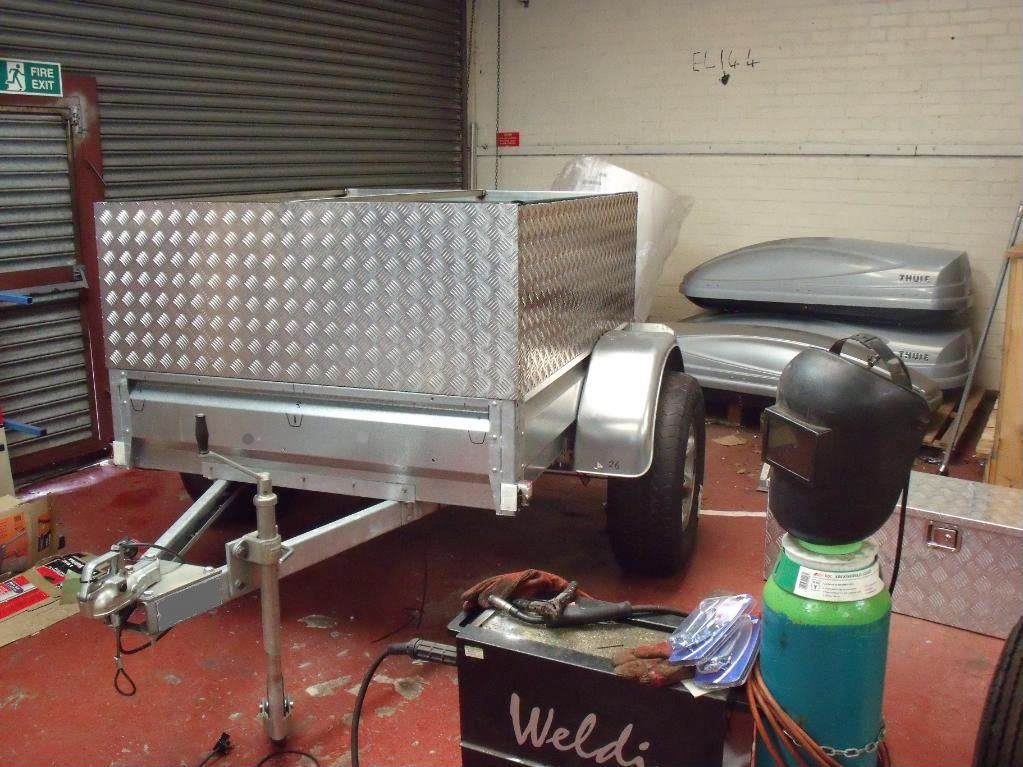
Thought you might like to see the offroad trailer I'm building too. These are a few pic's and a brief description. 
The trailer roughly 5'6" x 4' (internal dim's). It's 750kg GVW and unbraked, so payload's about 500kg. Don't think you'd want to drag anymore than that to be honest. I've already plans afoot for a disc braked version and have a design that'll overcome the mandatory auto-reverse and hand brake requirements... watch this space!
The basic trailer. I still need to roof it and extend the drawbar. Im going to hinge the lid (the ally top part - you can see the black marked out points the hinges), for access when loaded. I'm also fitting roofbars for carrying the kayaks/bikes etc.
The mudguards need spacing out to cover the Shogun wheels (£13 for 4 from eblag ). I had the axle made (torsion system type) with the correct pcd for the wheels and mounting points for the trailer. The axle's only offered up and still needs fixing securely - still not sure on final position. It's made to the same wheel base width as my tow vehicle - a '96 Shogun LWB.
This is one of the two ally toolboxes that I'm thinking of fixing on the sides, above the mudguards. I've welded in extra supports on the steel frame (inside the lid), as loaded they'd tear through the ally sides after 20 yards! 
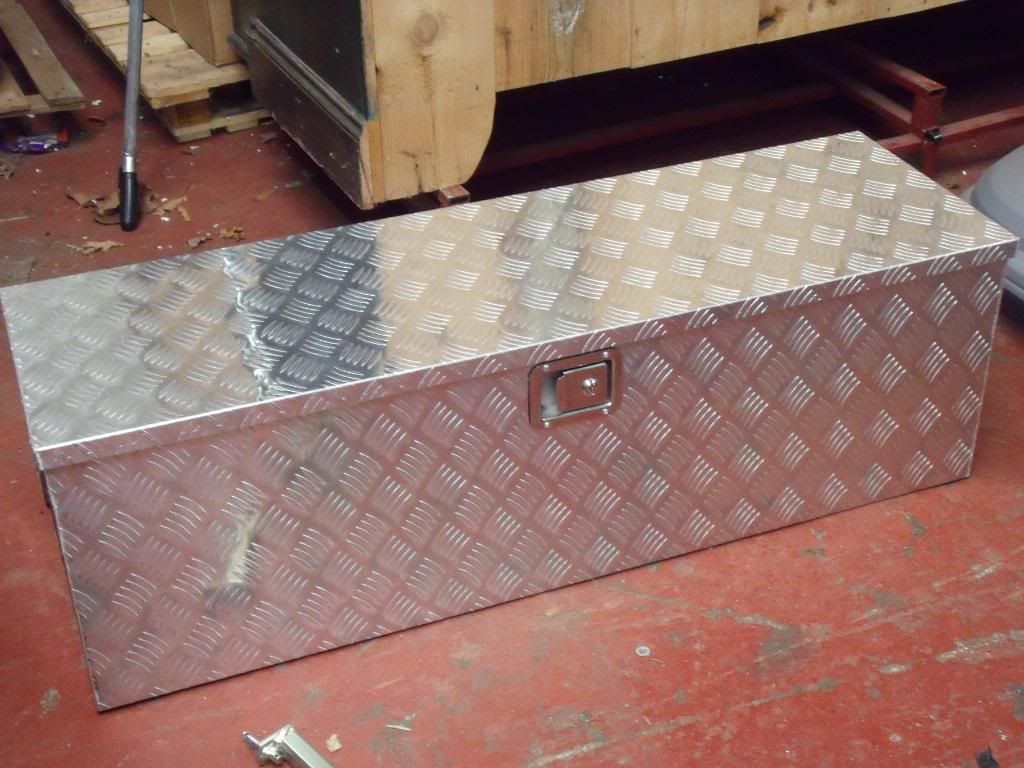
They're about 48" long by about 14" x 12", so plenty of space inside for gear.
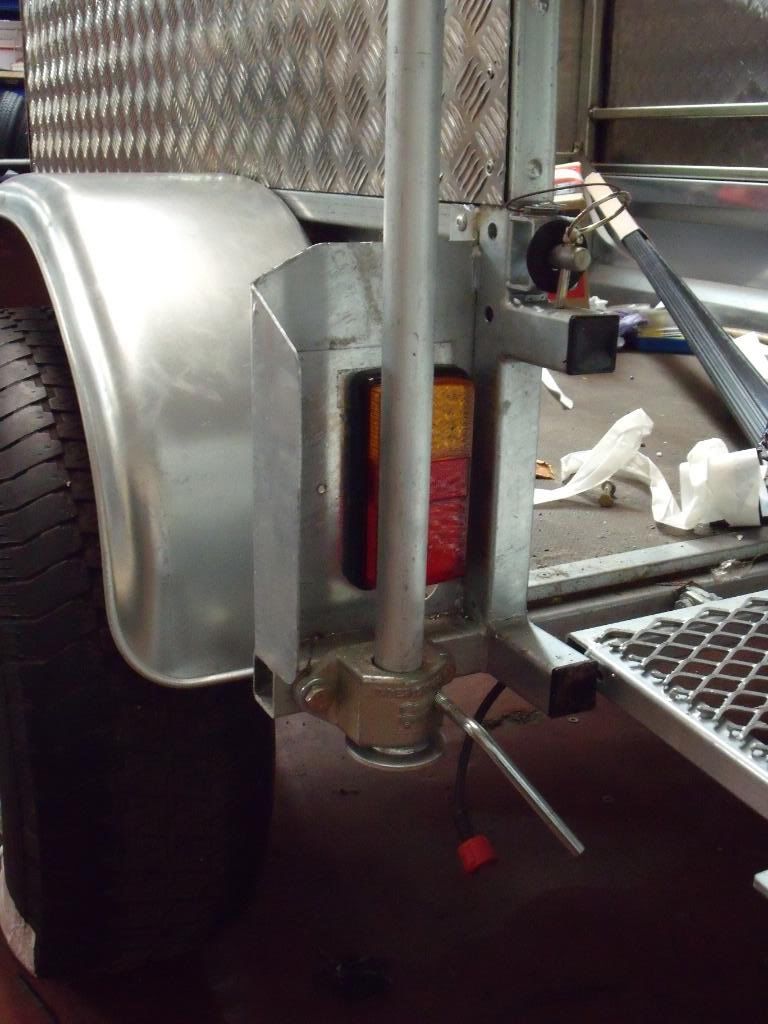
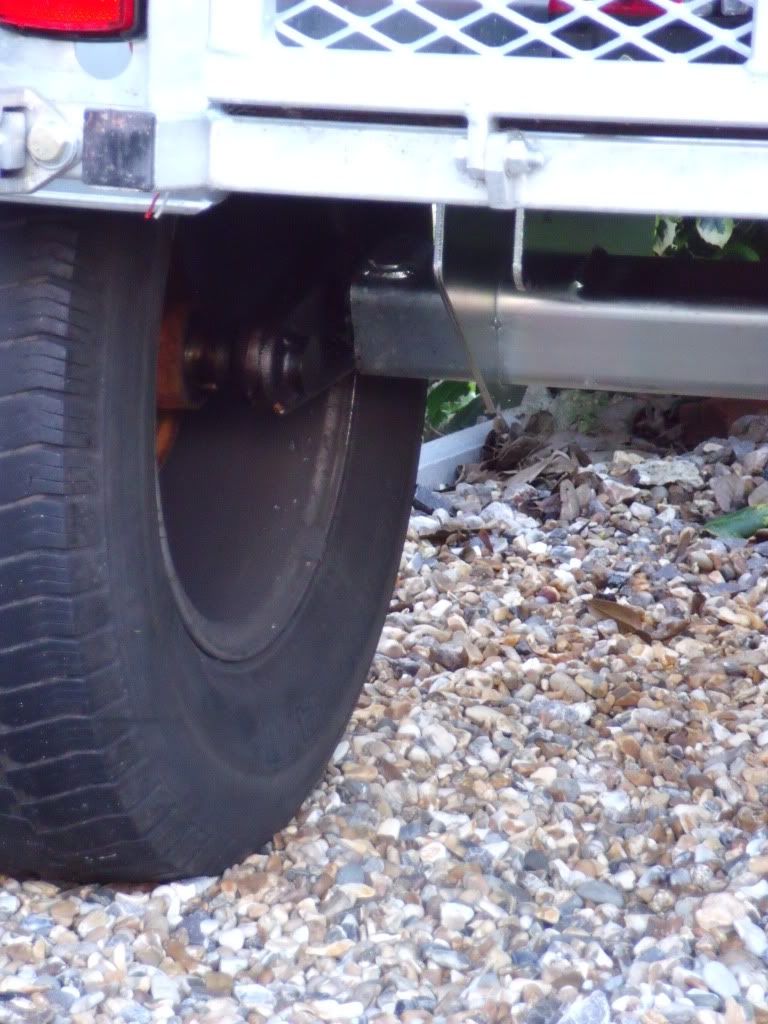
This shows the position of the axle at the mo' - quite far to the rear, negating most chances of the trailer getting battered on the run up or down sharp inclines. Not sure if the nose weight will be too much, so it's still able to be repositioned. The sharper sighted of you will notice the ill fitting (and also lack of, in some cases!..) of wheel nuts. The drum's got 1/2" UNF at the mo (cheap and easy) but will be replaced with proper jobs on completion.
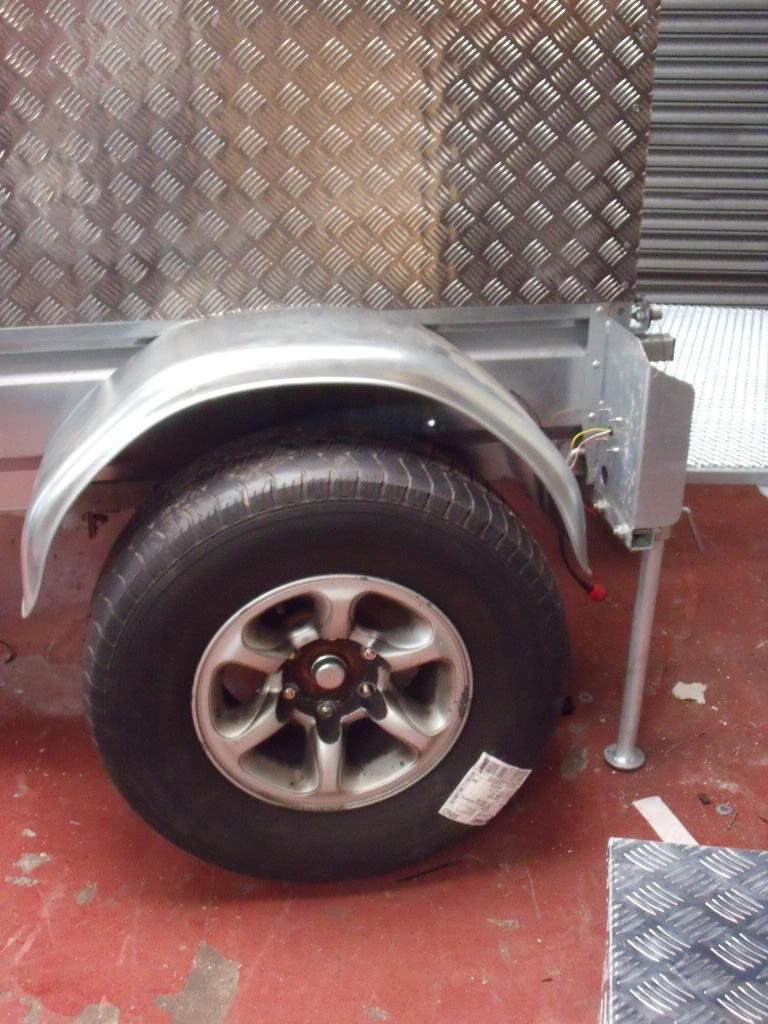
You can still see the Tuffnells collection sticker from the e-bay sale! The tyres will be replaced with decent jobbies .I get on pretty well with the manager of a local tyre company and our industries cross over occasionally, so it's a good thing that he and I still believe in the issuing and usage of favours - they'll come cheap! 
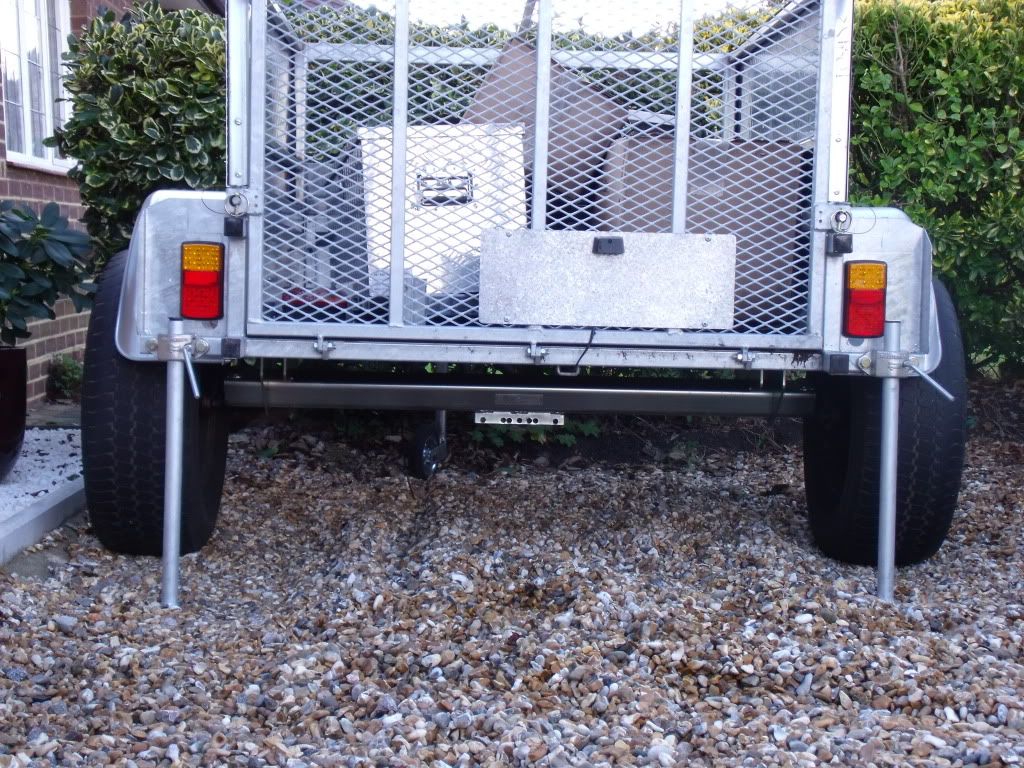
This is the LED rear lights - no blown bulbs, or water ingress on to the contacts! Fully sealed - water and dust resistant - can only be a good thing! 
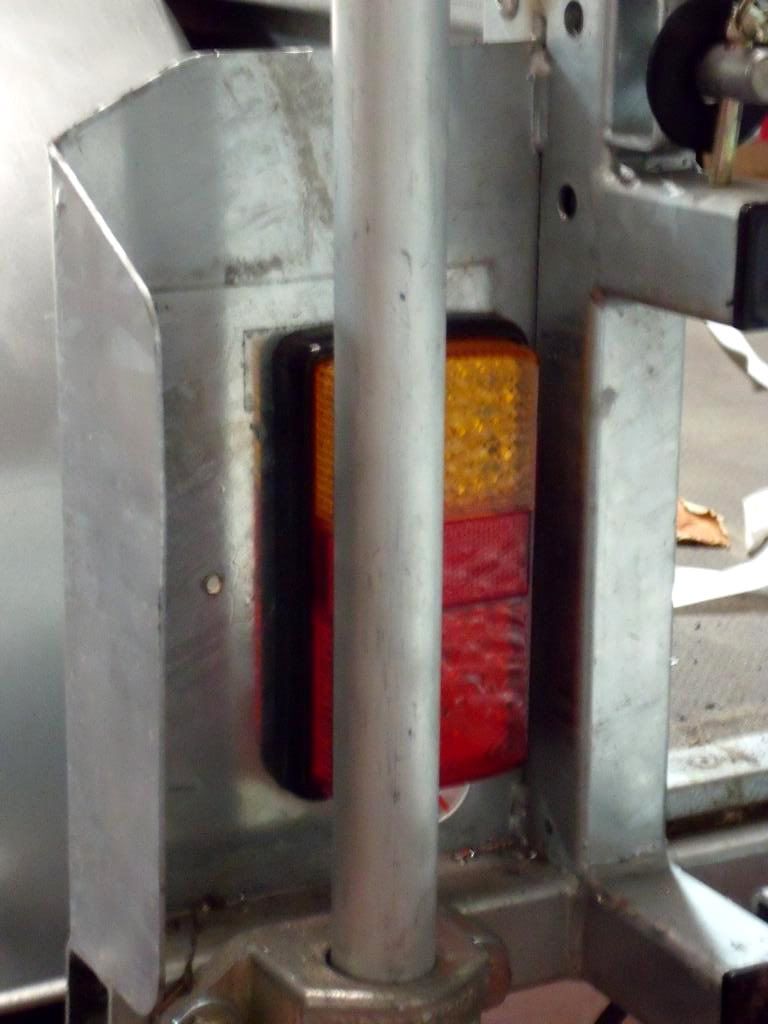
This shows the rear of the trailer and how well protected the lights are, especially with the propstands up.
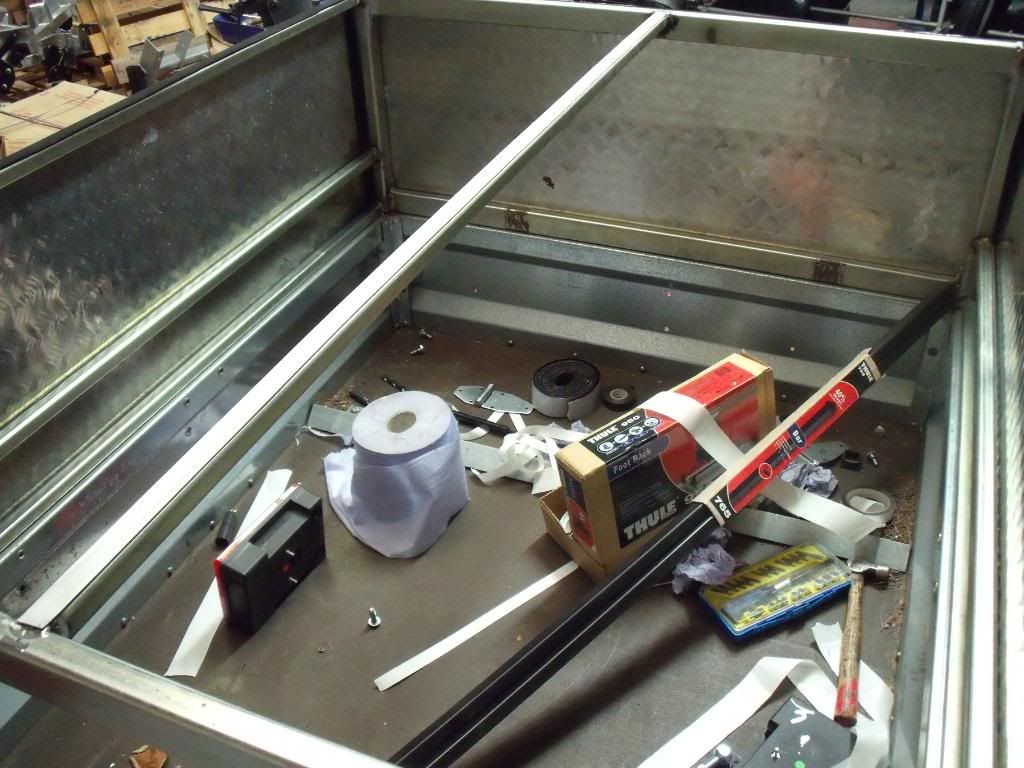
Ignore the mess!!  I try to pass it off as being creative! This pic shows the frame I've welded up, with the additional longitudinal supports for mounting the toolboxes to the sides. I'm going to line the sides, to hide any wiring (and the over the top welding!). I still need to fab some brackets for the gas struts (for the lifting of the lid). The Thule bars will be going on the lid when it's competed. I chose the standard square, steel, bars for strength and the fact that you can get all of the Thule accessories to fit them - kayak carriers, bike carriers, roofboxes, etc I try to pass it off as being creative! This pic shows the frame I've welded up, with the additional longitudinal supports for mounting the toolboxes to the sides. I'm going to line the sides, to hide any wiring (and the over the top welding!). I still need to fab some brackets for the gas struts (for the lifting of the lid). The Thule bars will be going on the lid when it's competed. I chose the standard square, steel, bars for strength and the fact that you can get all of the Thule accessories to fit them - kayak carriers, bike carriers, roofboxes, etc
This is the NATO hitch on the back of the Shogun. With full 360 degree rotation it's ideal for towing off road. I relocated the 12N & 12S electrics up the metal bumper and replaced with a 13pin socket. The elec's are now up out of harms way!

Obviously the trailer's far from finished, I've got loads of things still to fit - access hatches / panels (how terribly 007, Q would be impressed!), the roof, the bars, the side toolboxes, extend the drawbar, change the 50mm ball coupling for a 40mm eye, wire it up, ad infinitum....
But it's a start, and I'd welcome any pointers / insight / comments.
__________________________________
www.compasstrailers.com |
|
| Back to top |
|
 |
|
|
jonkem
Just got MTs

Joined: 25 Sep 2007
Odometer: 389
Location: Bedfordshire, UK
1989 Isuzu Trooper
|
| Posted: Fri Aug 28, 2009 4:52 pm Post subject:
|
|
|
Come on, get a move on!  All that space in your workshop, you should be done by now All that space in your workshop, you should be done by now  It's even got a painted floor, I've just go some tins of paint 4 years old that I can't get on the concrete because of so much s*** all over the place It's even got a painted floor, I've just go some tins of paint 4 years old that I can't get on the concrete because of so much s*** all over the place 
I know you know this Trailerguy but others looking at the thread mightn't.................You need to estimate the laden weight distribution to be able to get the axle in the right place, just enough nose weight for stability and not too much for the car. If you go too far back you will be loading up the drawbar as well which isn't a good idea. You should be able to find the correct noseweight from Mitsi. I'd personally try for 3/4 of what they say.
Are you thinking of supporting underneath the tool boxes or just cantilevering them off the frame?
I think you'll be suprised with the weight when it's all together, the wheels & tyres will be probably 3 times that of trailer wheels, the Nato Eye hitch (assuming it's a Bradley) will be upto 10 times (or more!) the weight of a pressed steel one, etc. etc. etc. And you'll need to plate it as well after construction / conversion.
Talking of plates, have you got any spares?
LEDs are nice, lot of money though  Can't see in the pics if they are obscured by the corner props? Can't see in the pics if they are obscured by the corner props?
|
|
| Back to top |
|
|
trailer guy
Articulating
Joined: 19 Feb 2009
Odometer: 787
Location: Hampshire
1994 Land Rover 110
|
| Posted: Wed Sep 02, 2009 10:59 am Post subject:
|
|
|
Hi Jonkem,
Cheers for the jivvy-up, you're right I should be further along with it , but paying customers come first!  . .
I'm reconsidering the hinging lid, as the front will be mainly water tank and fridge, so access will be through filling neck and side drawer anyway... eurgh, too much to think about!!
I'll bracket the bottom of the toolboxes, as well as bolting them thru the frame (can you imagine trying to clear the mess up off the motorway?!)
the lights just about clear the props!
have some spare plates - pm me your address (what weight?) and i'll post it out, may even have some spare rear leds somewhere...
__________________________________
www.compasstrailers.com |
|
| Back to top |
|
|
jonkem
Just got MTs
Joined: 25 Sep 2007
Odometer: 389
Location: Bedfordshire, UK
1989 Isuzu Trooper
|
| Posted: Wed Sep 02, 2009 4:28 pm Post subject:
|
|
|
| trailer guy wrote: | Hi Jonkem,
, but paying customers come first! .
I'm reconsidering the hinging lid, as the front will be mainly water tank and fridge, so access will be through filling neck and side drawer anyway... eurgh, too much to think about!!
the lights just about clear the props!
may even have some spare rear leds somewhere... |
Only joking with the chivvy-up, I'm the last to throw stones about how long it takes
And even NON paying family & friends get in the way 
And with the sides getting quite high you'd have to be pretty tall to access all the insides! Are you thinking of side entry ? because the box will be in the way 
I bracketed my props half off the side of the chassis to clear the lights, another one of those second thoughts. Quite important I thought to keep them clear but close enough to protect the lenses.
If only I'd known about the leds before. I'm fine with the tail lights and couldn't face any changes now.
Talking about an axle today for another trailer, and wondered why they had made your hubs with imperial threads but Jap 6 stud? Did you forget to spec M12s or wasn't there an option?
"too much to think about" Yep...that's about the strength of it
|
|
| Back to top |
|
|
trailer guy
Articulating
Joined: 19 Feb 2009
Odometer: 787
Location: Hampshire
1994 Land Rover 110
|
| Posted: Thu Sep 03, 2009 9:38 pm Post subject:
|
|
|
main access will be thru the back (ooer missus  ), sides are high and will obviously have a lid on the top, so may still hinge it... so decisive, can't you tell?! ), sides are high and will obviously have a lid on the top, so may still hinge it... so decisive, can't you tell?!
the water tanks going in the front, but low down for CoG, and a fridge above/next to, so yes will need to make access hatch thru the side. Think a hatch should fit just in front and below of the toolboxes - what access size did you need?
I told them to throw any old stud in it (as long as they weren't 5/8"!) and I swap them over (have hundreds in different sizes on the shelf) when needed. I'm fortunate that I can get axles made to any spec I want.
I may build another one (might sell this to fund it, not sure ) and build it out of twin skin ally with disc brakes. Have some good ideas.
let me know about that chassis plate.
__________________________________
www.compasstrailers.com |
|
| Back to top |
|
|
jonkem
Just got MTs
Joined: 25 Sep 2007
Odometer: 389
Location: Bedfordshire, UK
1989 Isuzu Trooper
|
| Posted: Fri Sep 04, 2009 9:29 pm Post subject:
|
|
|
I made the door and then sourced the fridge which was a mistake. Get the fridge and then size the door
Haven't forgotten the plate, thought about a trip to my weighbridge first rather than mirroring the Sankey plate, mind you I could keep the original and fit a 2nd, that'd confuse the ministry
|
|
| Back to top |
|
|
trailer guy
Articulating
Joined: 19 Feb 2009
Odometer: 787
Location: Hampshire
1994 Land Rover 110
|
| Posted: Sat Oct 10, 2009 6:10 pm Post subject:
|
|
|
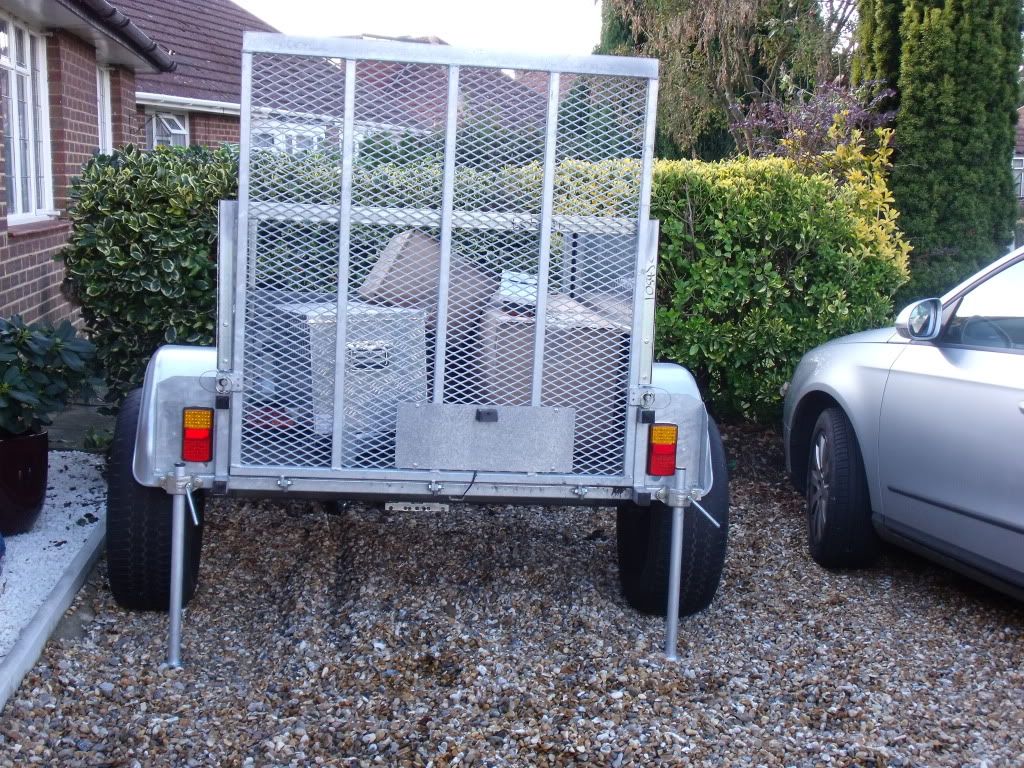
Here's a few more pic's. Shows the width and height of it against my Passat! She's a bit of a beast.
There's roughly 14" / 360mm of clearance from ground to bottom of axle, which is pretty good I think.
__________________________________
www.compasstrailers.com |
|
| Back to top |
|
|
jonkem
Just got MTs
Joined: 25 Sep 2007
Odometer: 389
Location: Bedfordshire, UK
1989 Isuzu Trooper
|
| Posted: Tue Oct 27, 2009 5:45 pm Post subject:
|
|
|
So when are the arch extensions going on then?
Is the axle a bit springy, cause I always found that when I was building indespension type trailers?
|
|
| Back to top |
|
|
|
|
You cannot post new topics in this forum
You cannot reply to topics in this forum
You cannot edit your posts in this forum
You cannot delete your posts in this forum
You cannot vote in polls in this forum
You can post calendar events in this forum
|
|
|


